How to create an eCommerce shop and checkout with a Shopify Buy Button
Create a full product listing and shopping cart with the uSkinned Site Builder for Umbraco and Shopify.
Step 1
Login to the CMS.
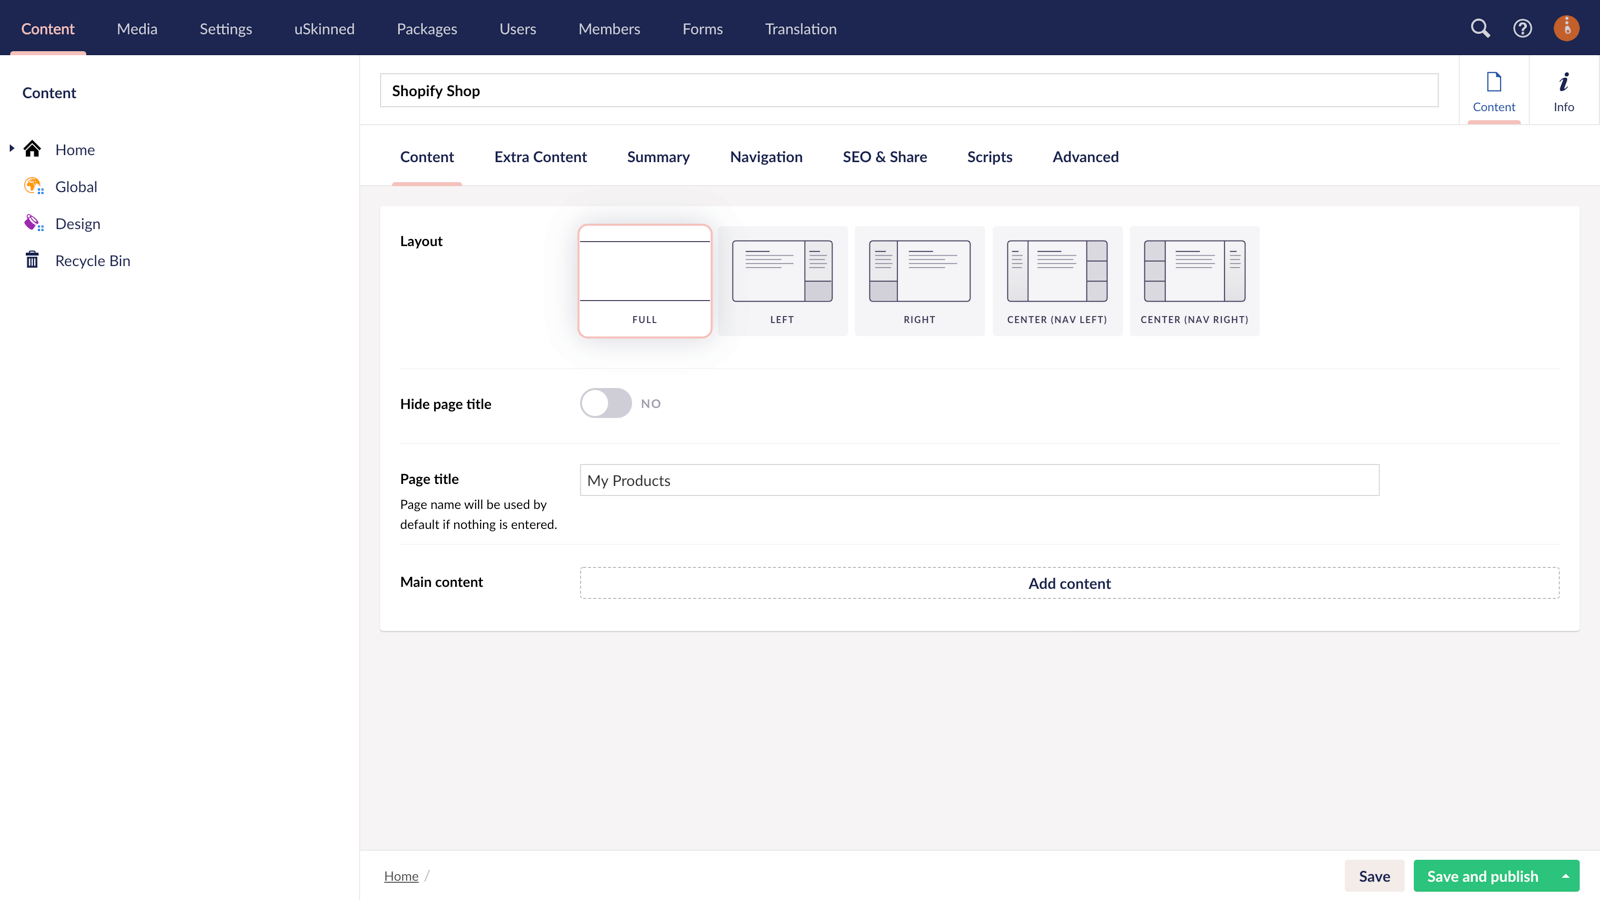
Step 2
Under Home, create a new Page, name it and select the 'Full' layout option.
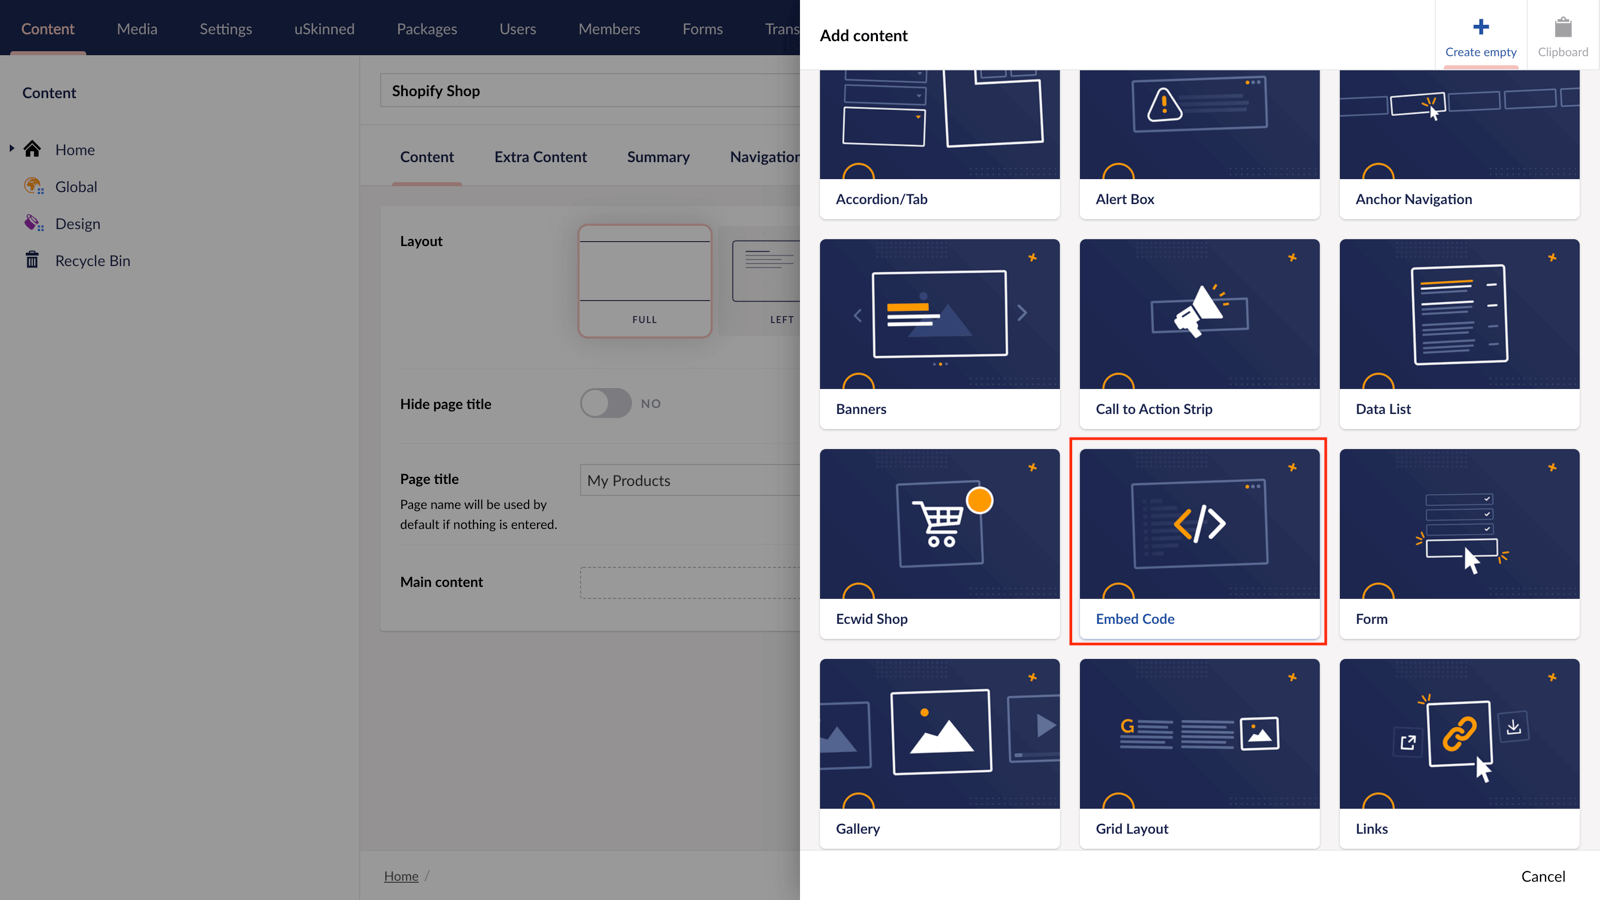
Step 3
Click 'Add Content' and choose the 'Embed Code' component.
Step 4
Go to your Shopify admin and create a new Sales Channel with a 'Buy Button' — follow the steps here (https://help.shopify.com/en/manual/online-sales-channels/buy-button/create-buy-button).
From the Shopify admin panel, you can choose several layout options, from the number of products per row to the color of the text. This will help ensure that your products match your uSkinned website.
Step 5
Return to the uSkinned Site Builder CMS. In the 'Embed Code' field, paste the first part of your Buy Button code. It will look something like this:
<div id='collection-component-1234556789'></div>
In the bottom right corner, click 'Submit'.

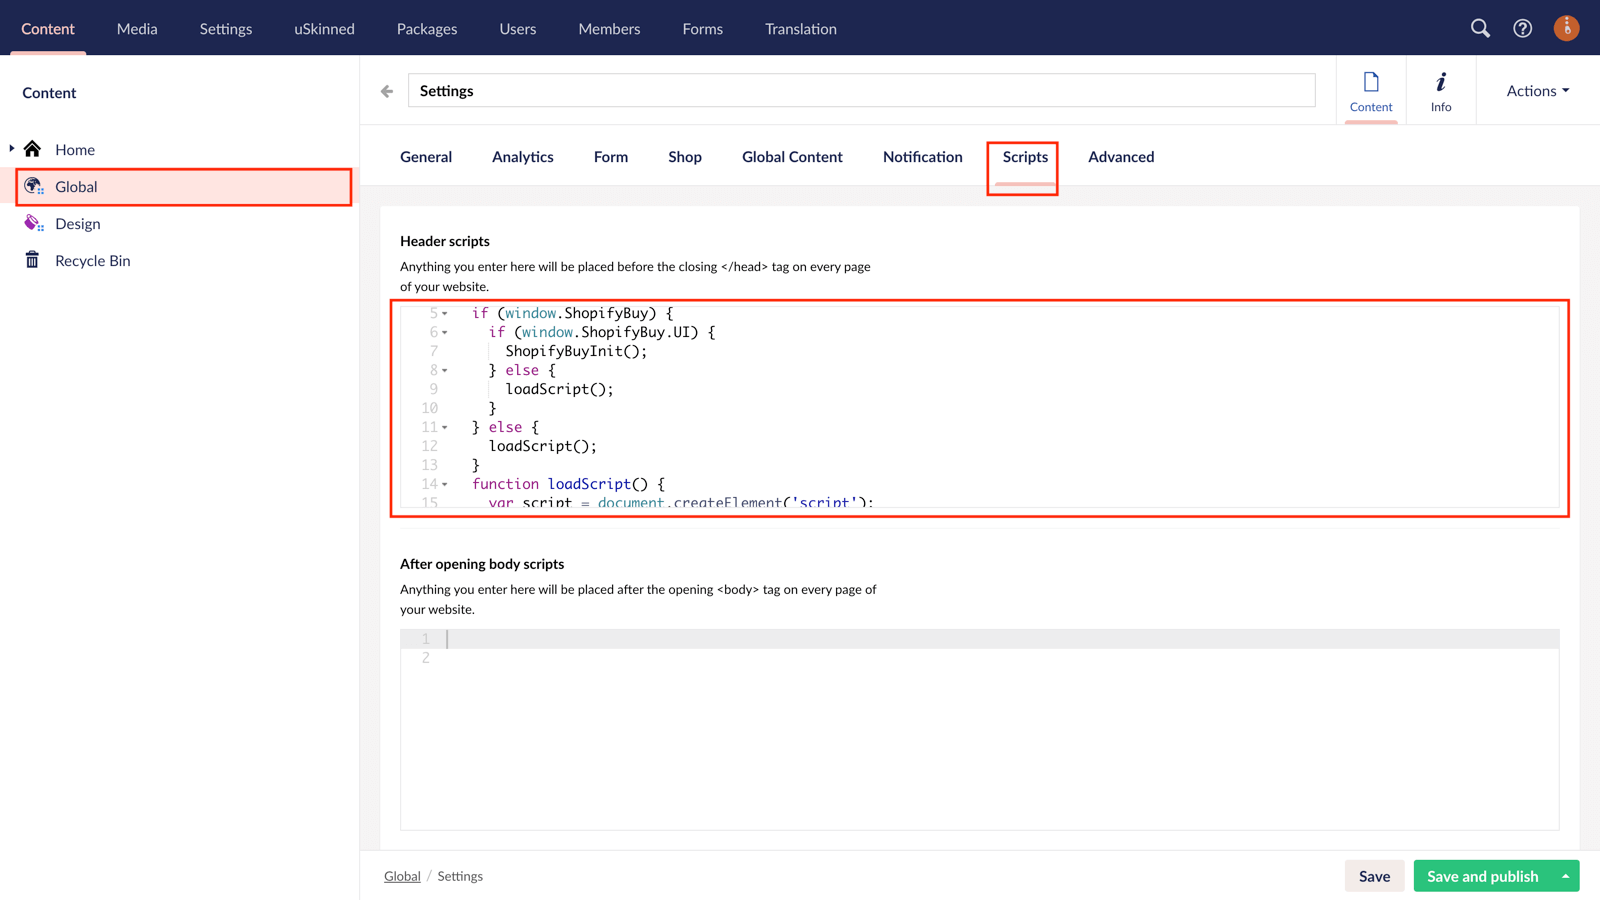
Step 6
We now need to paste the Javascript embed code. This will live at a global level so that your shopping cart is accessible throughout all of your website pages.
In the tree menu, go to 'Global' > Click on 'Settings' > Click on 'Scripts'. In the field 'Header Scripts' paste in the Javascript code provided by Shopify. In the bottom right-hand corner, click 'Save and publish'.
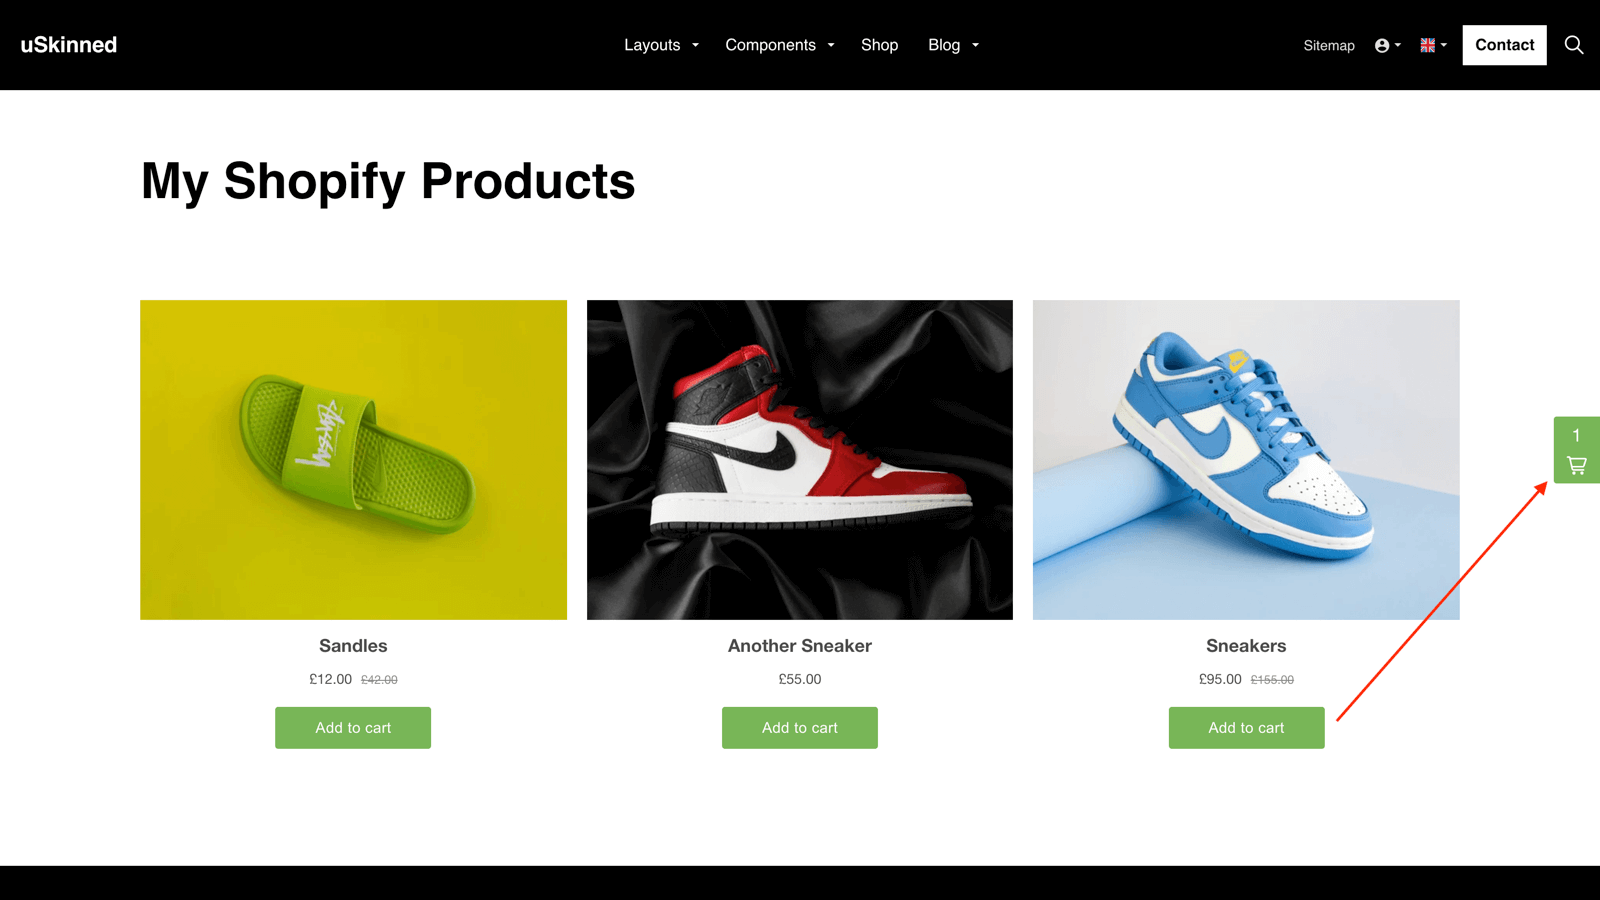
Step 7
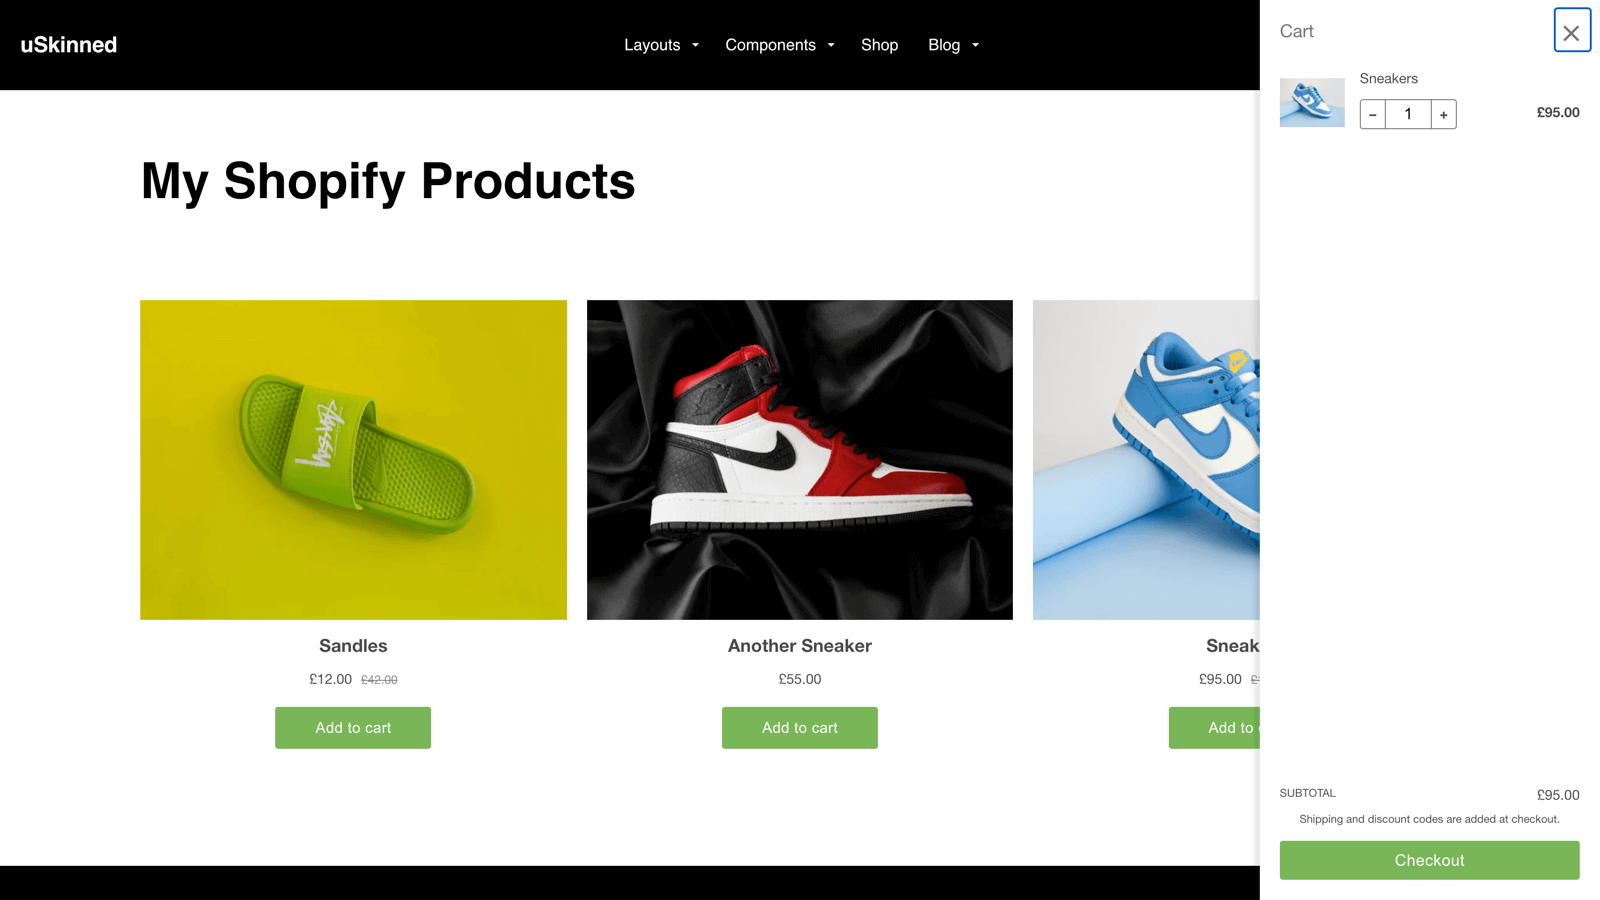
You can now view all of your Shopify products on the front end of your uSkinned Site Builder for Umbraco website.
Go to any other page on your site and you will be able to access your shopping cart. This will make sure your customers can get to the checkout from any page.
#h5yr
Showcase
Here are some examples of uSkinned Site Builder powered websites that have already adopted this integration.


See more in our Showcase.


Step 3
Create
Create content with the Visual Editor and utilise built-in eCommerce and integrations.
Step 4
Go Live
You can host securely on Azure with uSkinned Hosted, or go your own way with a Self-Hosted license.
