How to set up Umbraco Forms
uSkinned Site Builder for Umbraco is fully compatible with Umbraco Forms. Umbraco Forms are great for when you need to collect more complicated data, such as document uploads, dates etc.
Umbraco Forms licenses
An additional license is required to use Umbraco Forms — find out more on the Umbraco website.
uSkinned Site Builder for Umbraco comes with a variety of form types out of the box. These include Contact Form, Newsletter Signup Form, Umbraco Forms Compatible Option, Login Form, Reset Password Request Form, Reset Password Form and Register Form.
You can even use Third-party form providers, such as Hubspot, ActiveCampaign, Typeform and more. Learn how to integrate any Form provider with uSkinned Site Builder.
Step 1
Login to the CMS.
Step 2
From the menu in the top bar, go to "Forms".
Step 3
You will now see a green button in the middle of the screen that reads "Install Forms". Click this button.
Step 4
Please wait while Forms installs. The CMS will refresh once complete. This may take several minutes.
Step 5
Once the installation has been completed, use the button "Create a form" to start building your first form.
Step 6
Name your form.
Step 7
Add the relevant fields to your form. You can choose from a wide range, including, text field, text area, select box dropdown and multiple choice checklist plus lots more.
Step 8
Once you're happy with the form you can set up a unique workflow. This can be extended to integrate a number of other third-party CRM systems etc.
In this guide, we will just set up the form to send an email to the recipient and save the entry in the database to be viewed via the CMS.
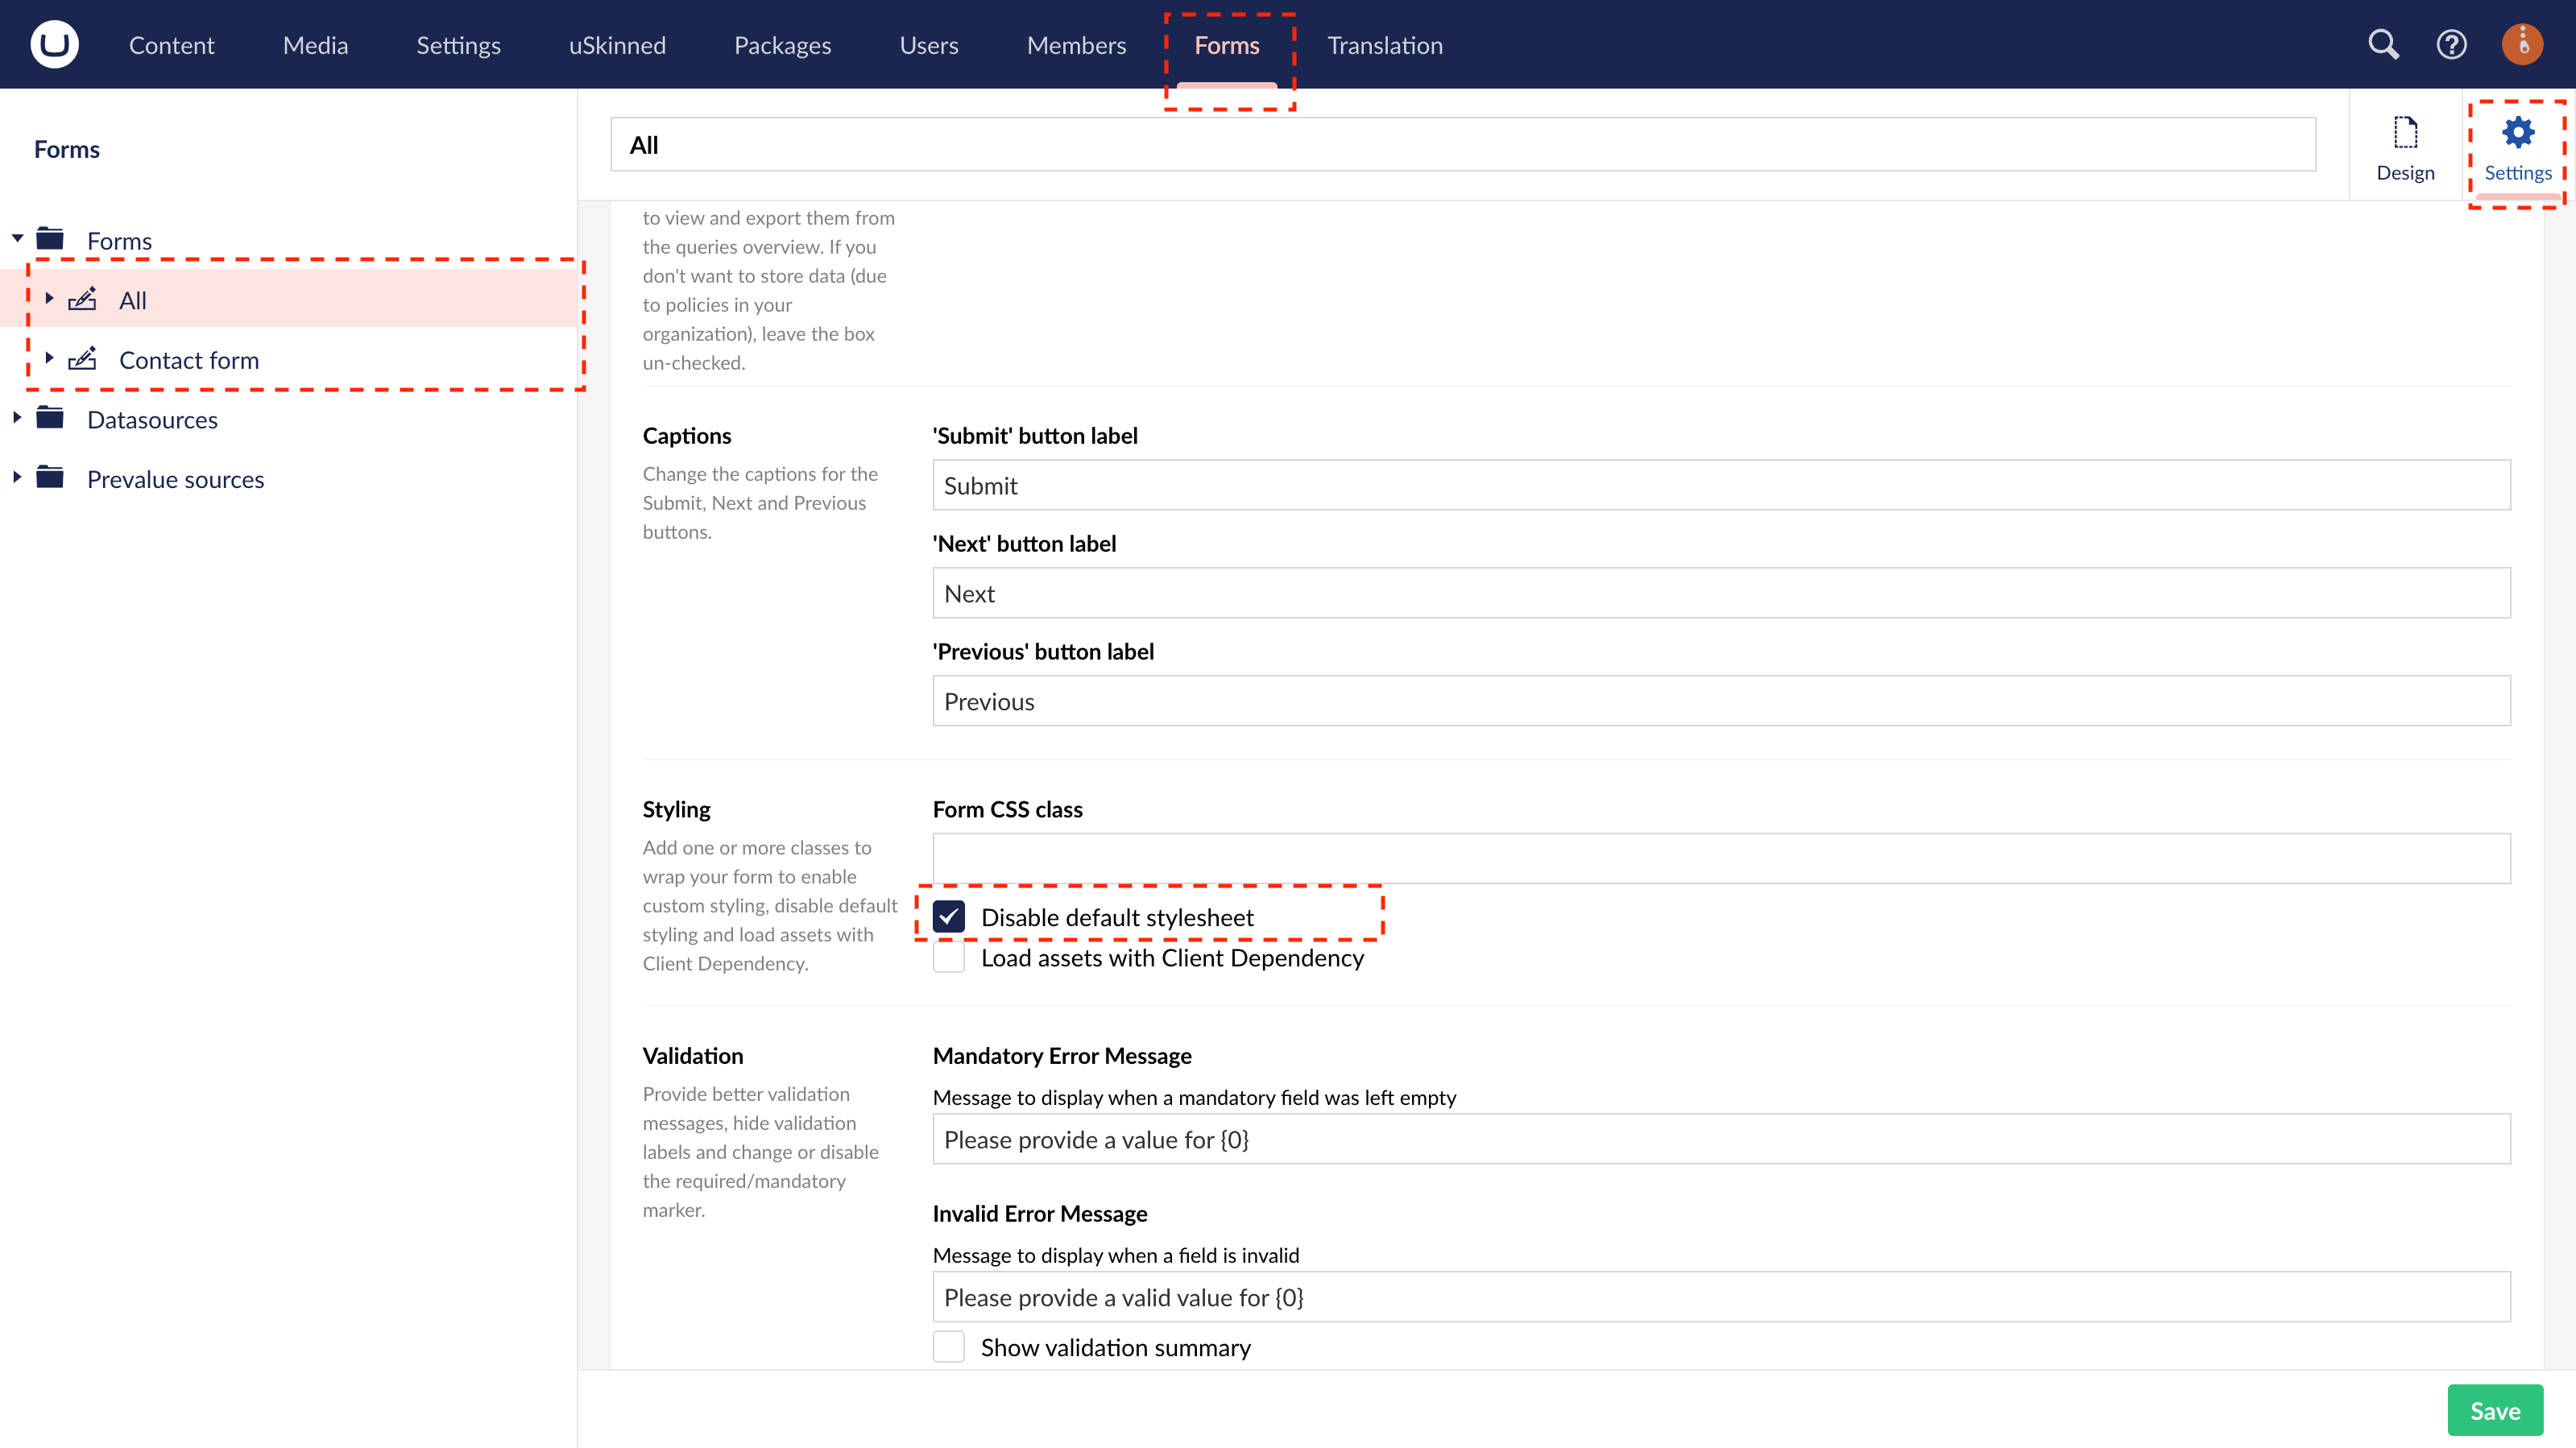
In the top right, go to Settings. From the options next to the label "Styling", you should check the box "Disable default stylesheet". This will ensure that your Umbraco Form adopts the styling of your uSkinned website.
Step 9
Save your form.
You can add a Umbraco Form to many areas of your site including, as a Component, Pod, Split component item or in the Footer. In this following example, we will add it as a component.
Step 10
Go to the "Content" section of the CMS. In the tree menu, go to any page or post — or create a new one.
Step 11
Go to the 'Content' tab. At 'Main Content' add a new component.
Step 12
From the slide-out panel, select 'Form'.
Step 13
From the options provided, select "Umbraco Form".
Step 14
Now click "Add" to add your new Umbraco Form.
Step 15
From the slide-out panel choose the correct form.
Step 16
Save and publish.
Step 17
View and test the form on the front end of your uSkinned Site Builder website.
More ways to display Umbraco Forms
There are a variety of places you can add a Umbraco Form to your uSkinned Site Builder website.
You can try this out using the same steps for:
— Pods component > Form
— Split component > Form
— Global components > Form
— Reusable components > Form
— Global pods > Form
— Extra Content pods > Form
— Reusable pods > Form
— Footer pods > Form
#h5yr
Step 3
Create
Create content with the Visual Editor and utilise built-in eCommerce and integrations.
