How to create member only content
Whether you're building an Intranet where your full site is behind a login page or just want to share some extra content with specific users, the ability to create member-only content is essential for a modern website.
Luckily for you, uSkinned Site Builder for Umbraco comes with 'Password Protected' features out of the box. You can utilise these features to hide and protect, either all of your content or only certain pages from users unless they have been registered as a Member of your site.
You can either manage member's manually from inside the CMS or you can add a registration form to your website's frontend to allow visitors to register themselves.
Create and view Member Groups
If someone is registered as a Member then they will be able to log in and view the password-protected content that has been assigned to their Member Group.
Step 1
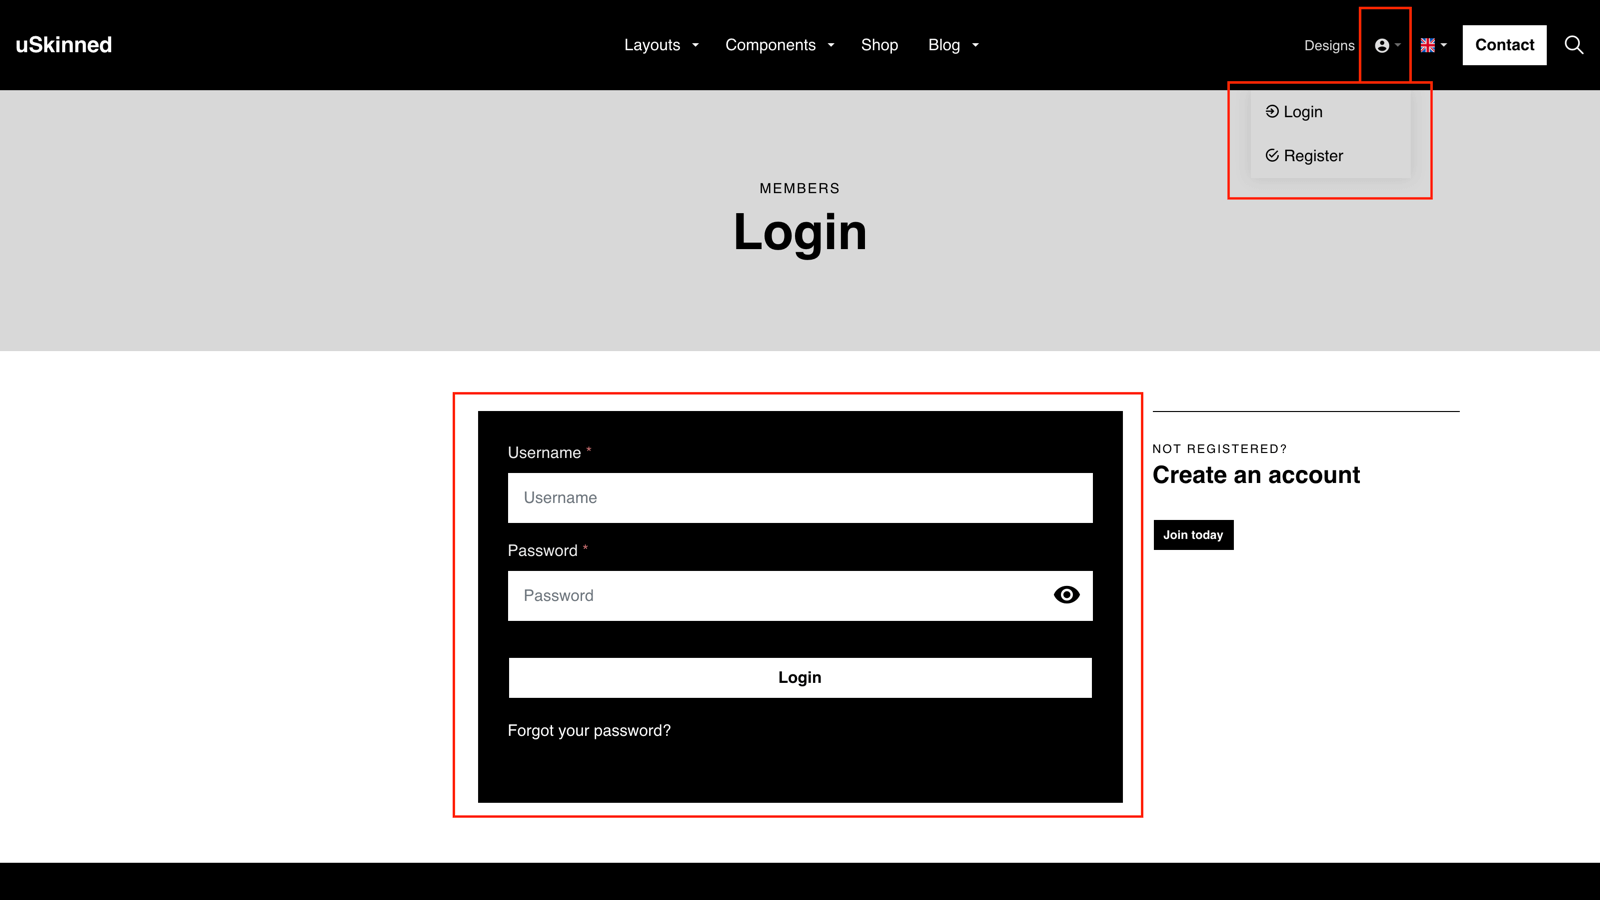
Login to the CMS
Step 2
In the top bar, go to 'Members'.
Step 3
On the left side, expand 'Member Groups'.

Step 4
To create a Member Group, hover the folder and click the "..." icon, then Create.
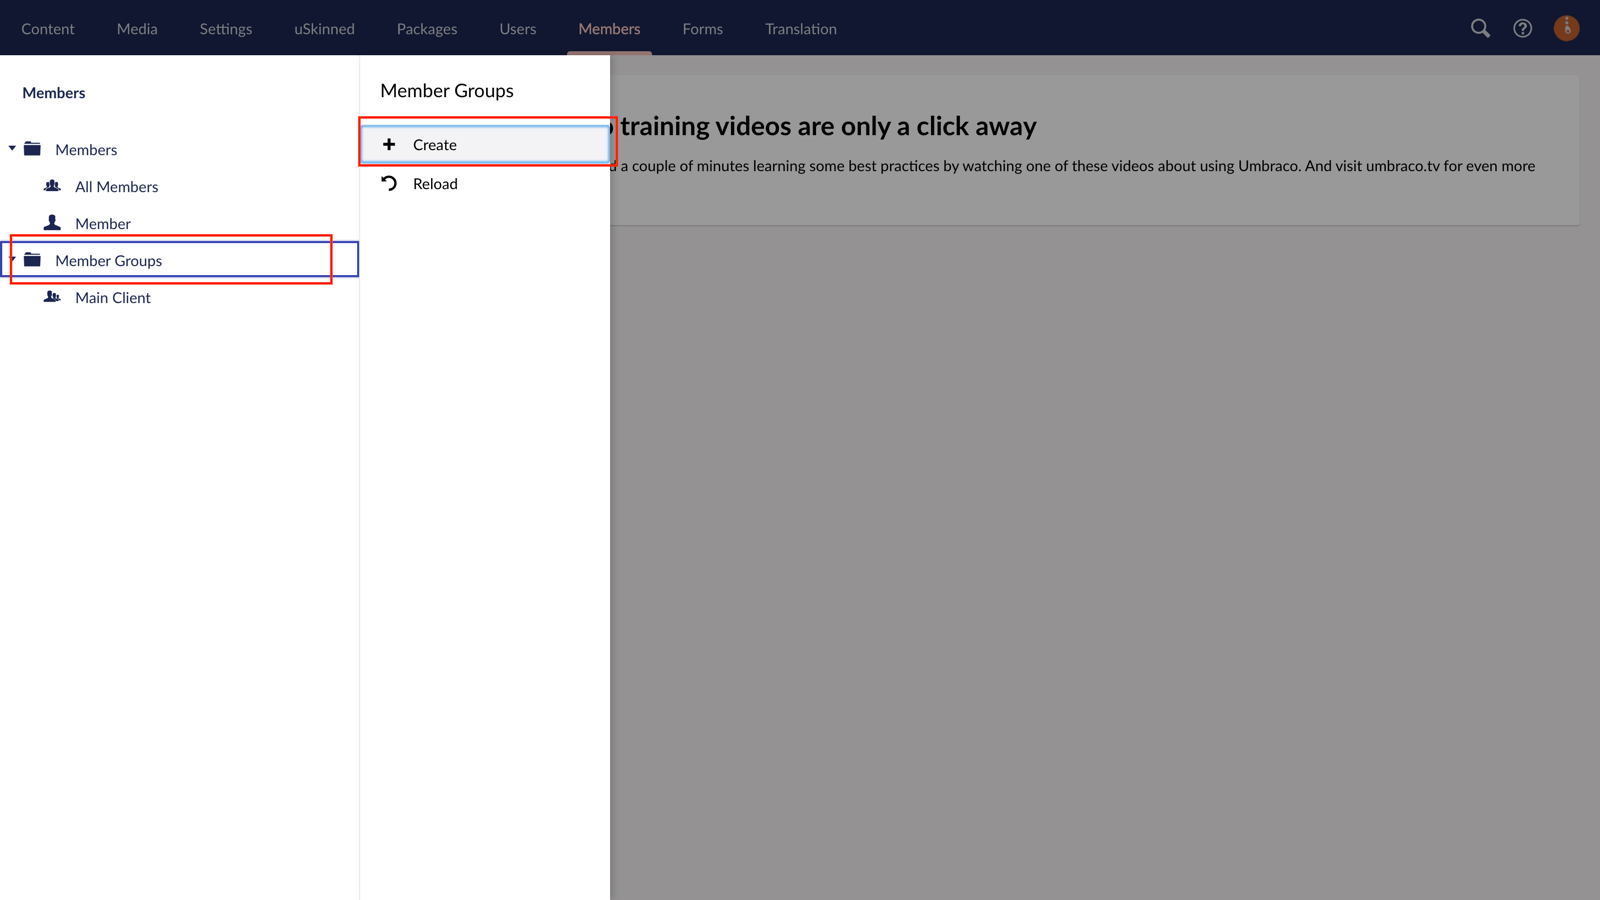
As an example, during installation, we create a Member Group called 'Main Client'. So let's work with this for the time being.
Create and view Members
This is how you can create Members from inside the CMS.
Step 1
Login to the CMS
Step 2
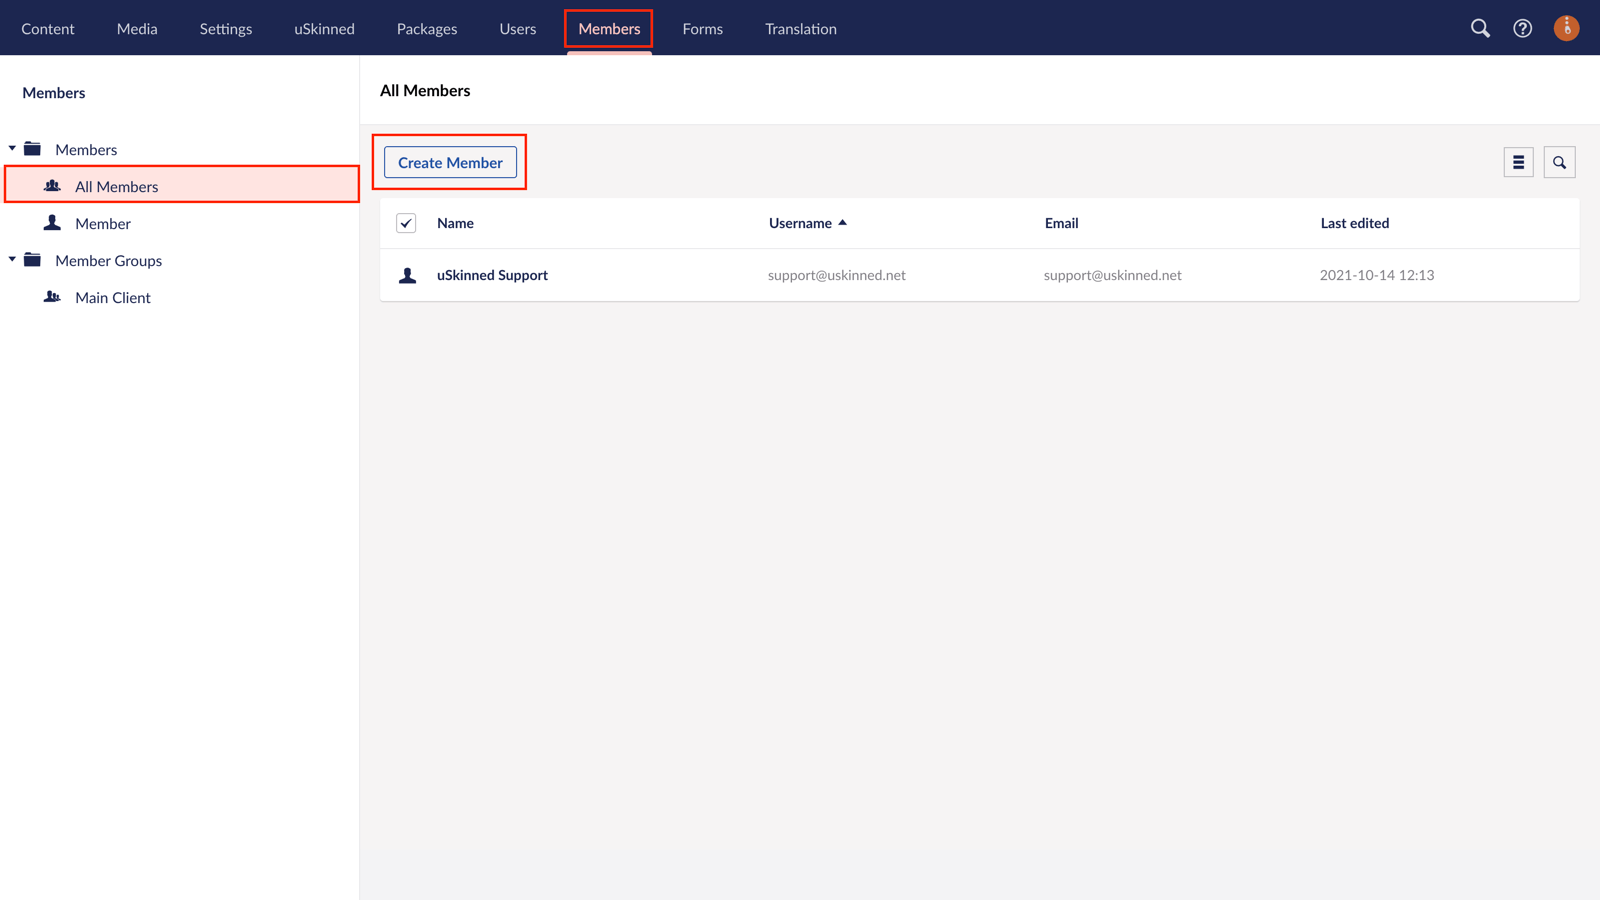
In the top bar, click 'Members'
Step 3
On the left side, expand 'Member'.
Step 4
Click 'All Members'.
Step 5
On the right side, click 'Create member'.
Step 6
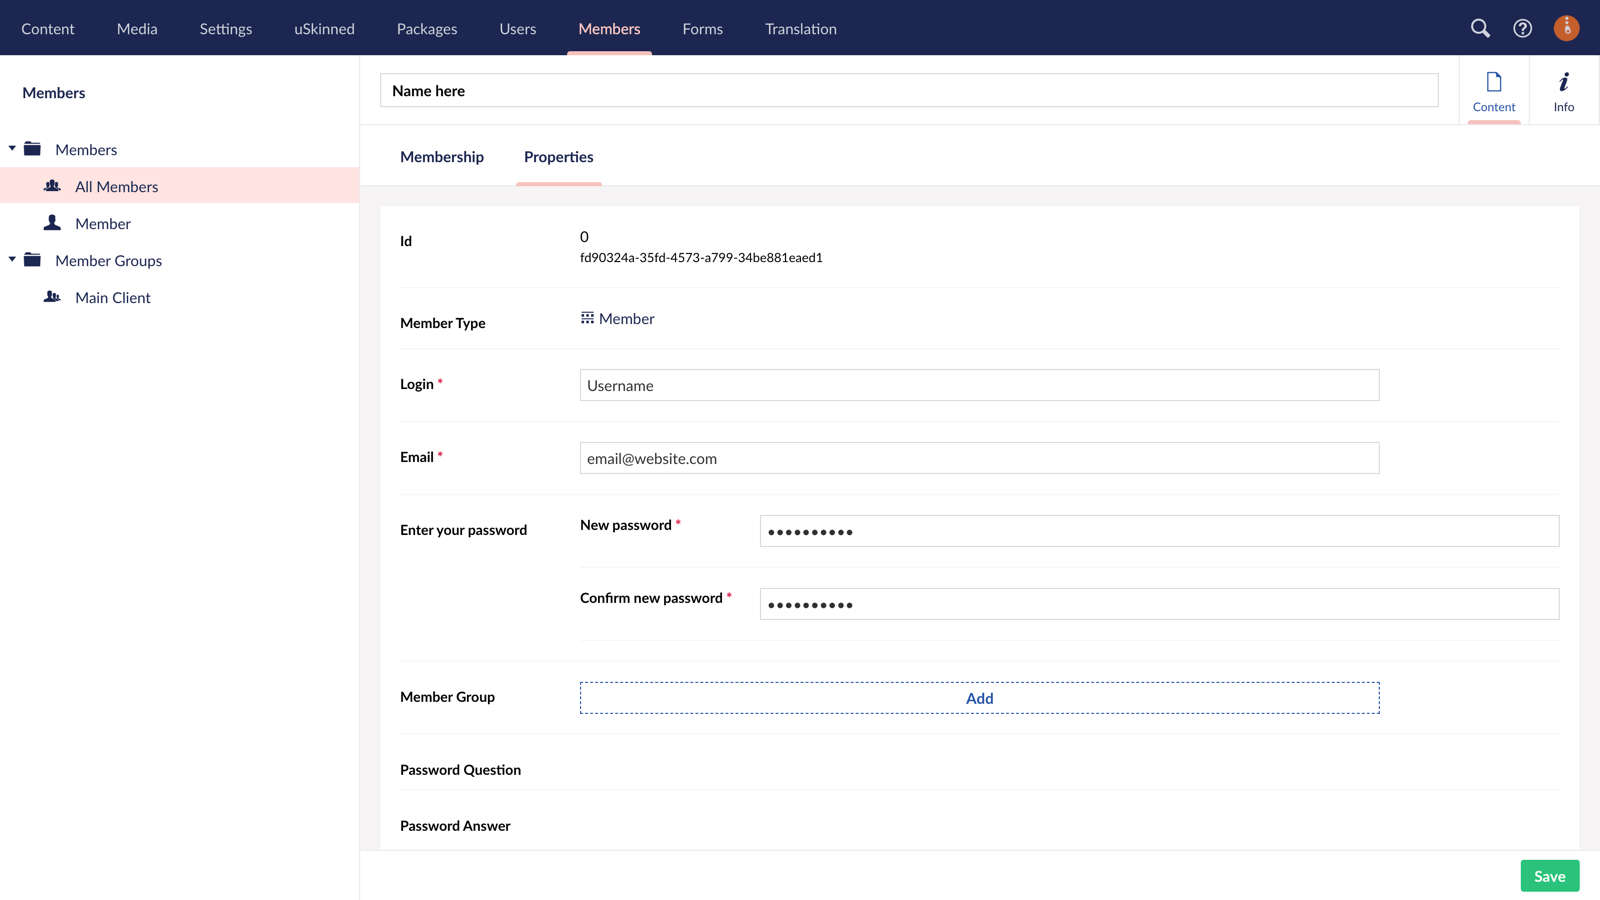
Add a name for the user, on the properties add the email address, username and password — or generate the password.
Step 7
At the label 'Member group', click add.
Step 8
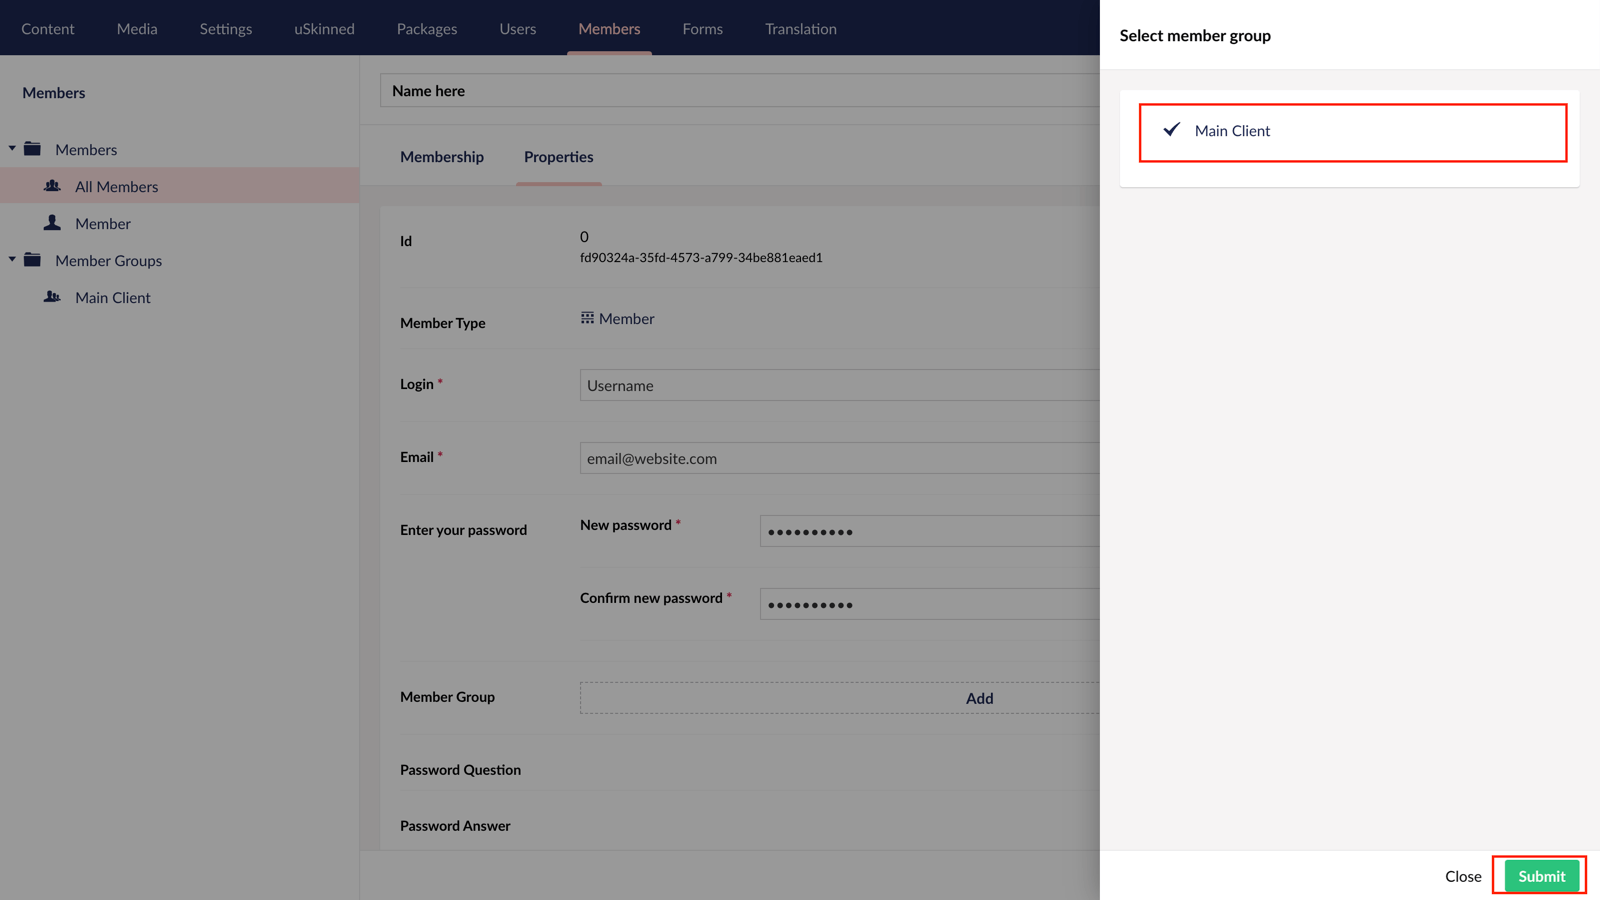
From the slide-out panel, select the Member Group you wish to assign this user to.
Registration Forms
Site Builder comes with forms to allow your website users to register as a member via your website's frontend.
An example Member Registration form is created when you install your uSkinned Site Builder, but below we will show you the steps to create your own.
Create a registration form
Step 1
Login to the CMS
Step 2
In the tree menu on the left, create a page or go to an existing page.
Step 3
At 'Main content', click 'Add content'.
Step 4
From the slide-out panel, choose the 'Form' component.
Step 5
From the label 'Form type', select "Register form'. You can now refine the form settings related to the Member registration.
Settings include:
— Username configurations
— Admin approval option
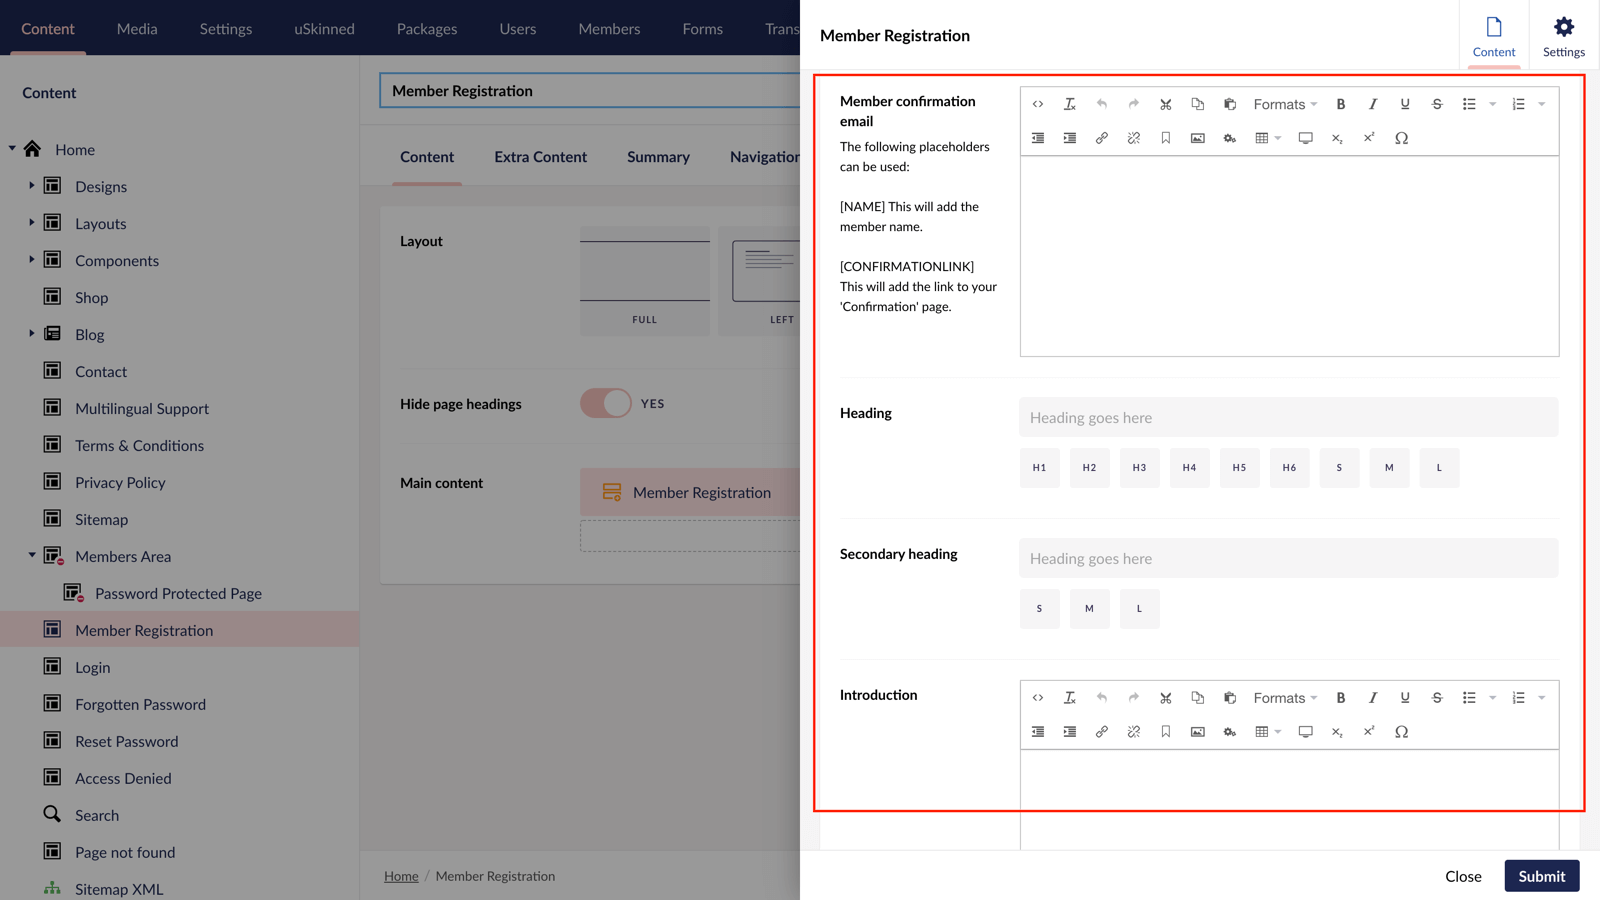
— Email confirmation
— Email confirmation message
— plus lots more
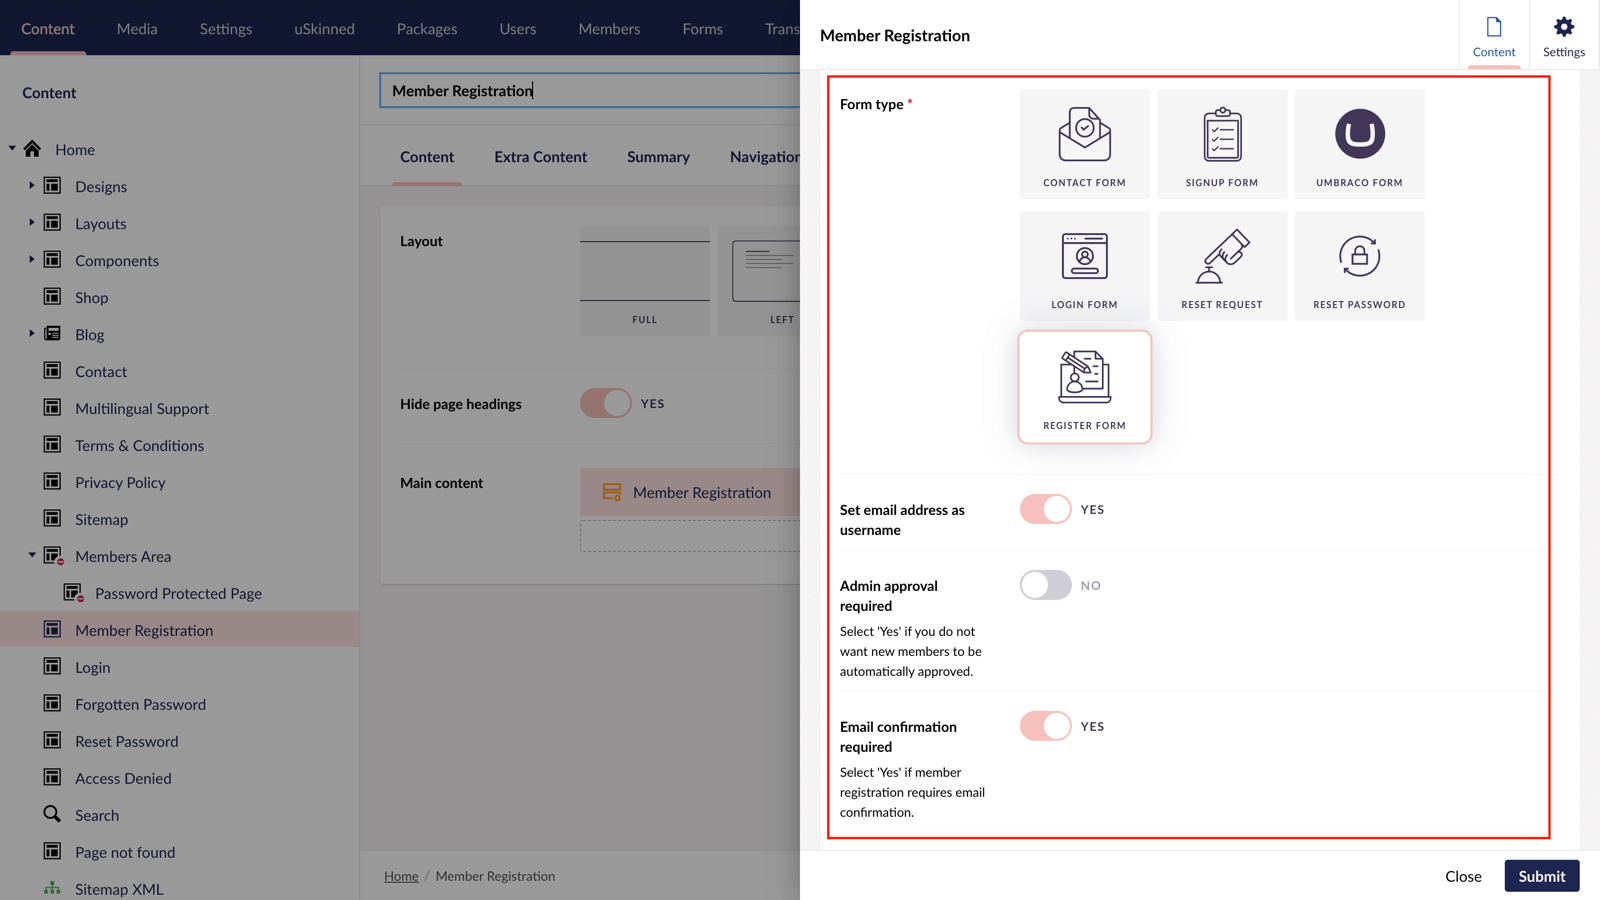
Once you're happy with the settings, hit submit.
Step 6
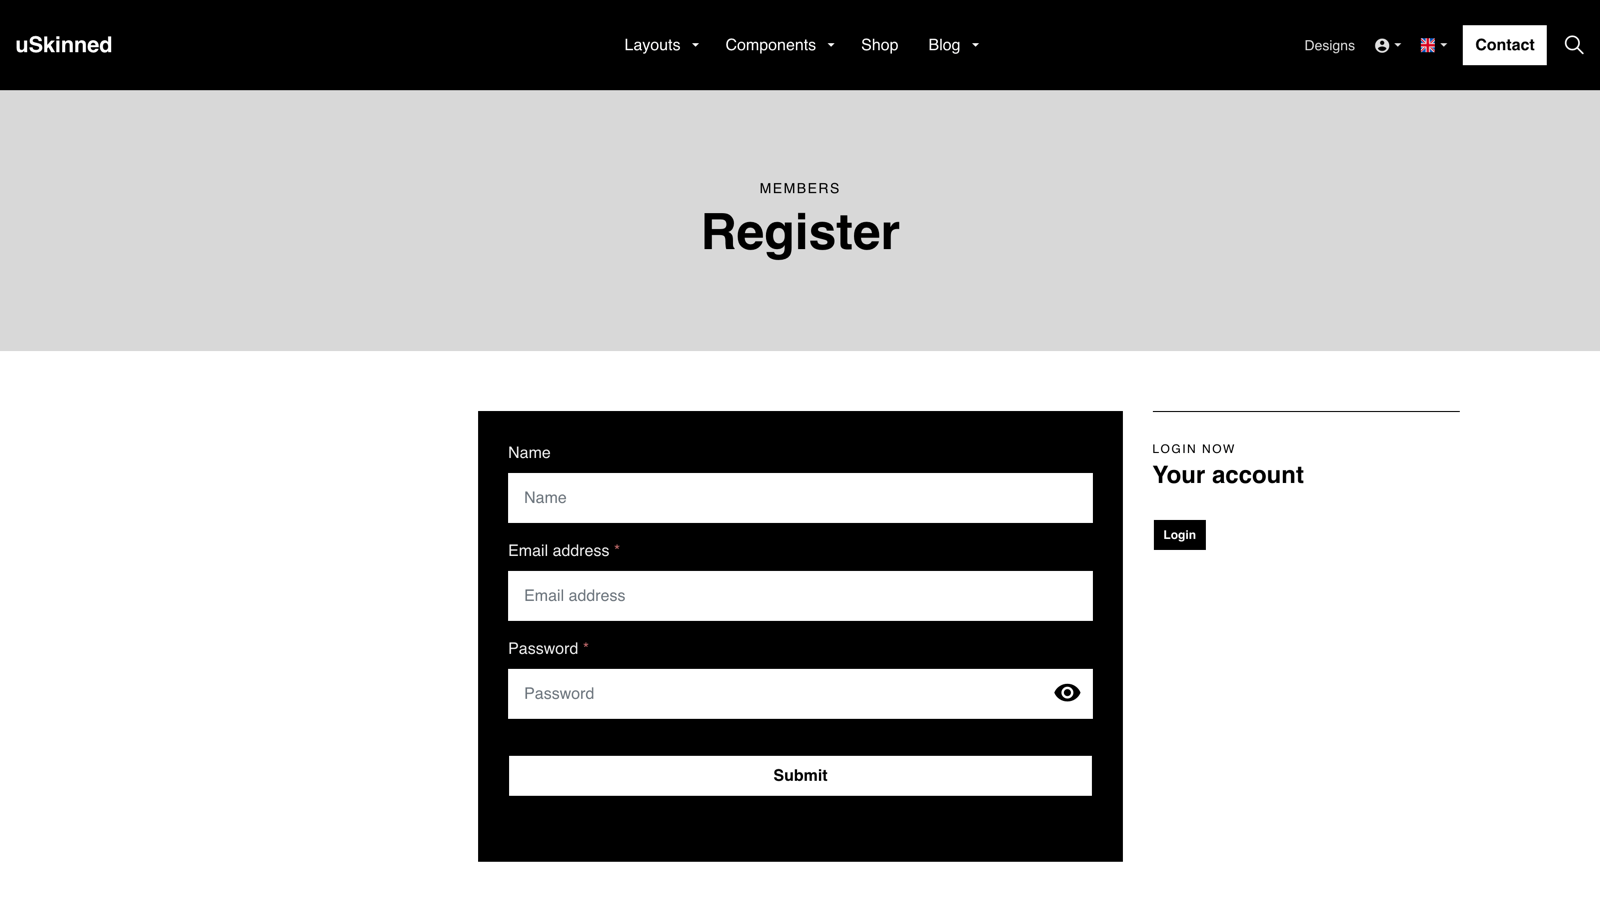
Save and publish the page. Visitors to your site will now be able to register for your password-protected content.
Create password protected content
You can password protect single pages, multiple pages or your entire website.
Step 1
Login to the CMS.
Step 2
In the tree menu on the left, go to any page or create a new page.
Step 3
Once the page has been saved, right-click on it in the tree menu.
Step 4
From the options, select 'Restrict public access'.
Step 5
From the options, set:
— The 'Member Group' who can access this content.
— Login page location.
— Error page location — for users who are logged but do not have access.
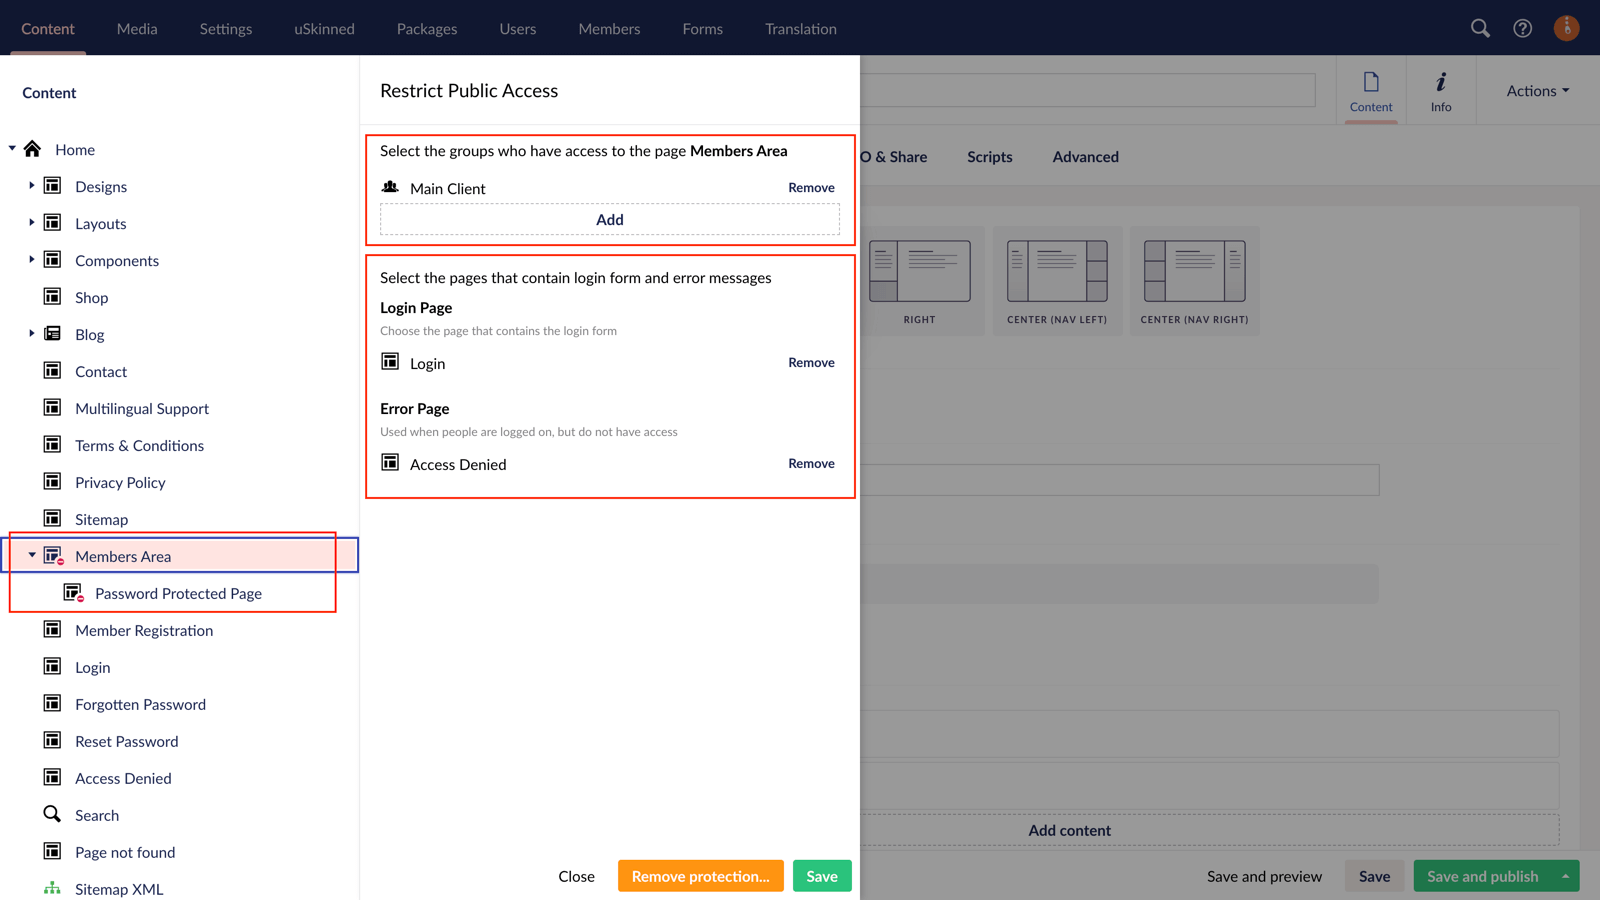
Step 6
At the bottom, hit 'Save'.
If you now access this page or its child pages on the frontend of your website, you will be presented with a login form.
#h5yr
Step 3
Create
Create content with the Visual Editor and utilise built-in eCommerce and integrations.
Step 4
Go Live
You can host securely on Azure with uSkinned Hosted, or go your own way with a Self-Hosted license.
