How to create a unique anchor ID and link
An anchor link is a URL that takes a user to a specific place on any page or blog post. These can be really handy if you plan on creating a one-page website.
Here we will cover how you can add an anchor to any component and then link to it with a button or navigation item.
Create a unique anchor ID for a component
Step 1
Login to the CMS and go to (or create) a page or blog post.
Step 2
On the content tab locate the label 'Main content'. You should either 'Add content' or click on an existing component.
Step 3
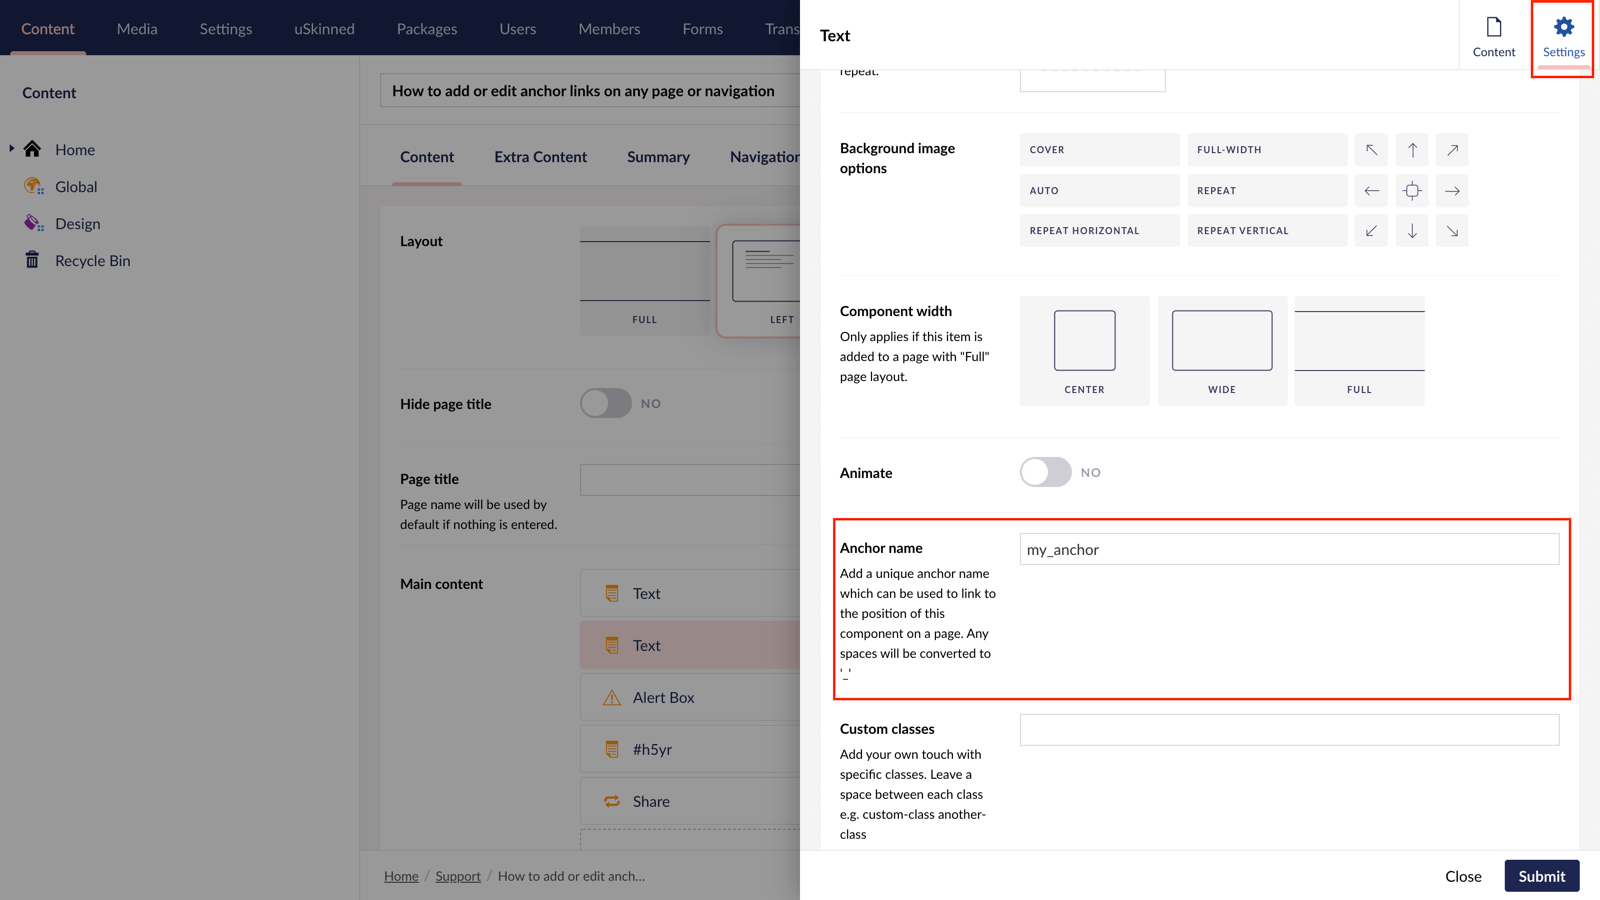
From the slide-out panel, click on 'Settings' in the top right corner.
Step 4
Scroll down to the label 'Anchor name' and enter a name in the field provided.
Please note, if you do leave any blank spaces here then they will be automatically removed and replaced with an underscore, like so _
You should copy what you have entered for the name, you will need this for the next part.
Create a unique anchor ID for a pod
Step 1
Login to the CMS and go to (or create) a page or blog post.
Step 2
On the content tab locate the label 'Main content'. You should either 'Add content' to create a Pod component or click to edit an existing Pod component.
Step 3
At Pod items, click to create a new Pod item or click to edit an existing Pod item.
We will use the Image Card pod item.
Step 4
You can now add an anchor in the Heading, Secondary Heading, or Text fields.
If you add to the Heading or Secondary Heading field, then you will need to enter the code, for example:
<a href="#my_anchor"></a>
If you add to the Text field, you can use the Anchor icon available in the rich text area toolbar.
You should copy what you have entered for the name, you will need this for the next part.
Add an anchor link to your navigation
Step 1
In the tree menu on the left, go to 'Global'.
Step 2
On the right side, click on 'Navigation'.
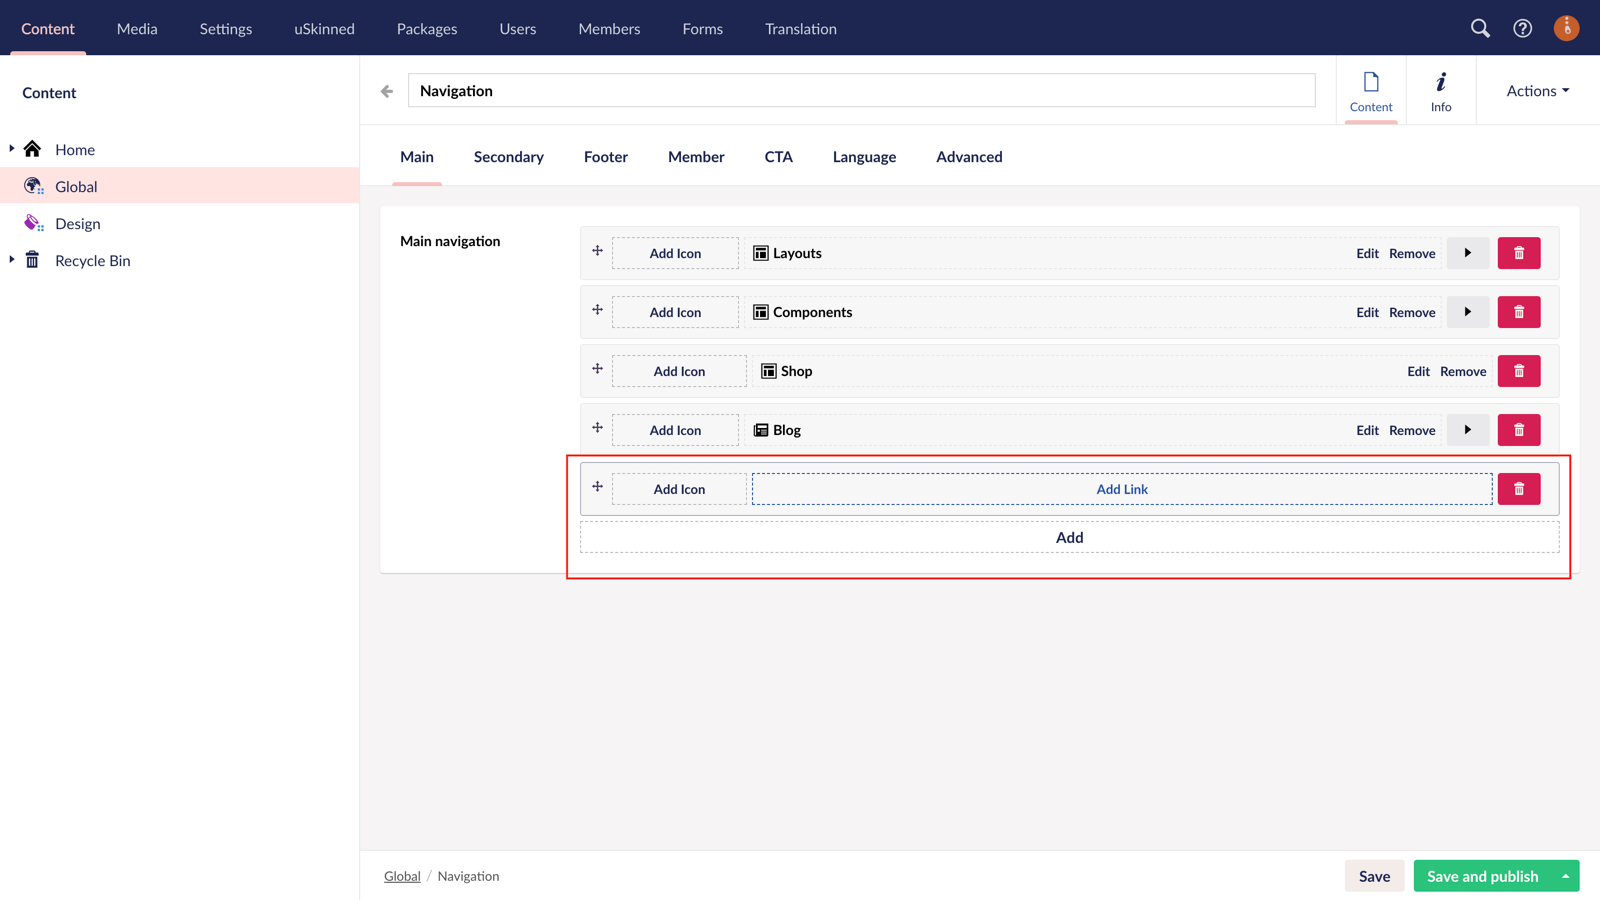
Step 3
On the 'Main' tab, locate the label 'Main navigation' and click 'Add' at the bottom.
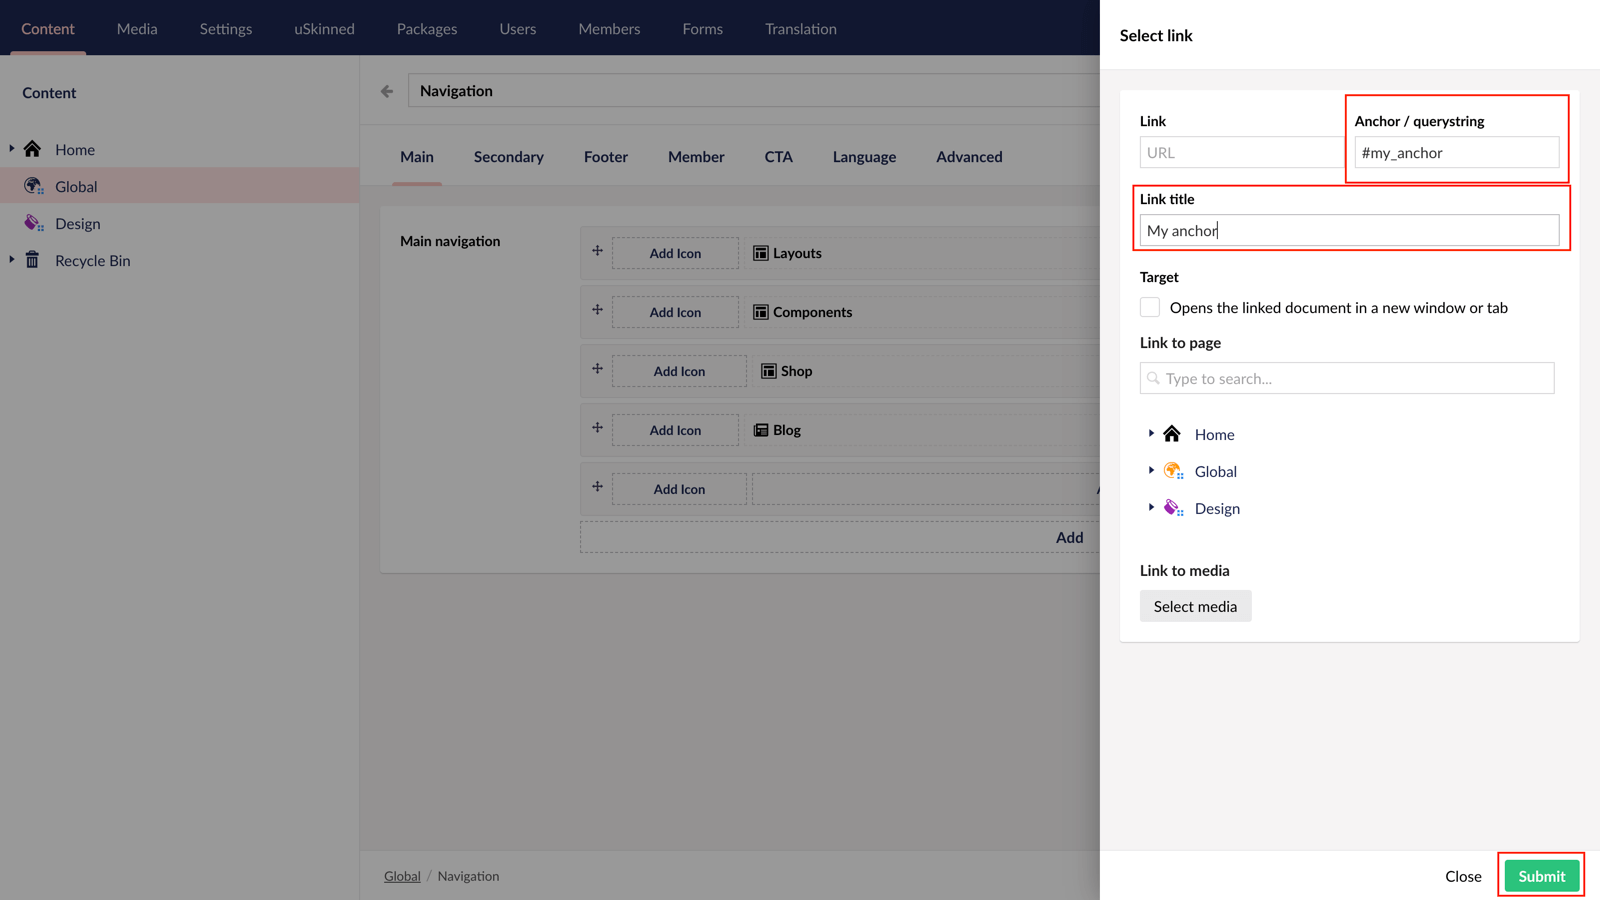
Step 4
In the slide-out panel, at the label, 'Anchor / query string' enter the unique ID you created above e.g. #my_anchor
At the label, 'Link title' enter the name you would like users to see on your navigation. Now click 'Submit'.
Step 5
Once the slide-out panel is closed, adjust your navigation link to suit your needs and the 'Save and publish'.
Other ways to link to a unique anchor ID
In the above example, we are linking to the anchor ID from the main navigation, however, you can link to an anchor ID from any link picker in your uSkinned for Umbraco website. This includes, from components, pods, footer navigation — everywhere!
Please note, if you link to an anchor ID on another page than the one the anchor link exists on then you will need to include the full URL slug e.g. /my-page/#my_anchor
#h5yr
Step 3
Create
Create content with the Visual Editor and utilise built-in eCommerce and integrations.
Step 4
Go Live
You can host securely on Azure with uSkinned Hosted, or go your own way with a Self-Hosted license.
