Step 1
Login to the CMS.
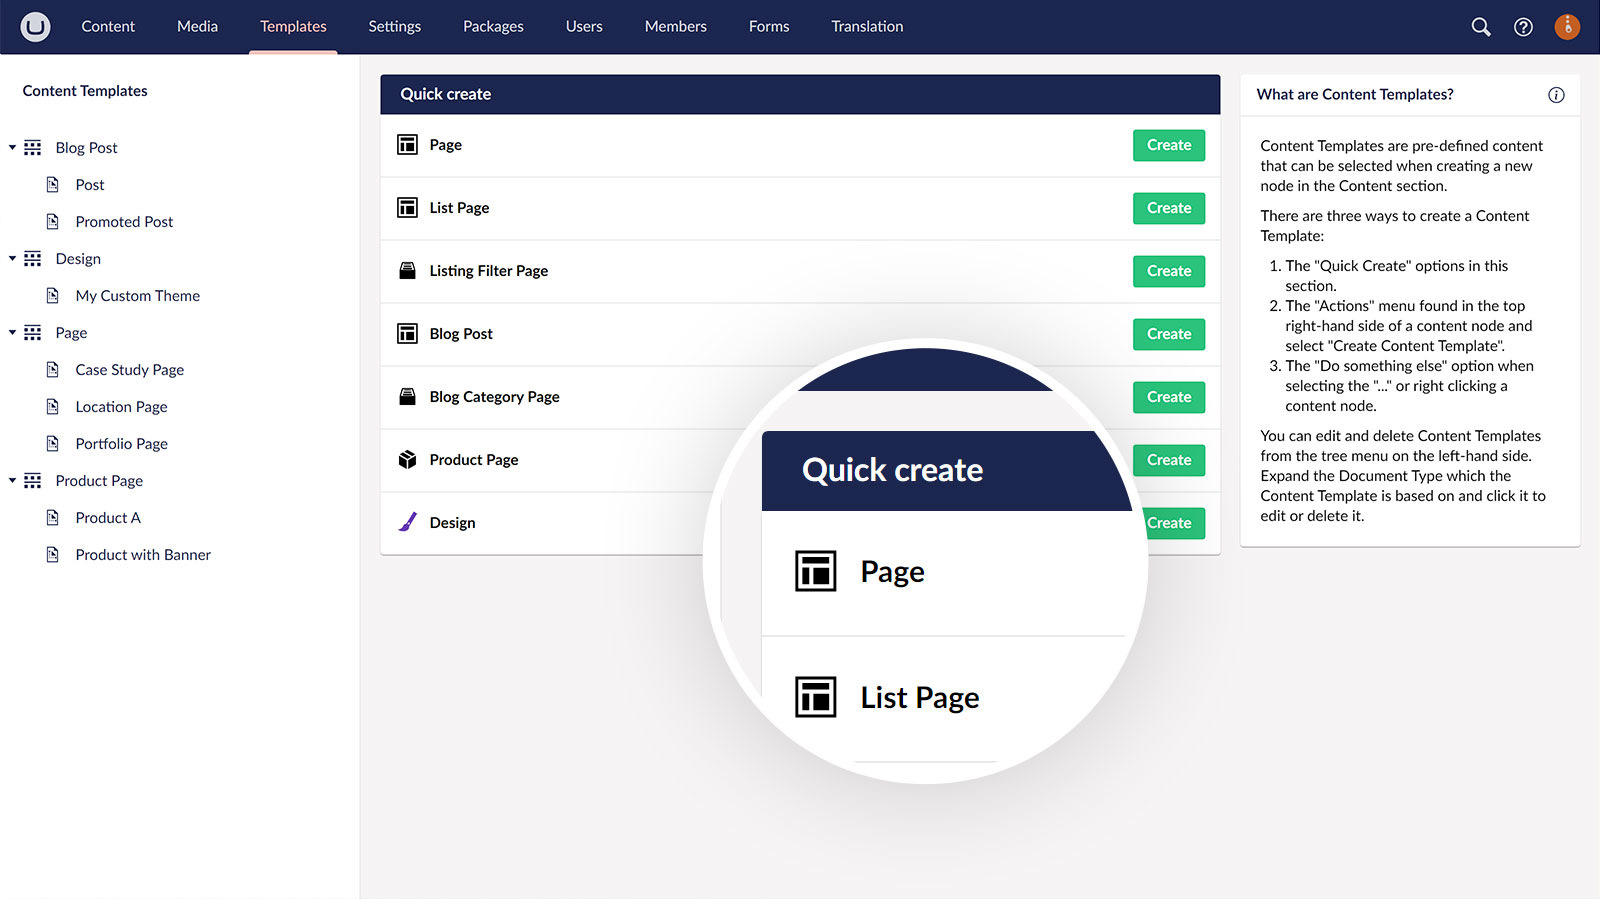
Step 2
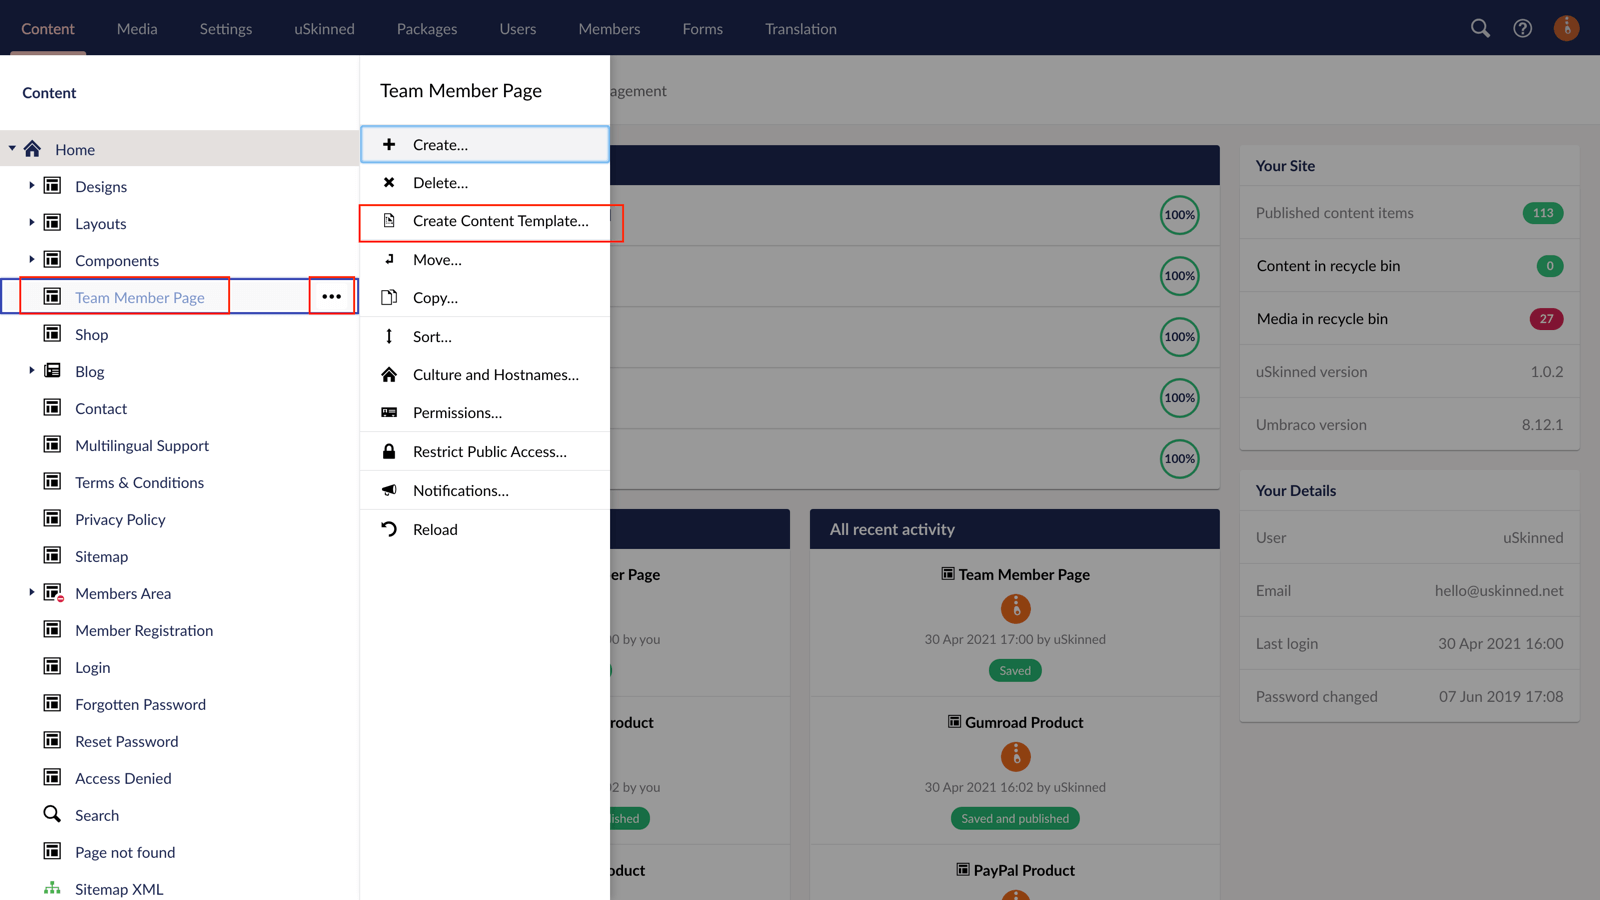
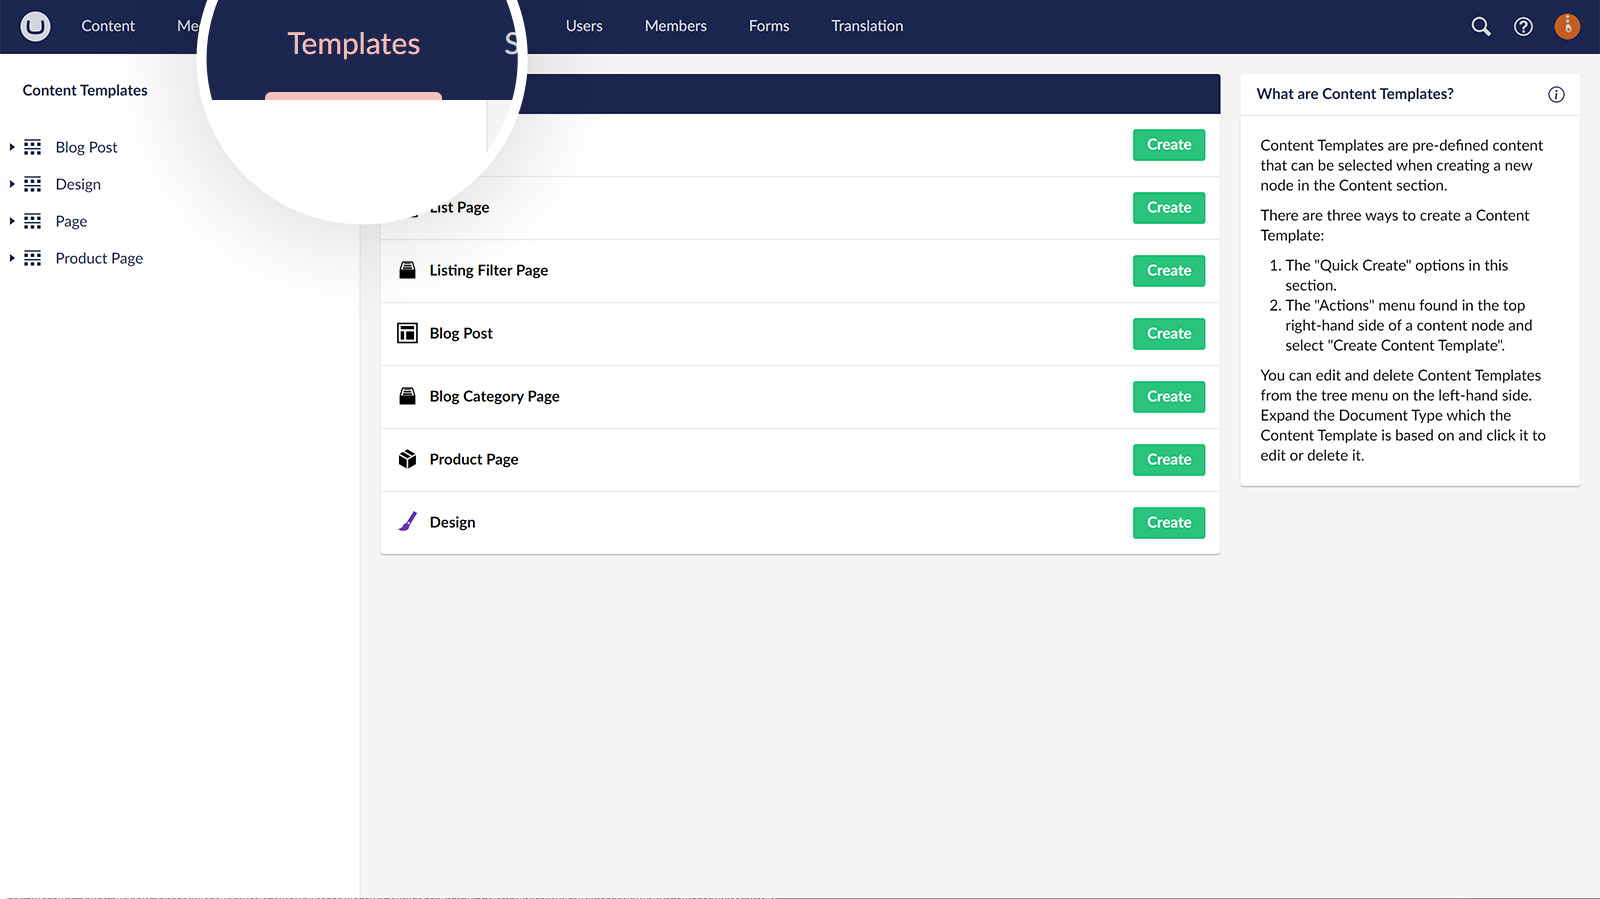
In the top navigation, go to the Templates section.
Step 3
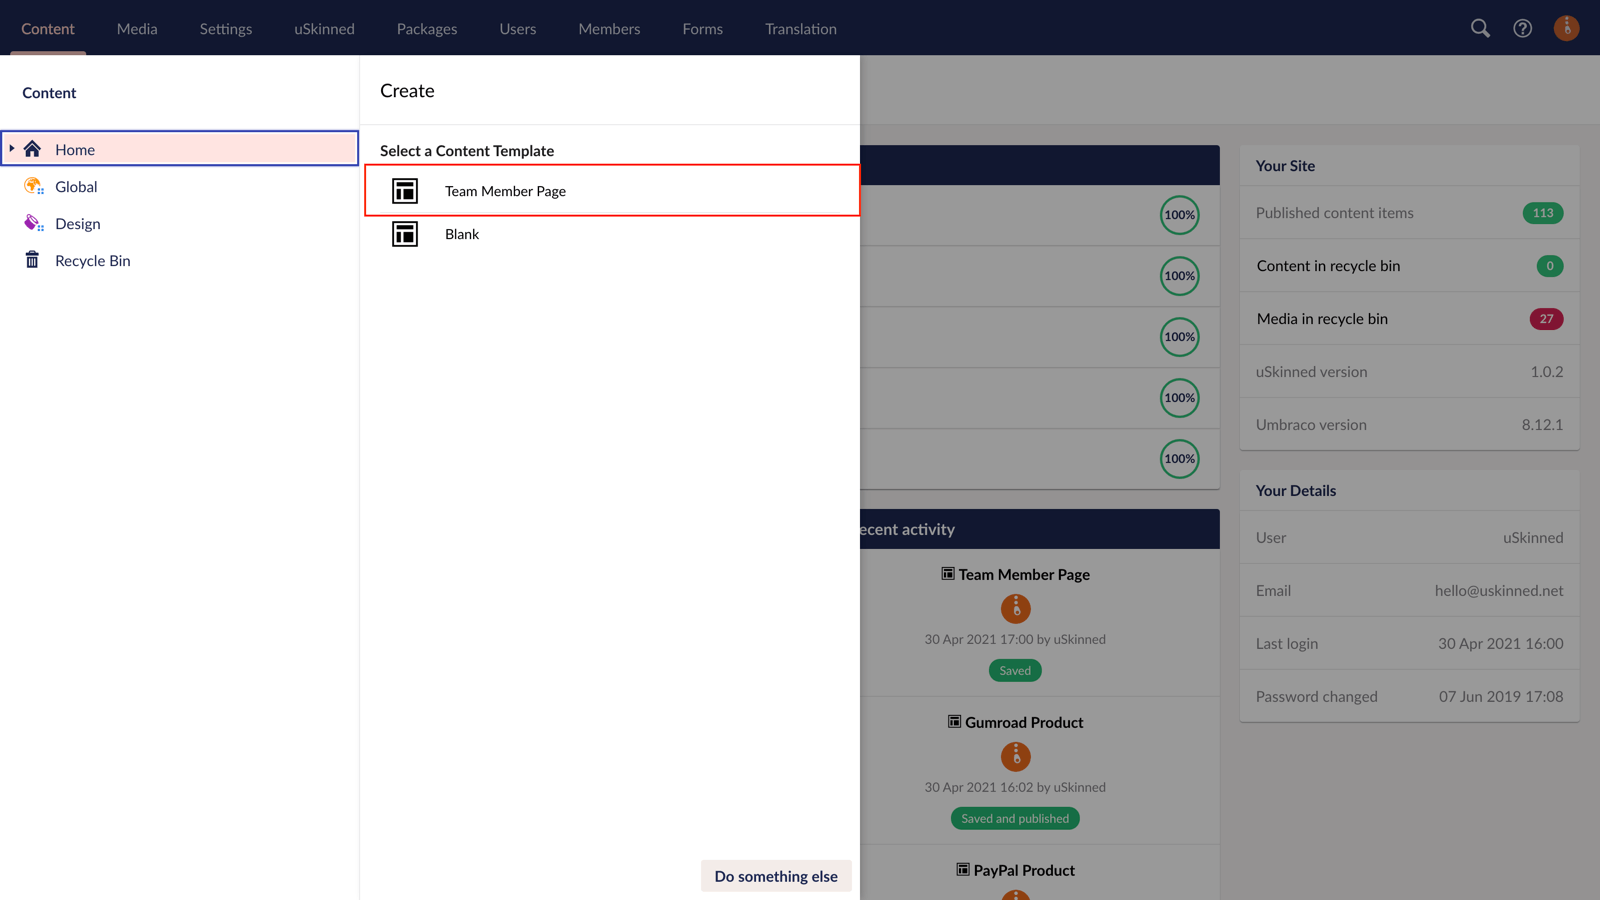
From the Quick Create panel, choose a type of Template to create.
Step 4
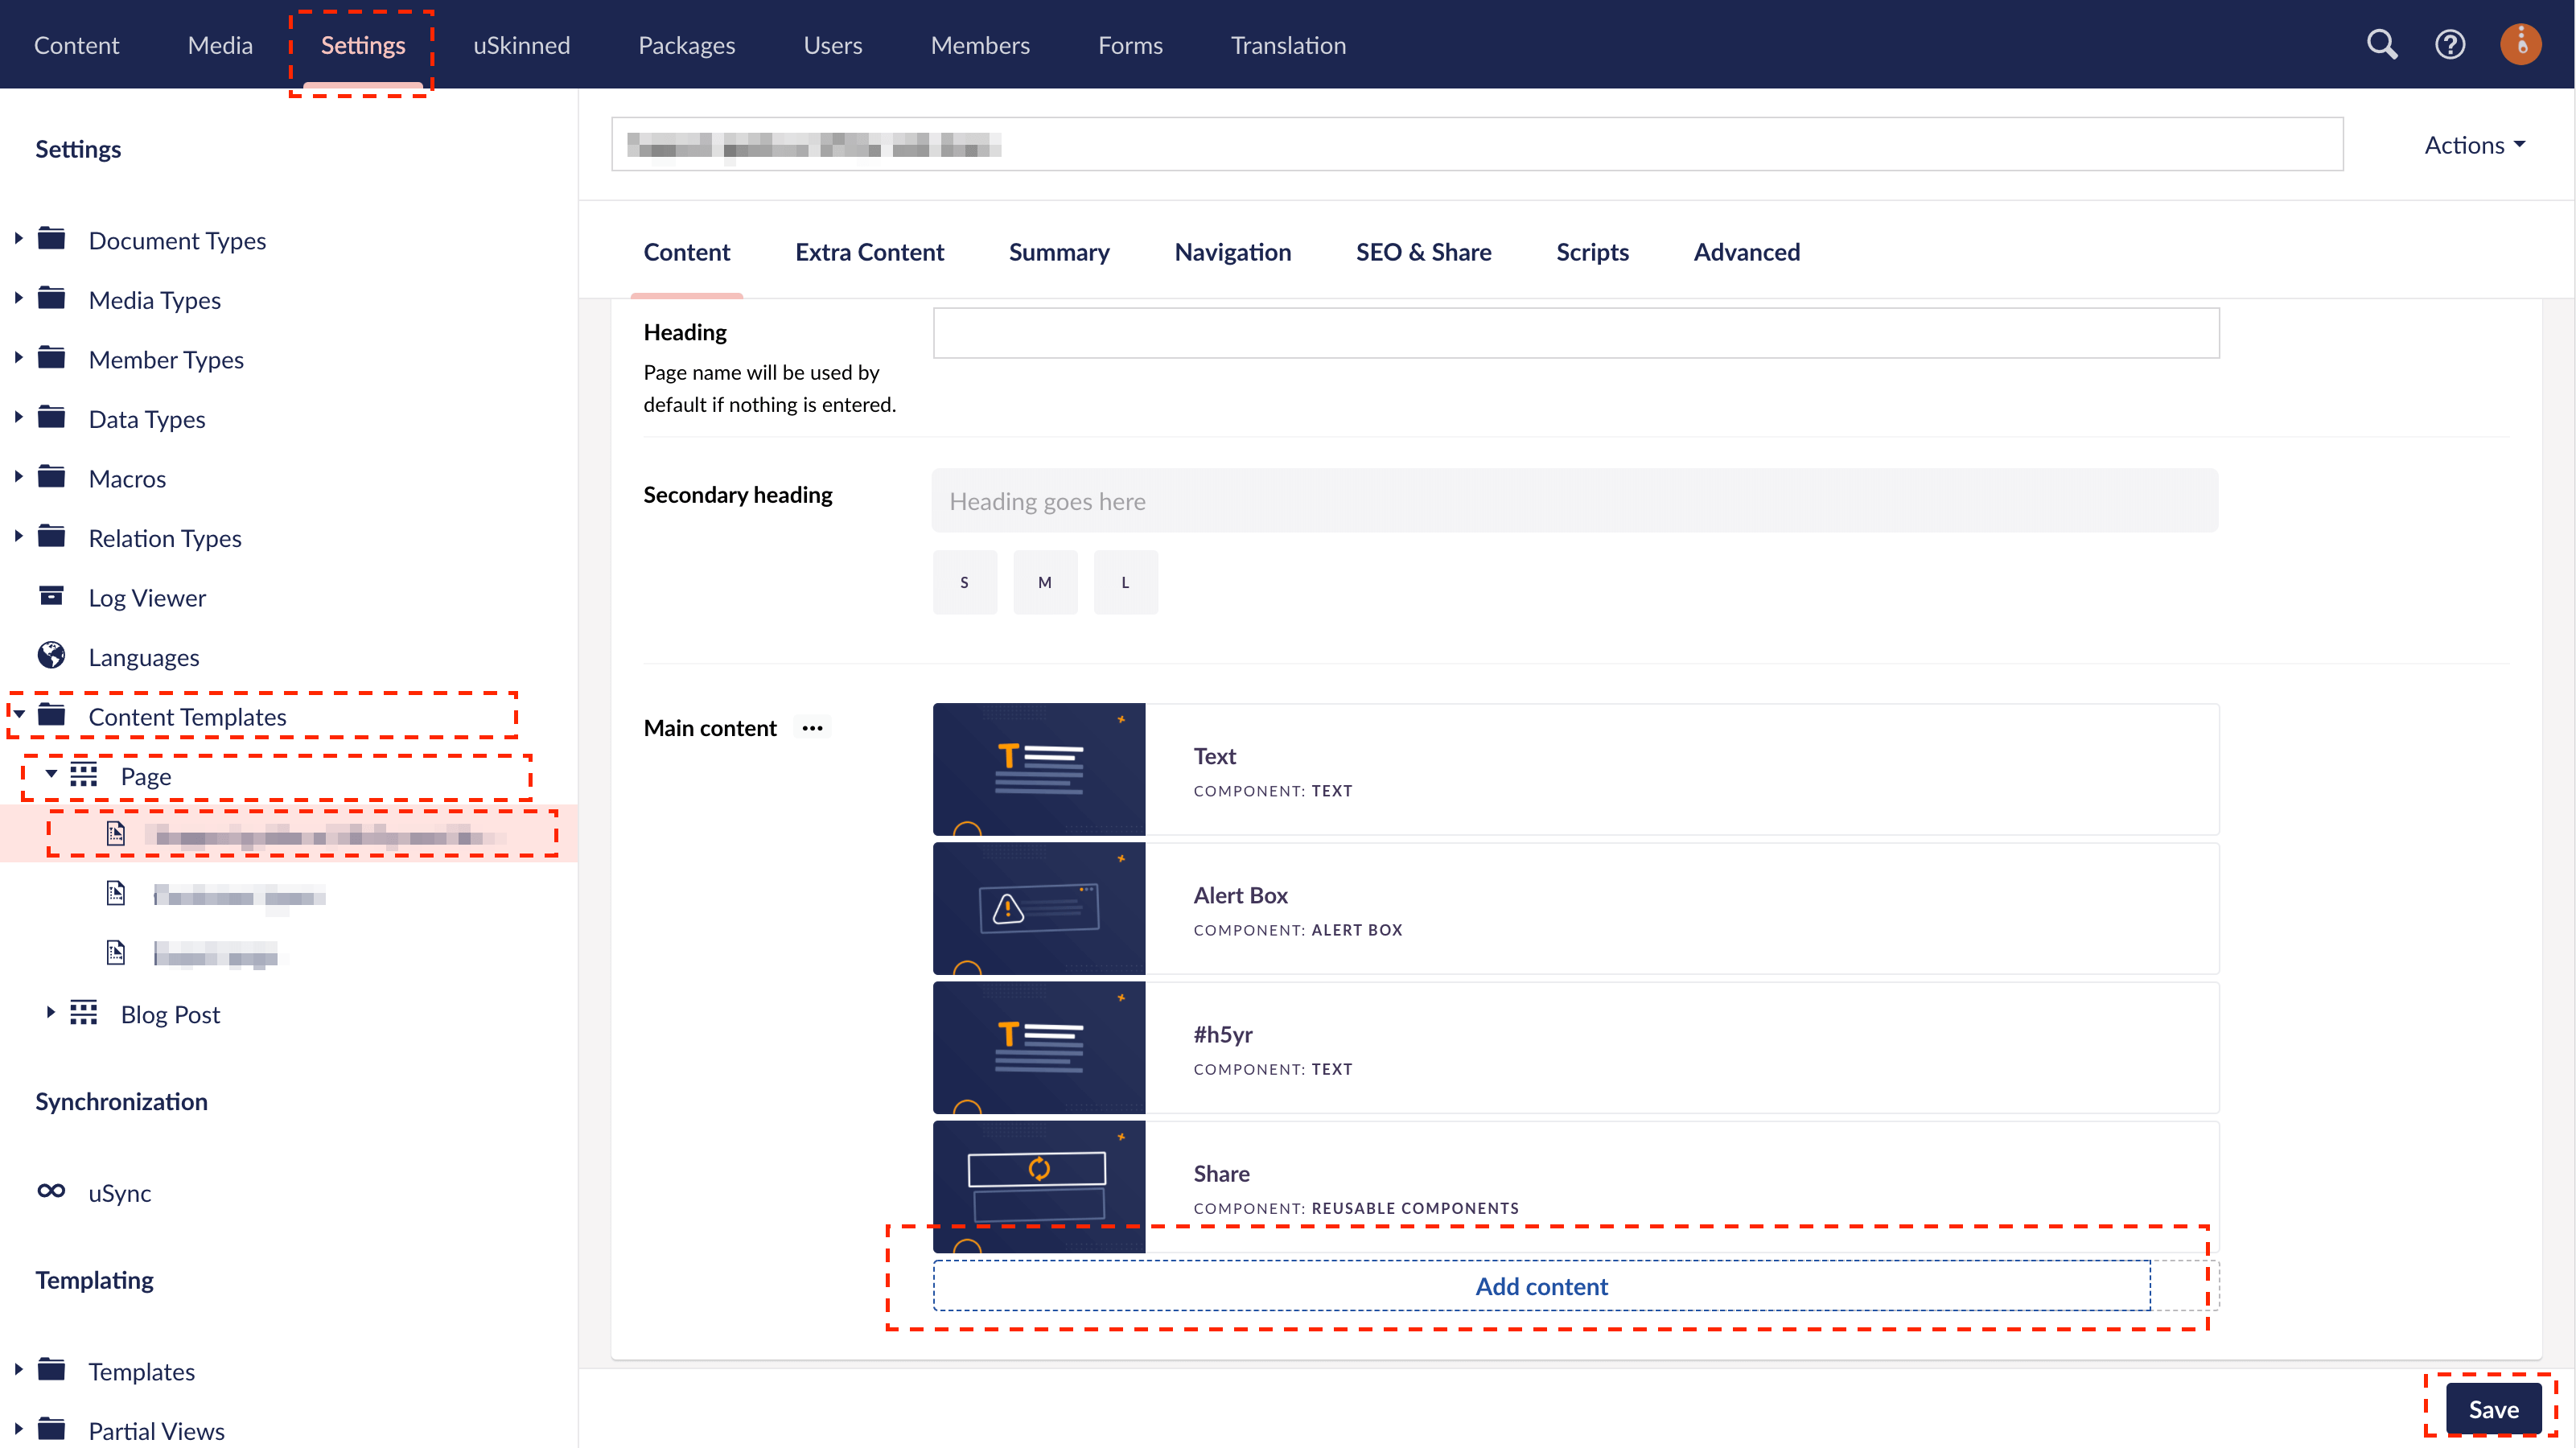
Add Components, Pods, and Settings as required to your Template — the same as you would when creating new pages or posts.
Step 5
Save the Template.
Step 6
Navigate to the Content section and use your Template to create new content.