How to create a website monitor and status page with Uptime Robot
A website is typically the first impression a potential customer has of your business and any website issues can lead to frustration and lost sales. This is why monitoring your website uptime is very (VERY) important.
There are lots of services out there but in this guide, we will look at Uptime Robot. We will take you through the steps to create an account with Uptime Robot, add your first website monitor and publish a status page.
Uptime Robot is the world's leading uptime monitoring service. Anyone can create an account and set up 50 monitors with 5-minutes checks totally FREE!
Currently, Uptime Robot keeps an eye on 6,000,000 monitors for more than 1,600,000 users and companies, including IBM, GoDaddy, Nasa, Expedia and more. Wow, that's a lot!
Create a website monitor
Step 1
Sign up for a free account with Uptime Robot.
Step 2
Once you've verified your email address, log into the Uptime Robot dashboard.
Step 3
Create your first monitor by clicking the button "Add New Monitor" in the top left.

Step 4
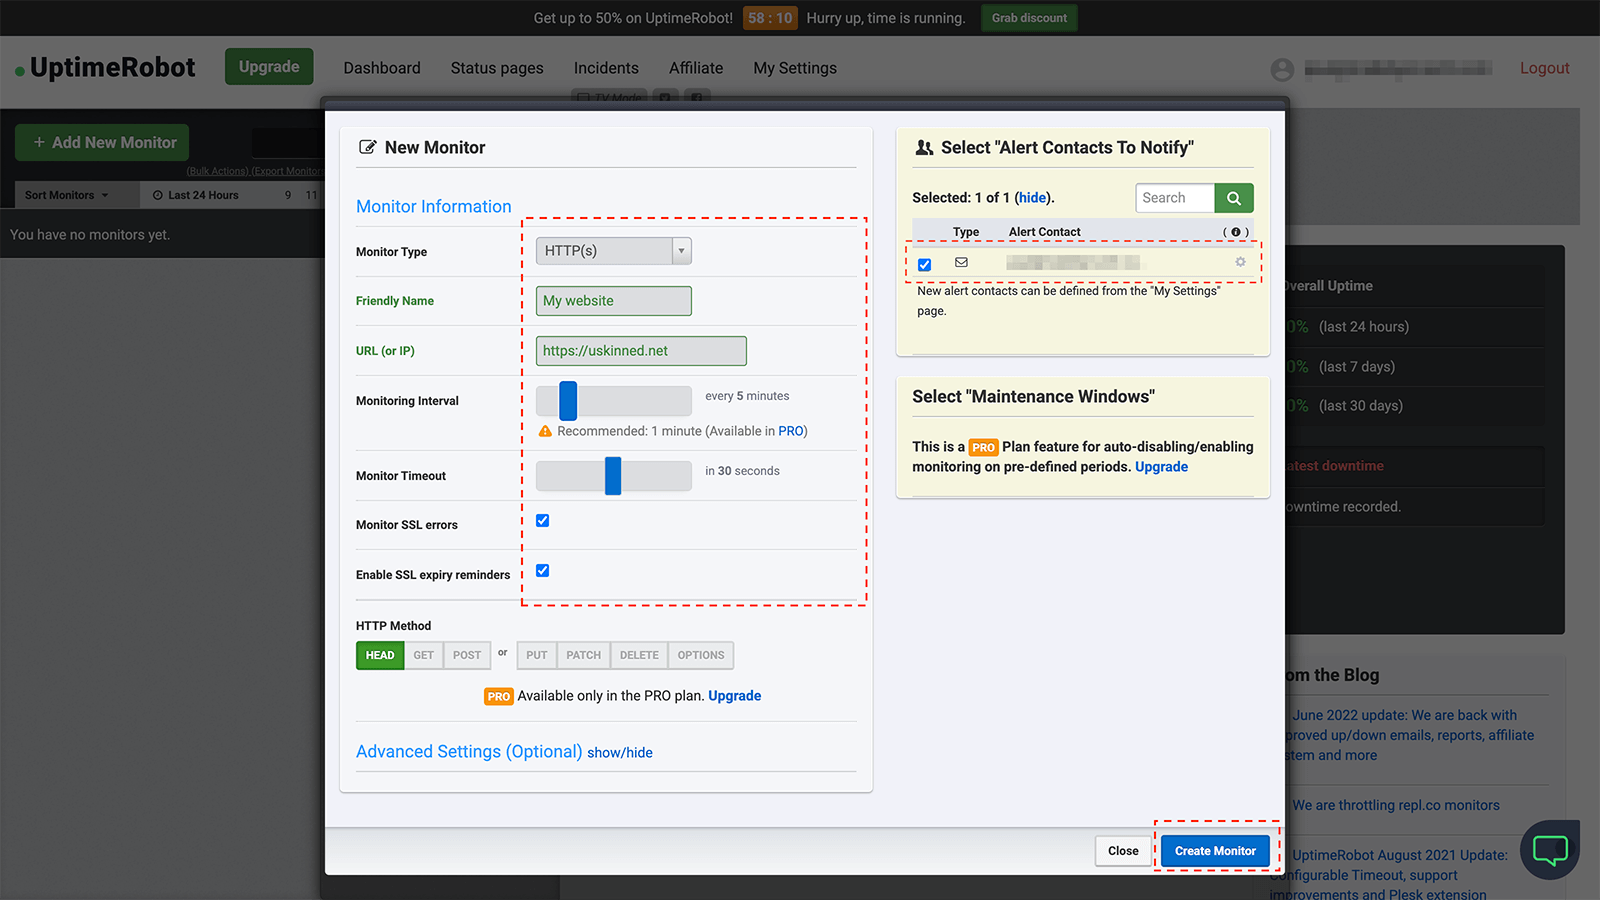
In the overlay panel, enter the details of your monitor. In our example, we are setting up with the following settings:
— Monitor type: HTTP(s)
— Friendly name: My website
— URL (or IP): https://website.com
— Monitoring interval: 5 minutes (it's free for anything over 5 minutes)
— Monitor timeout: 30 seconds
— Monitor SSL errors: Yes
— Enable SSL expiry reminders: Yes
In addition to this, we have also added an email address in the top right of the panel to be notified if the website does go down. That way you will know right away.
Once you're happy, click "Create monitor".
Step 5
Now that your monitor has been created you can use the Uptime Robot dashboard to review the stats related to it, for instance, the Uptime percentage from the past:
— 24 hours
— 7 days
— 30 days
The dashboard will also report the downtime.
The Uptime Robot dashboard is only accessibly via your own account login, but perhaps you would like your wider team or customers to monitor the stats too. Well, that's what we'll cover next!
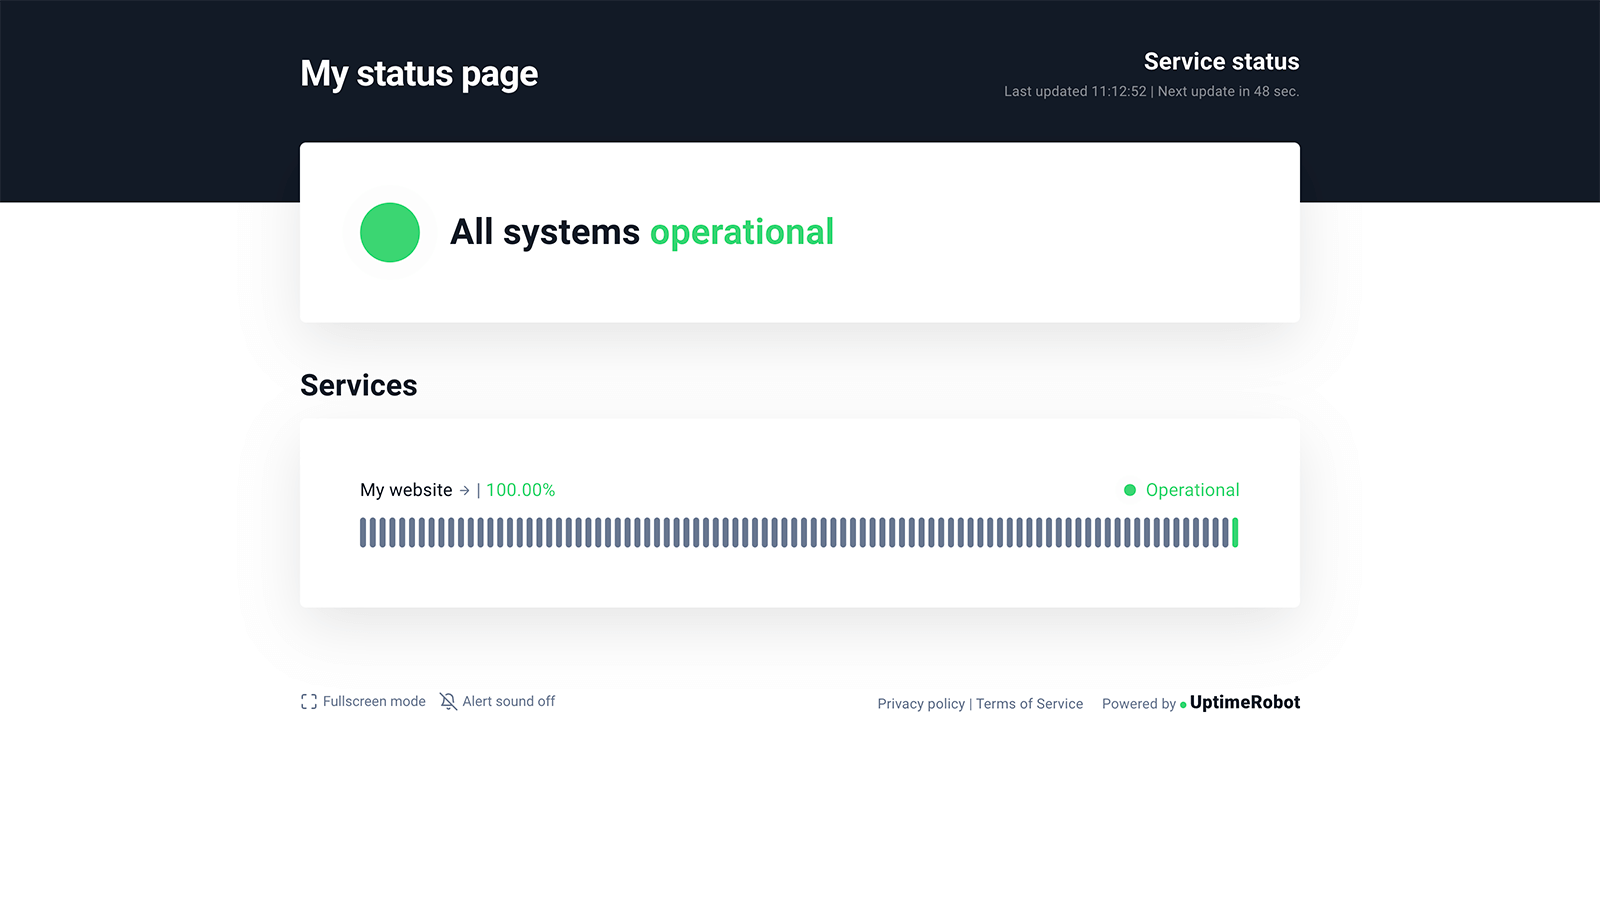
Create a public Status page
With Uptime Robot you can create a status page for all of your monitors. This page is publicly accessible so you can share it with all of the stakeholders from your websites, such as your development team or even your customers.
Step 1
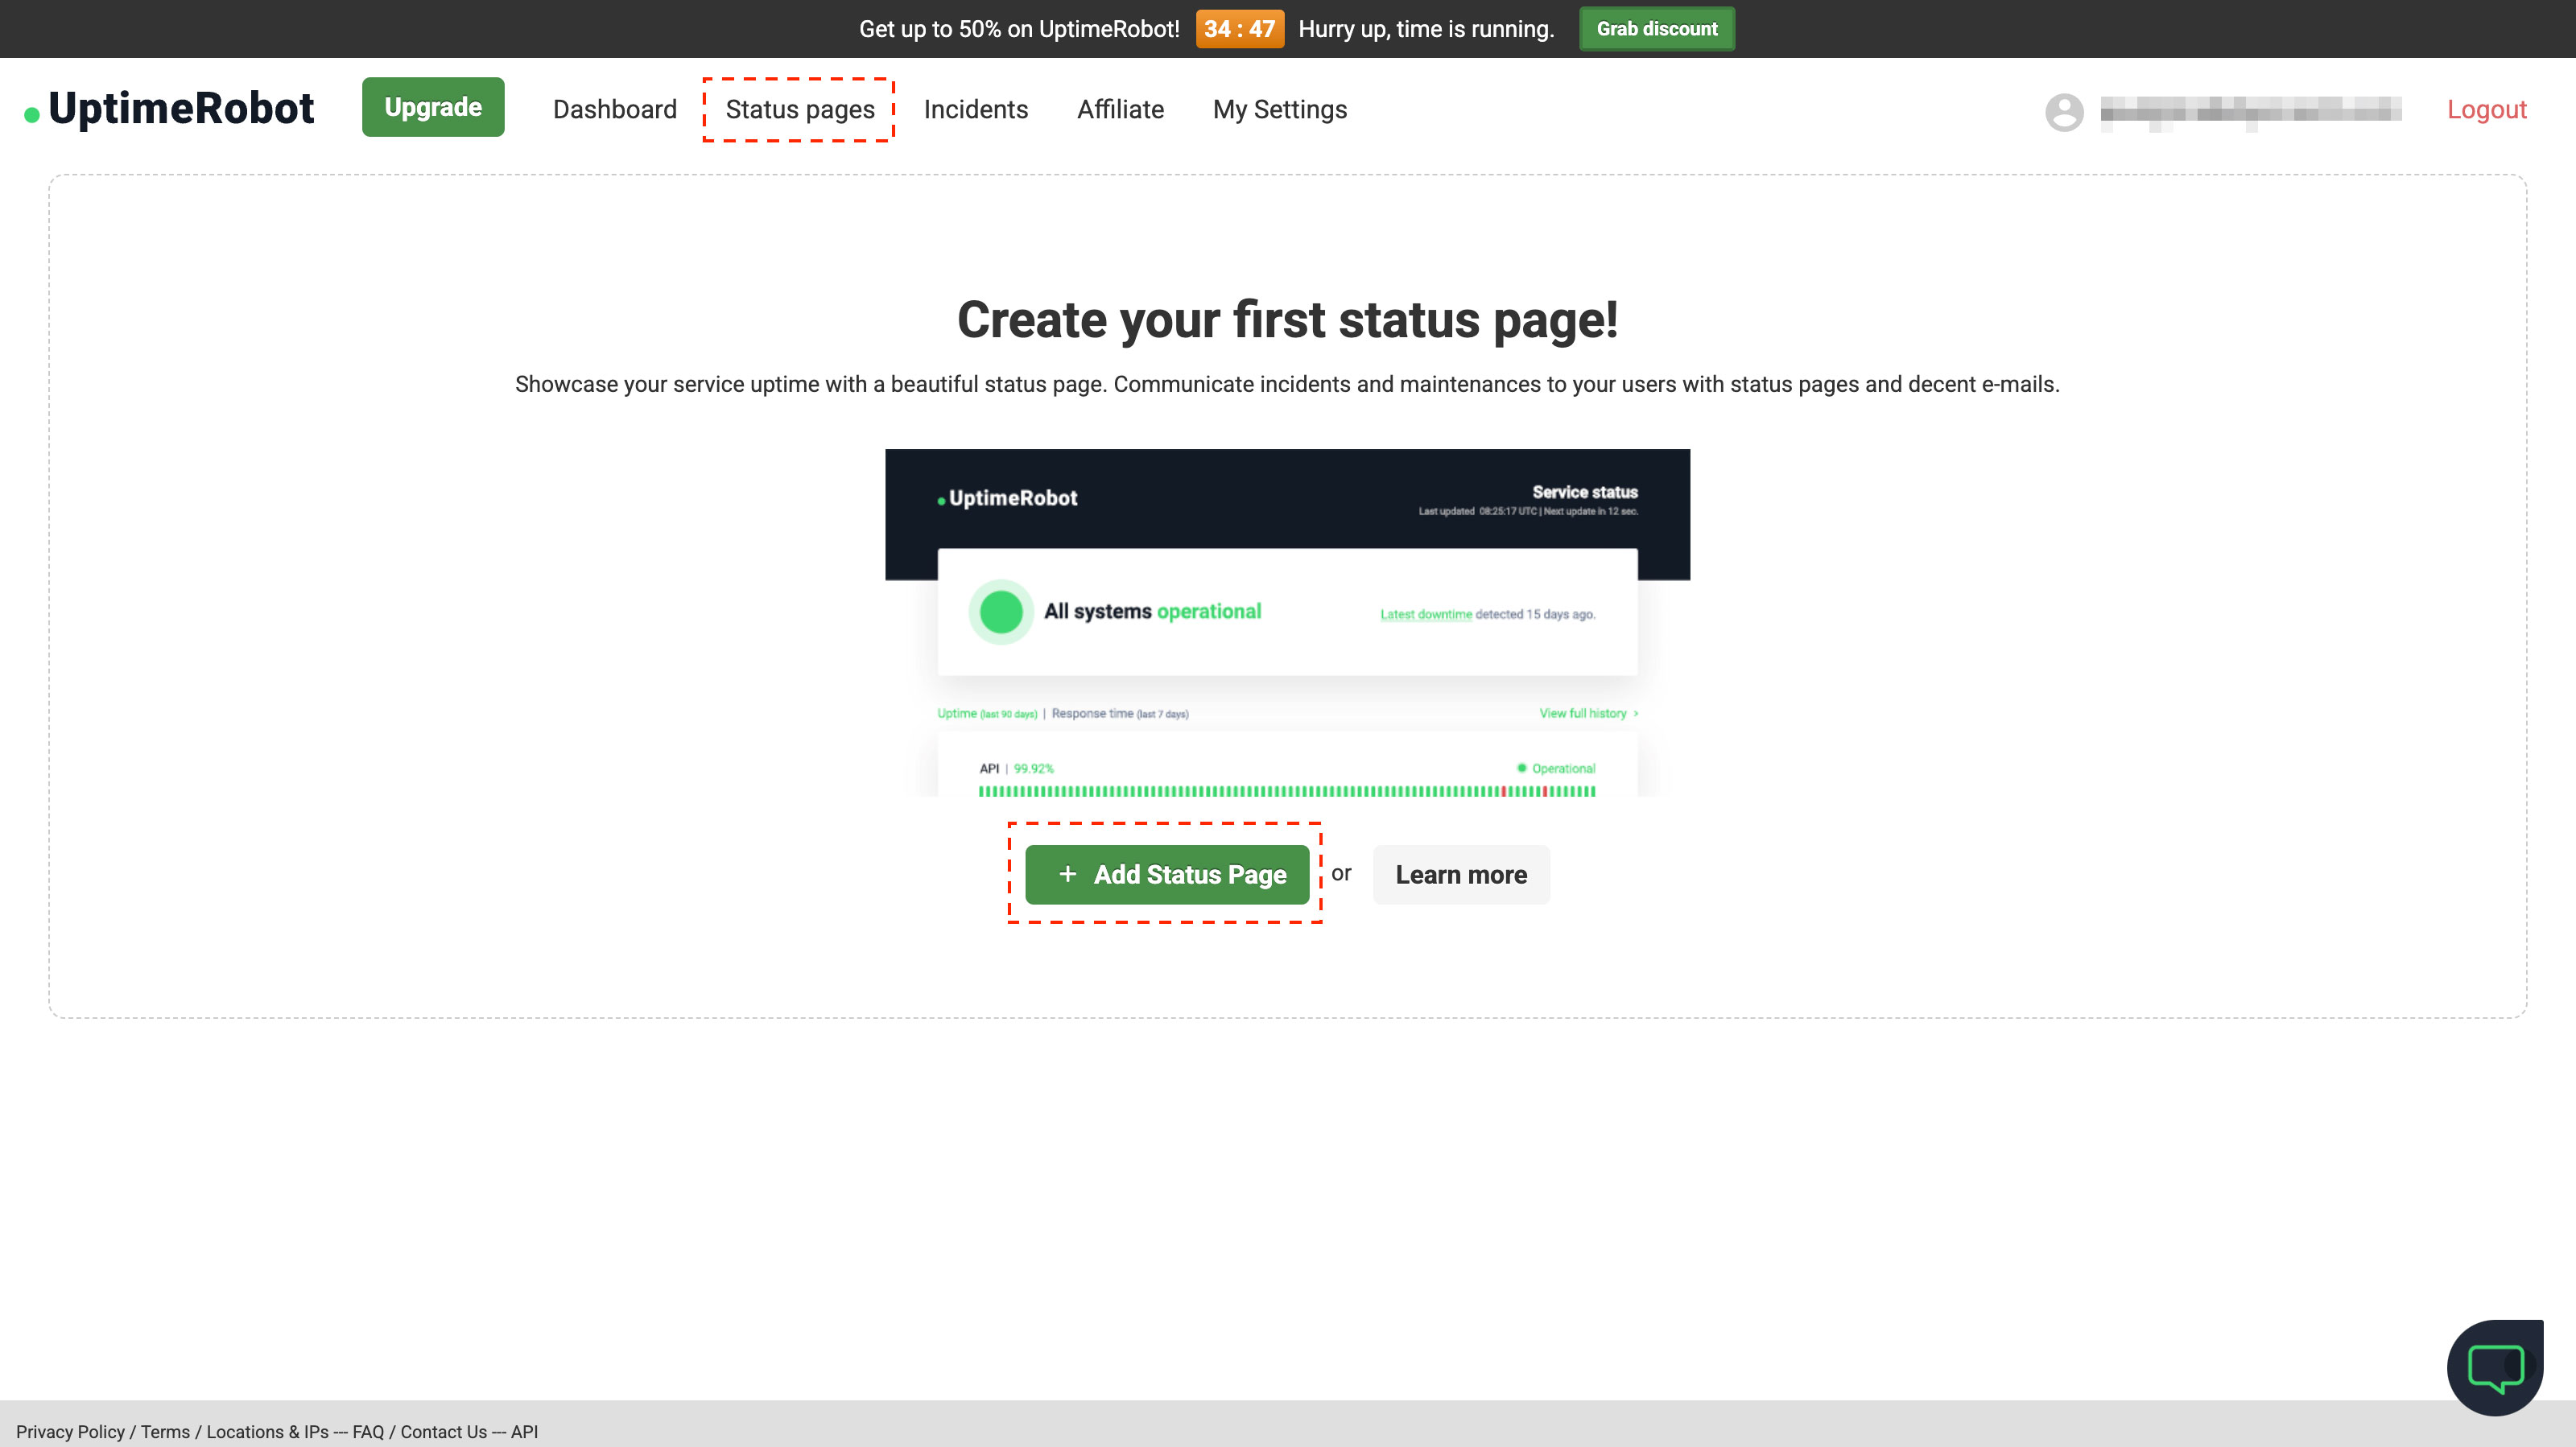
From your Uptime Robot dashboard, click on the "Status Page" link in the main navigation at the top.
Step 2
Click on the button to "+ Add Status Page".
Step 3
In the overlay panel, give your status page a name.
You can even create a password for it too, but since we would like it to be publicly available we will leave that blank.

Step 4
Once you're happy with the name, click to "Create Public Status Page".
Step 5
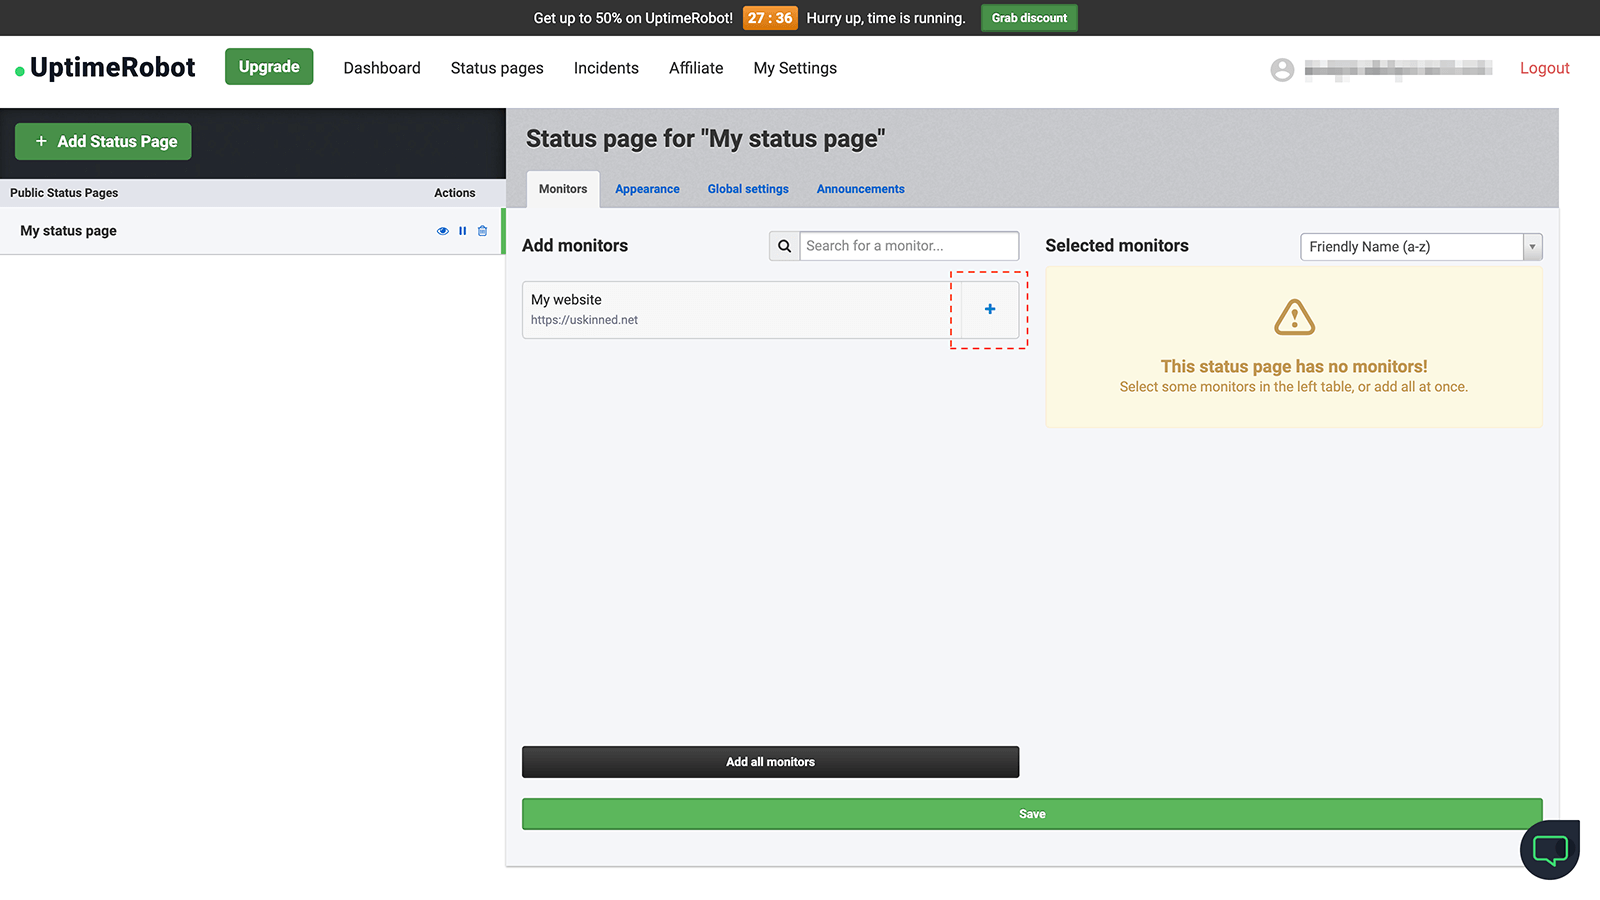
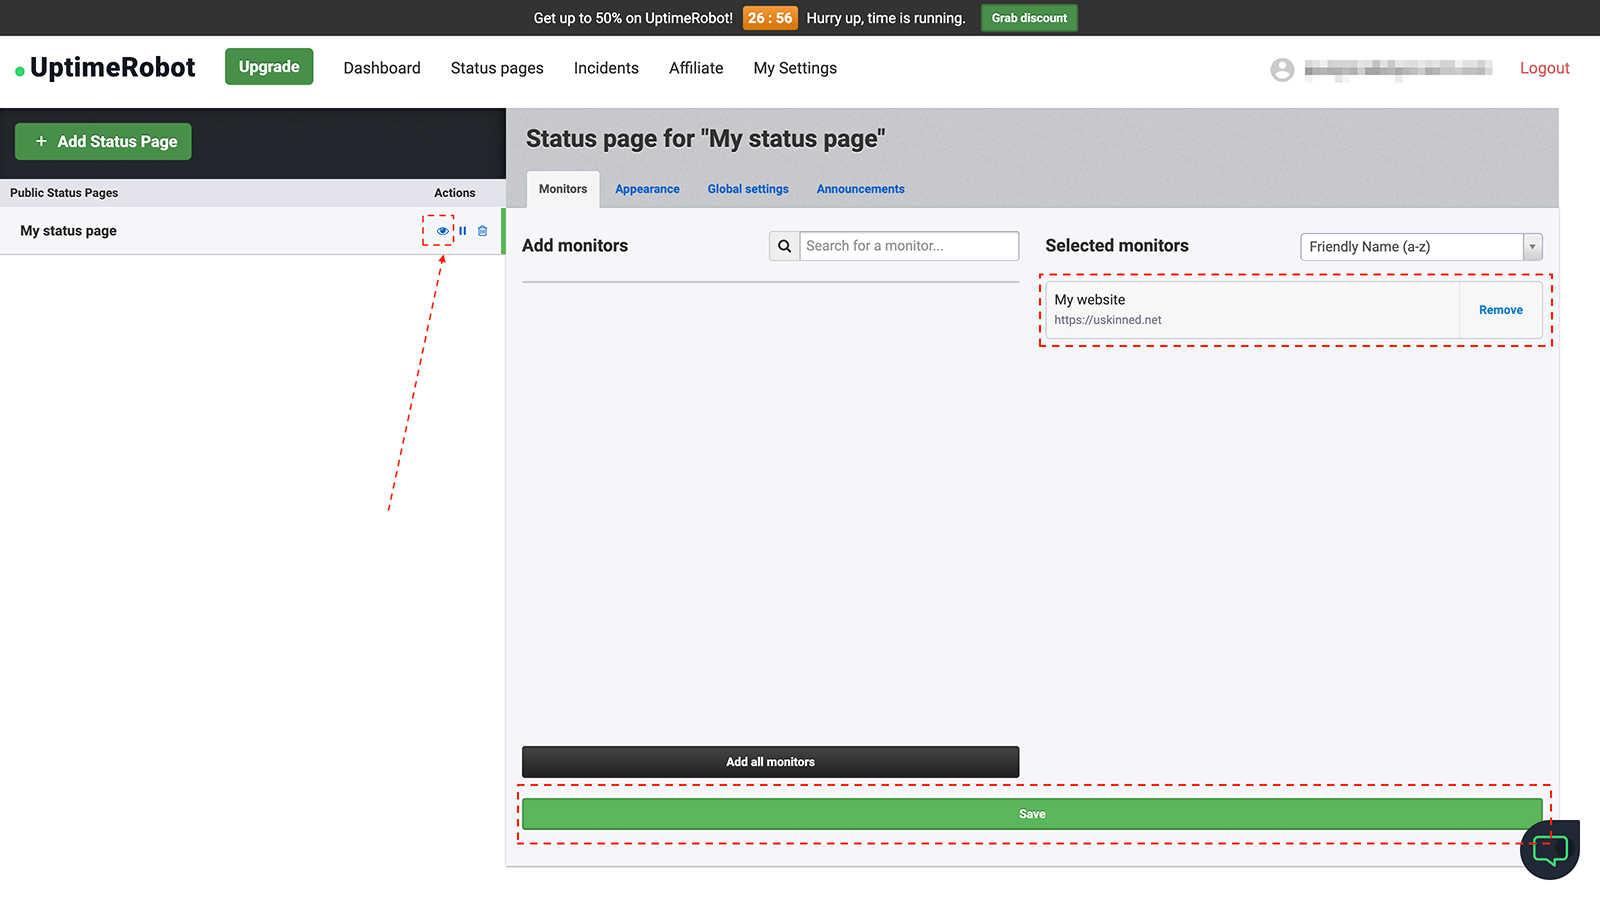
Now click the "+" icons next to the Monitors you would like to add to your Status Page. Once you're happy, click "Save" at the bottom.
Step 6
On the left-hand side, your list of status pages will be visible. Next to each, there is an eye icon, click on this to view the status page.
Step 7
You will now be taken to your Uptime Robot status page. Copy the URL in the browser bar and share it with anyone.
There's lots more to explore with your Uptime Robot account, including integrations with your team Slack channel, Zapier or Microsoft Teams. It's an awesome service and we would highly recommend it.
#h5yr
Related content


Step 3
Create
Create content with the Visual Editor and utilise built-in eCommerce and integrations.
Step 4
Go Live
You can host securely on Azure with uSkinned Hosted, or go your own way with a Self-Hosted license.
