How to add or edit social share images on any page or post
Social sharing meta images (Open Graph & Twitter Images) can be added to your site in a couple of different ways. You can set a default global image that will be used for your entire website however you can override this image on each individual page or blog post, giving every page its own unique and related image.
A social sharing meta image is used when a page or blog post is shared via any social network, be it, Facebook, LinkedIn, Twitter. Facebook and LinkedIn use Open Graph meta tags to share images and Twitter uses its own Twitter Image meta tag.
Don't worry though, you just need to upload the image, let uSkinned Site Builder take care of the meta tags behind the scenes.
Global Share Image
Step 1
Login to the CMS.
Step 2
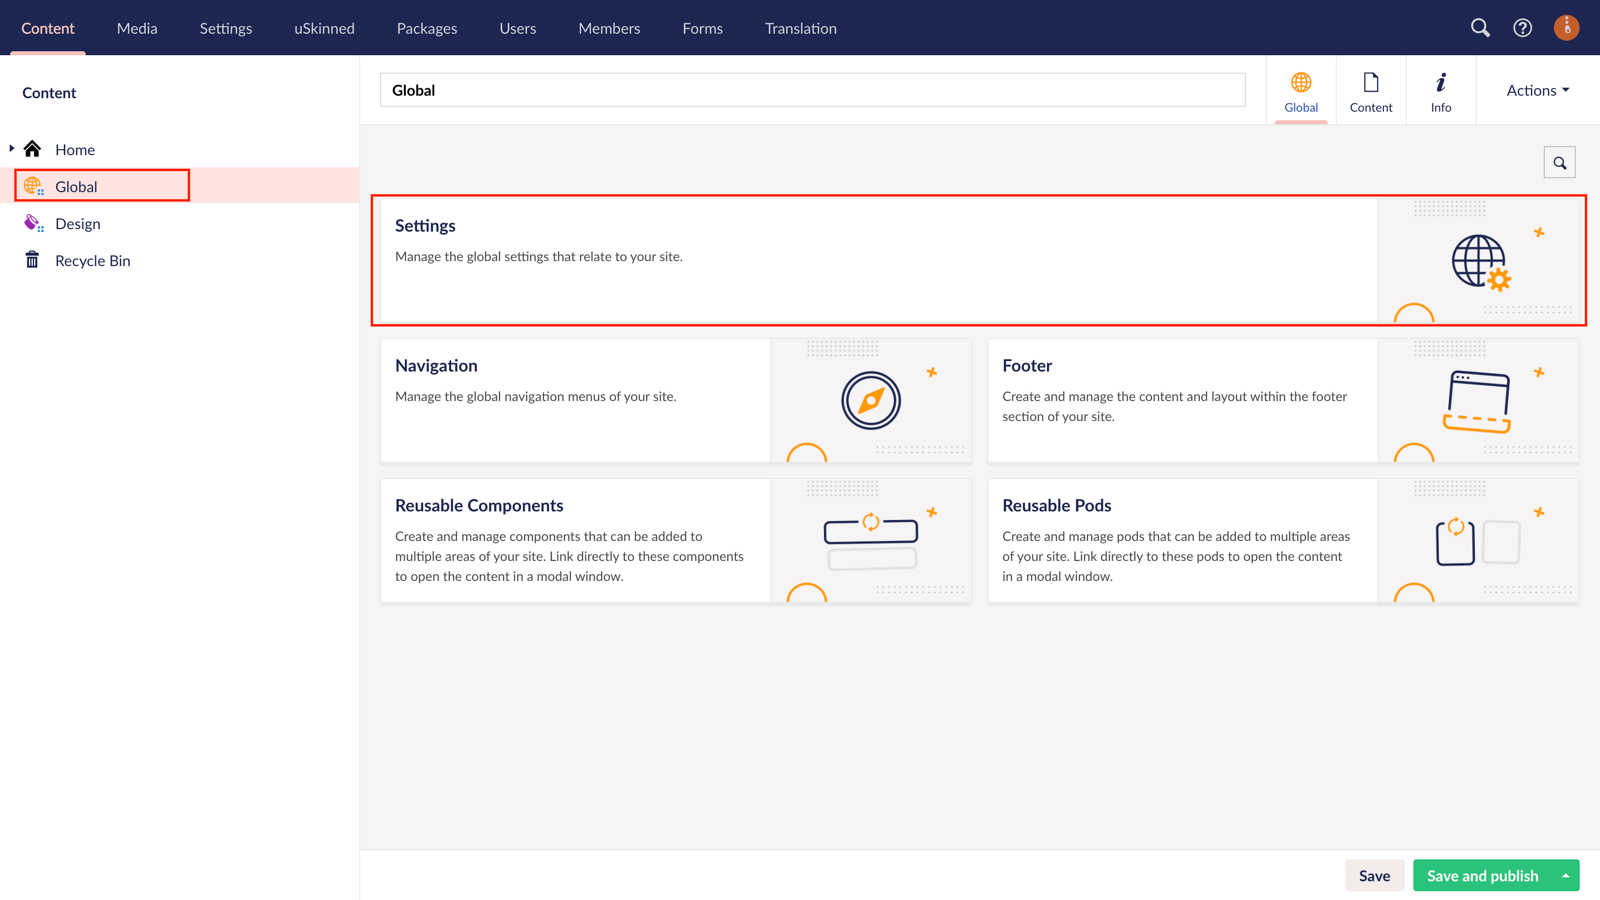
In the tree menu, go to 'Global'.
Step 3
From the grid of options, go to 'Settings'.
Step 4
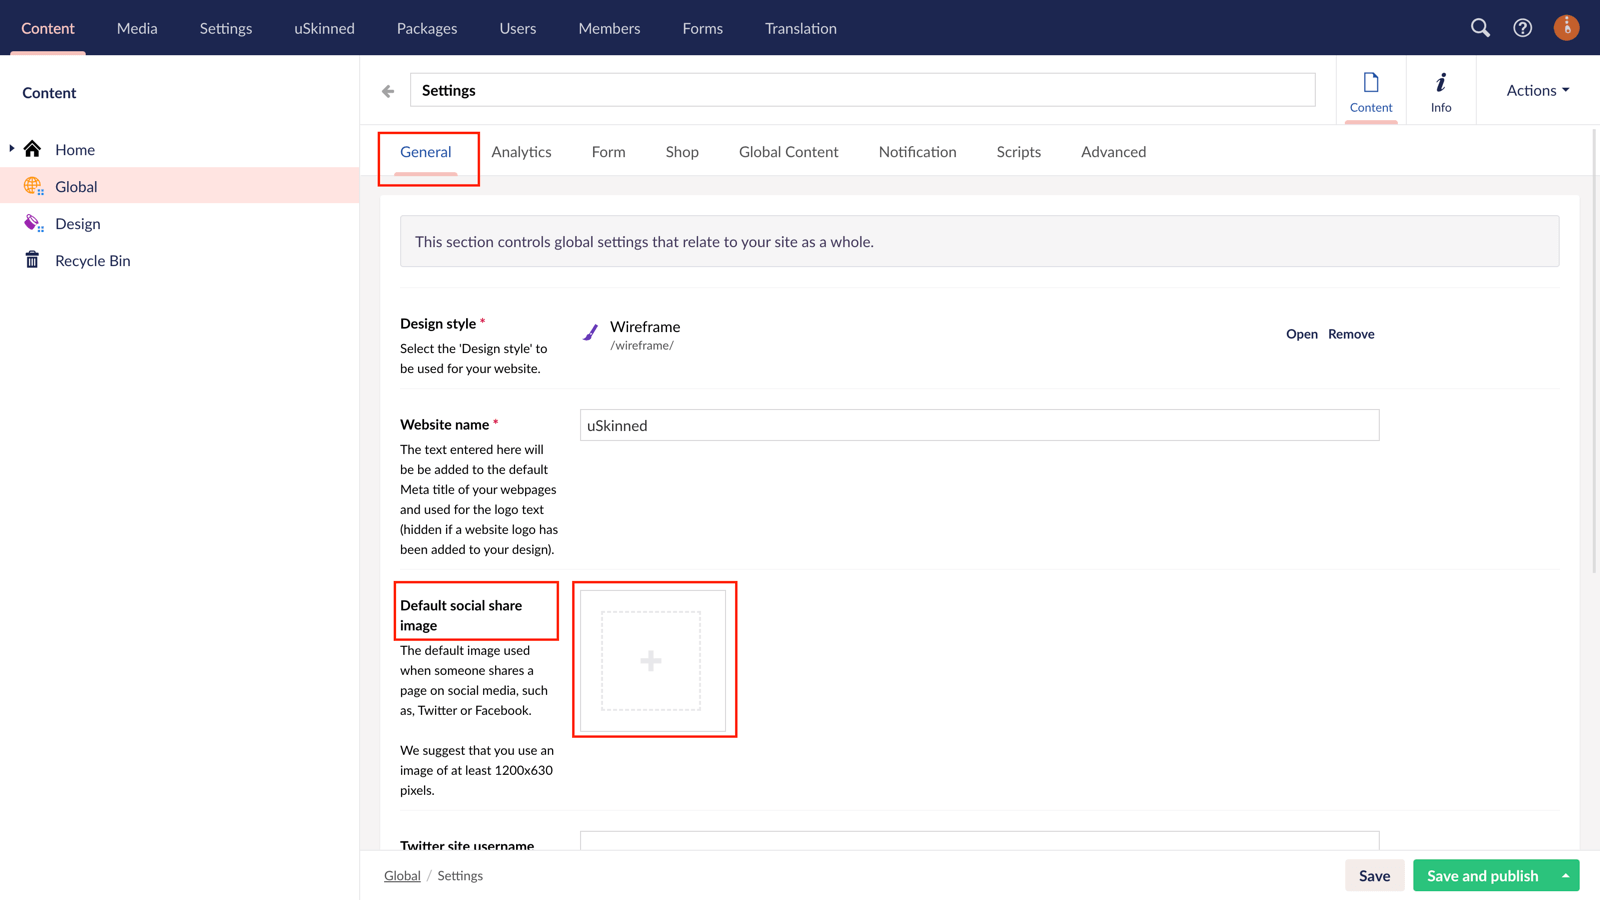
From the General tab, locate the label 'Default social share image'.
Step 5
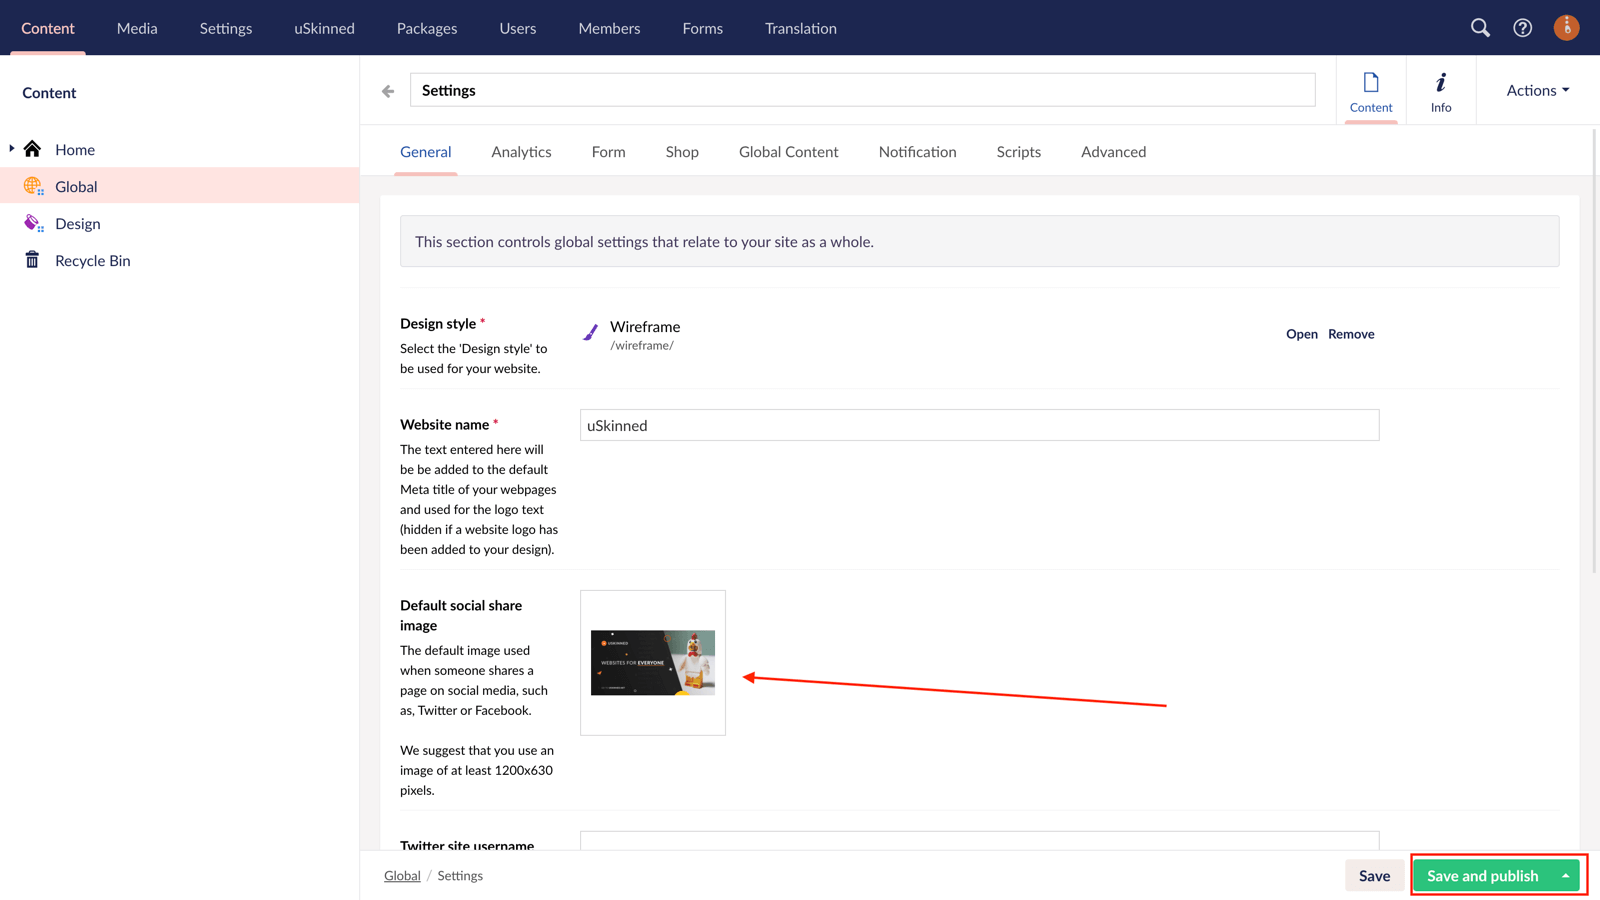
Using the Media picker option, locate the image from your Media section or upload a new one.
Please note, you should upload an image that is 1200 pixels by 630 pixels.
Step 6
In the bottom right corner, Save and publish.
Page or Blog Post Share Image
Step 1
Login to the CMS.
Step 2
In the tree menu, go to any page or blog post.
Step 3
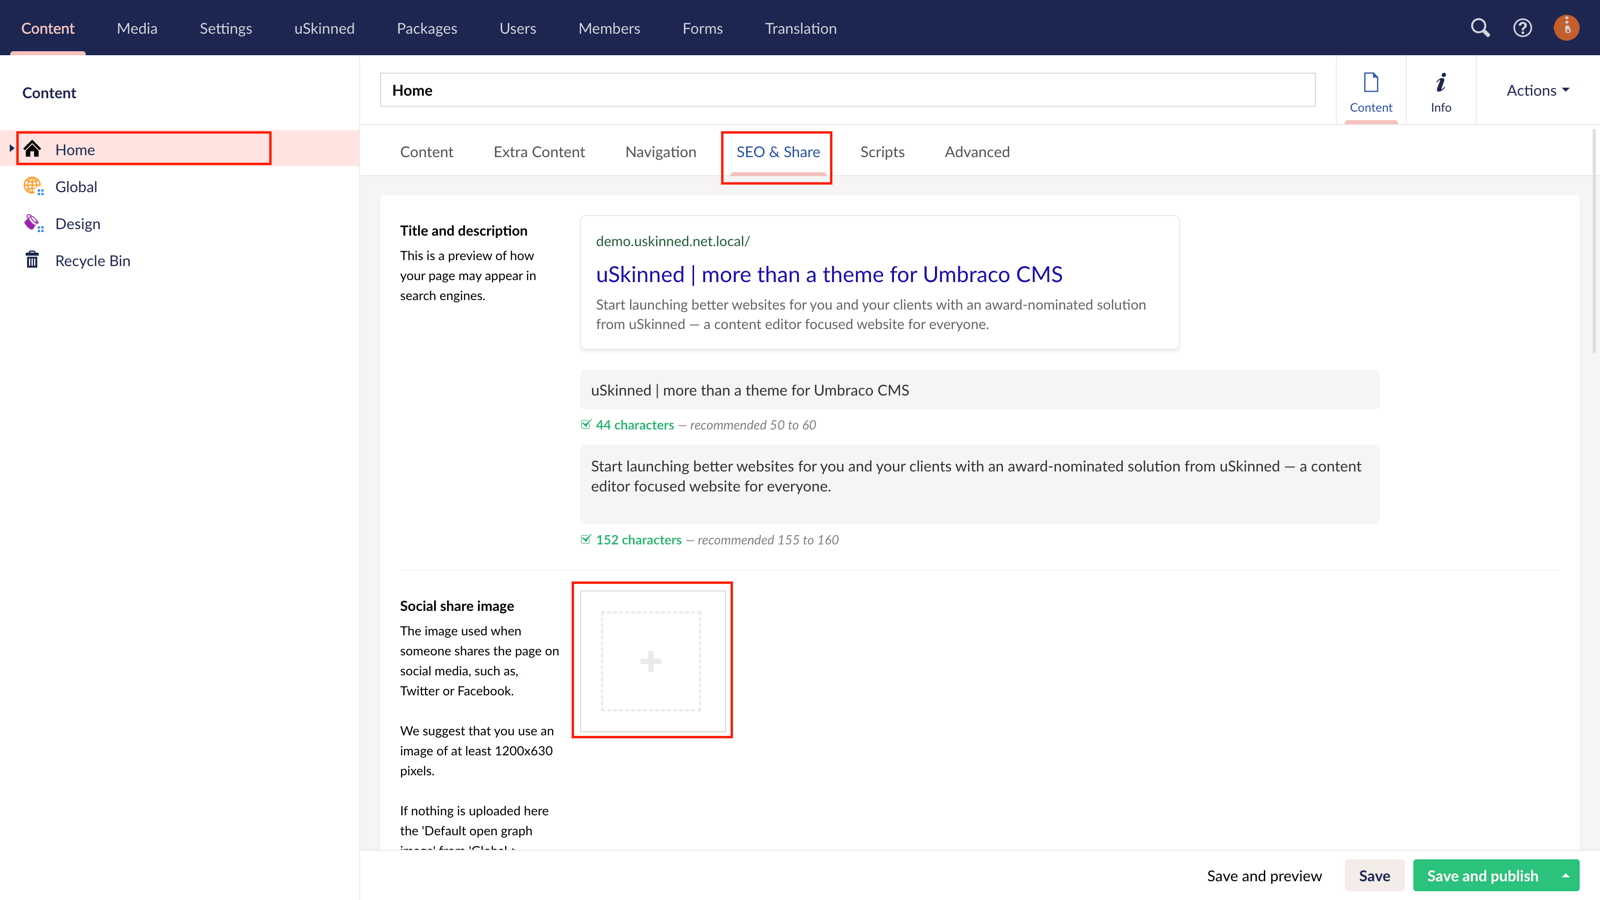
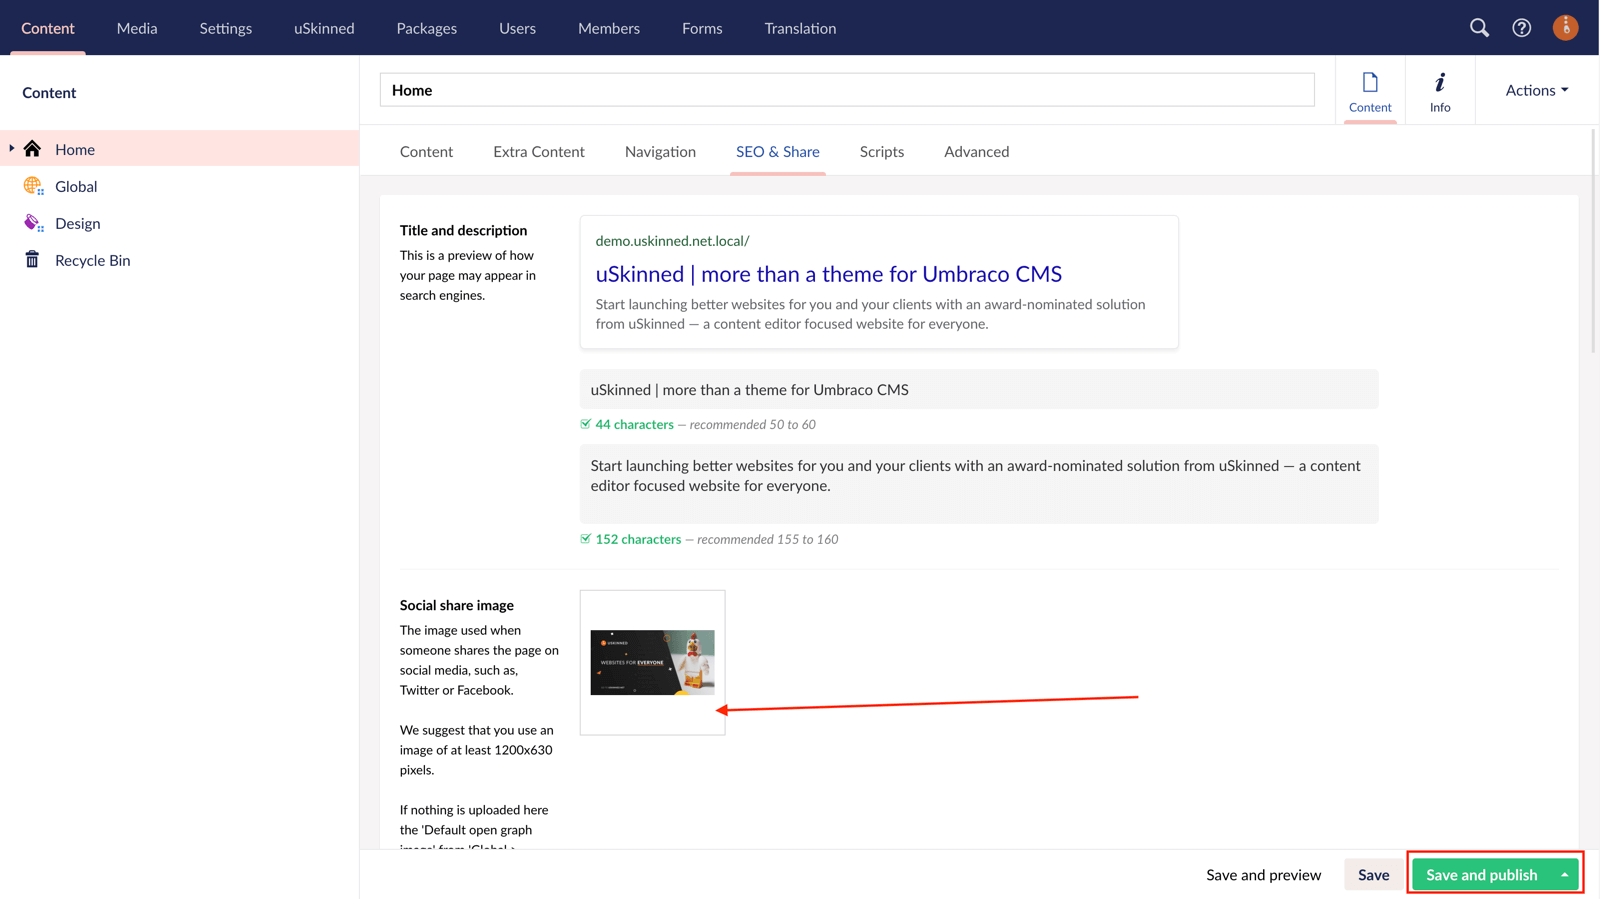
On the page or blog post, go to the 'SEO & Share' tab.
Step 4
Locate the label 'Social share image'.
Step 5
Using the Media picker option, locate the image from your Media section or upload a new one.
Please note, you should upload an image that is 1200 pixels by 630 pixels.
Step 6
In the bottom right corner, Save and publish the page or blog post.
Please note, Open Graph and Twitter Image metadata have a habit of caching once a page or site has been shared once. However, you can, luckily enough, force the cache to refresh. Here are the tools to do that:
Facebook sharing open graph debugger: https://developers.facebook.com/tools/debug/
LinkedIn sharing open graph debugger: https://www.linkedin.com/post-inspector/inspect/
Twitter sharing validator: https://cards-dev.twitter.com/validator
#h5yr
Step 3
Create
Create content with the Visual Editor and utilise built-in eCommerce and integrations.
Step 4
Go Live
You can host securely on Azure with uSkinned Hosted, or go your own way with a Self-Hosted license.
