How to add OpenTable booking platform
Embed OpenTable Booking widget forms on your uSkinned Site Builder website using one of the many embed HTML options provided.
Online reservations for your venue couldn't be more easy than with OpenTable — the world's most complete booking platform. Whether you have a restaurant, bar or cafe, you can integrate OpenTable with uSkinned in seconds.
In our example below, we will use OpenTable, which is an amazing service to get you up and running quickly.
Create an OpenTable Booking widget
Step 1
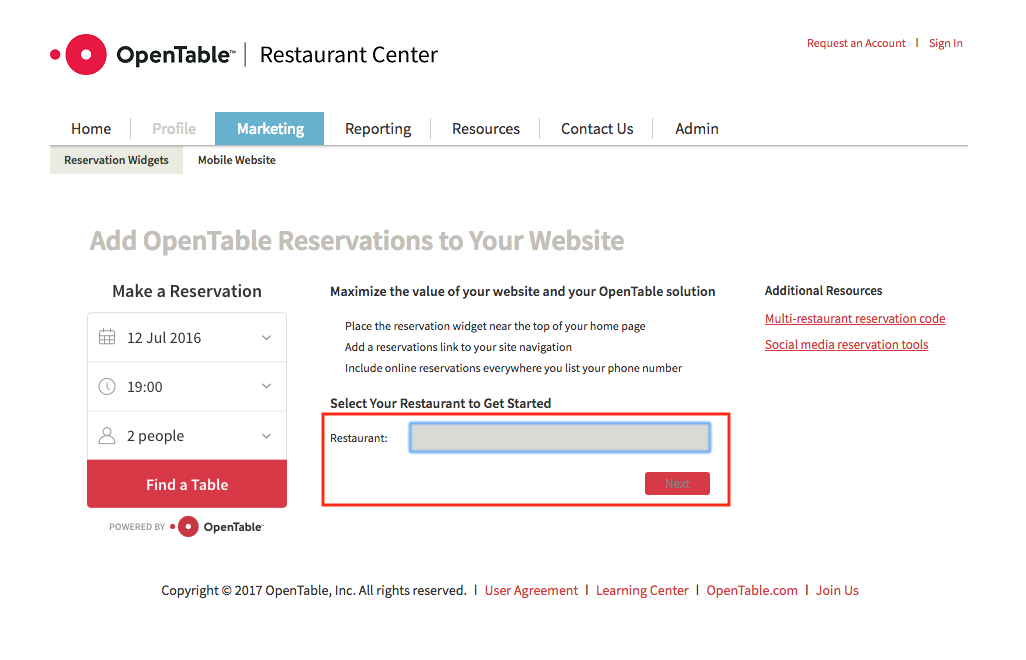
As mentioned above, this demonstration will involve the OpenTable reservation widget. So first, you'll need either to have an OpenTable account or sign up for one.
Go to your OpenTable account and follow the steps at "Add the reservation widget to your website".
Step 2
Now that you've created and configured your OpenTable booking widget, click on "Copy Code".
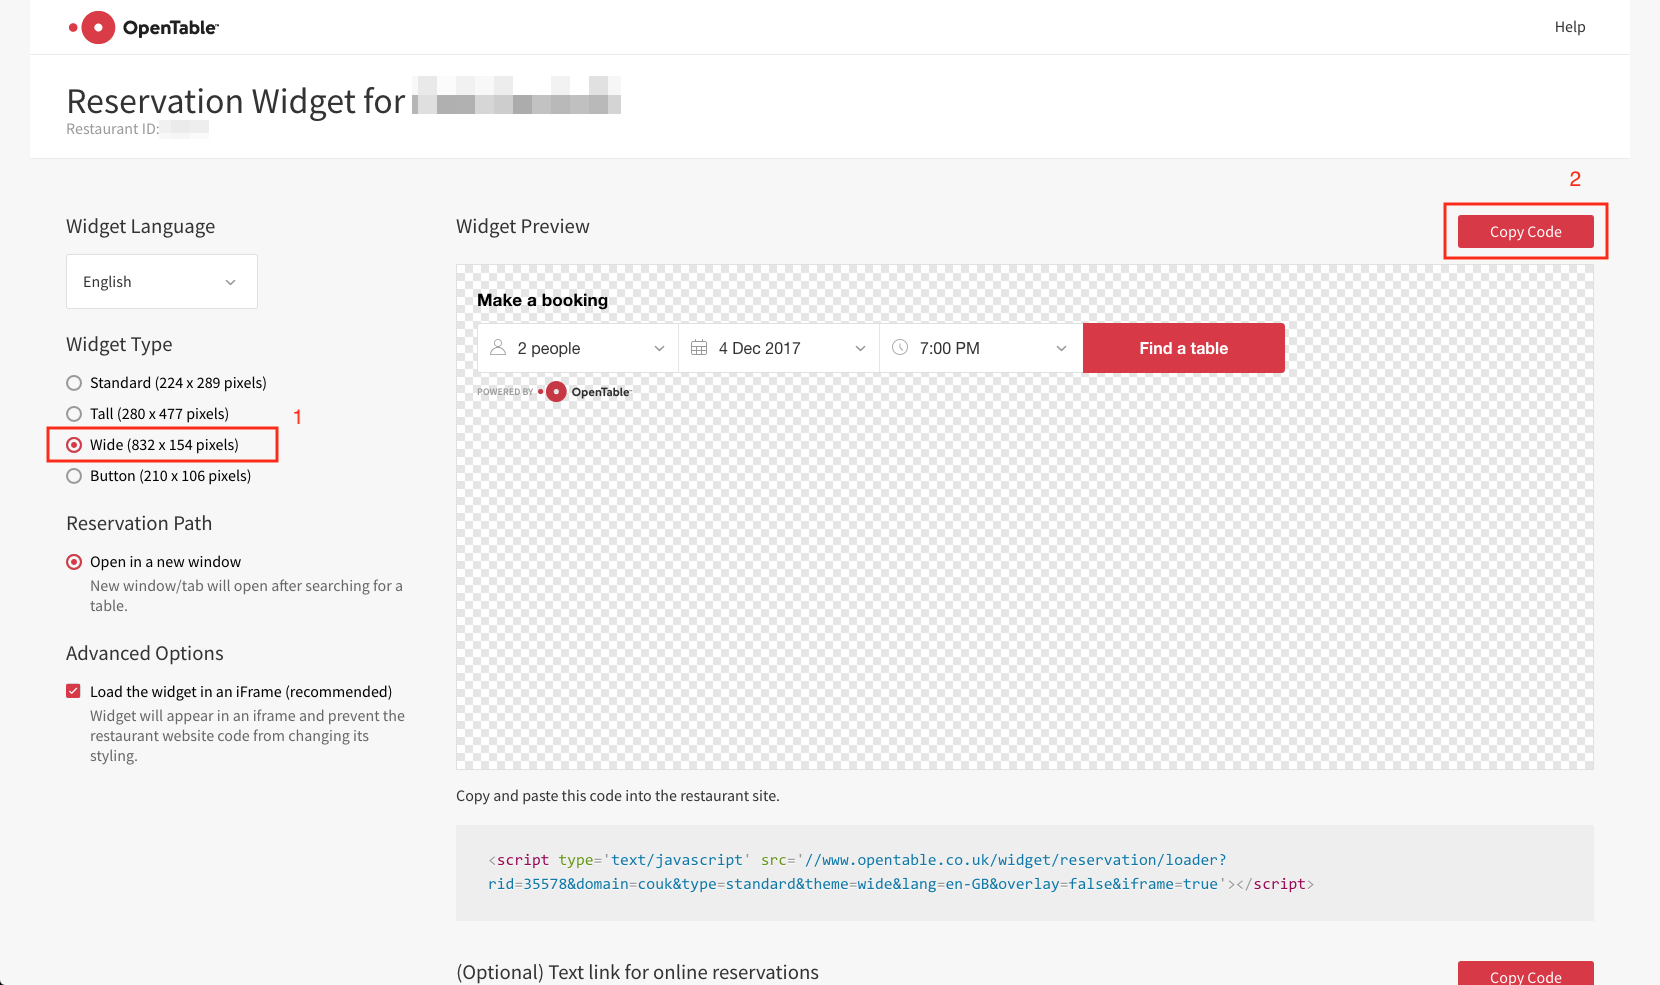

Generate your embed code from the OpenTable portal.
Embed an OpenTable Booking widget
Step 3
Login to the uSkinned Site Builder CMS.
Step 4
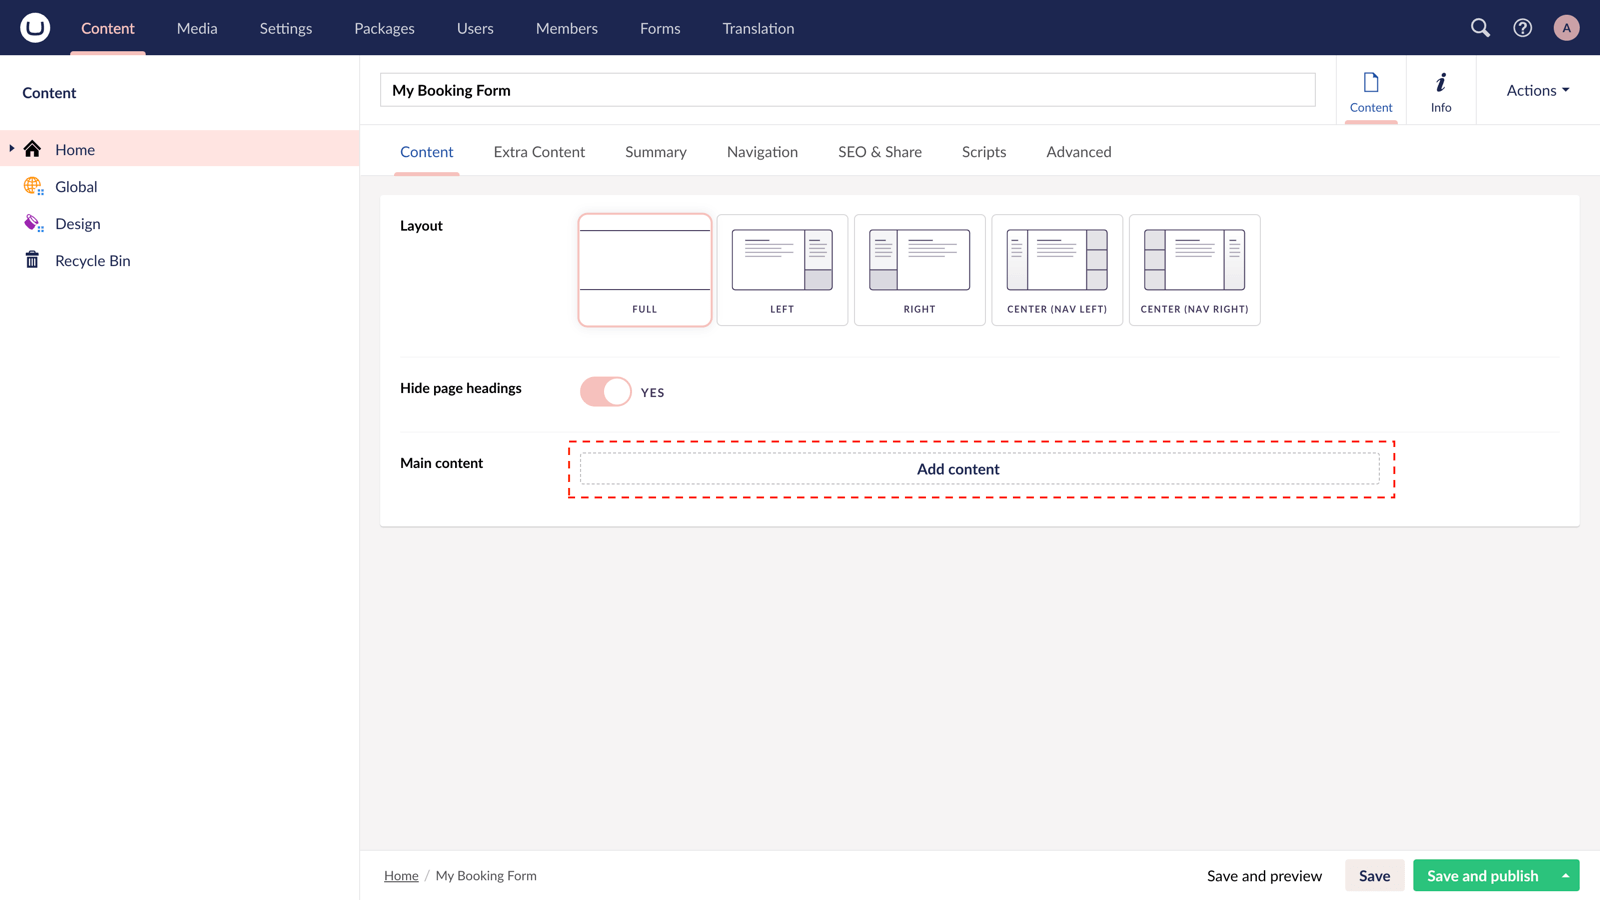
In the tree menu, go to any page or post — or create a new one.
Step 5
Locate the "Content" tab and add a new component at "Main Content". From the slide-out panel, select "Embed Code".

Step 6
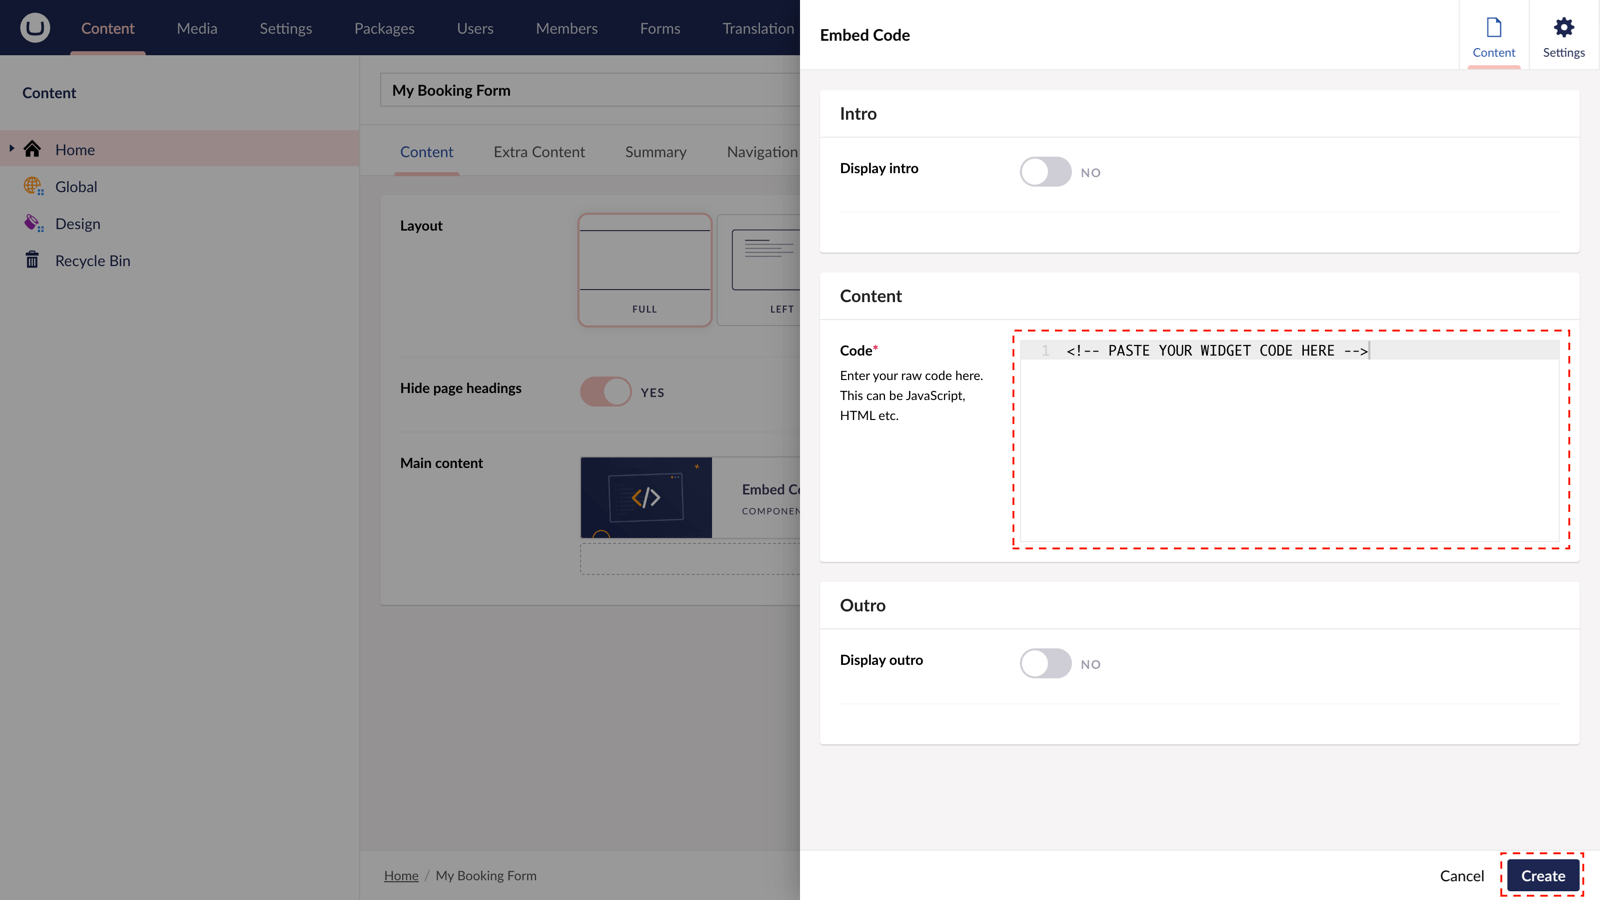
Paste the code you copied in Step 2 into the field provided.
Step 7
Save and Publish. Check out the final result on your website.
The OpenTable Booking Widget form is active and your customers can make reservations directly from your uSkinned-powered website.
More ways to add OpenTable Booking forms
There are a variety of places you can embed OpenTable Booking widget forms on your uSkinned Site Builder website.
You can try this out using the same steps for:
— Pods component > Embed Code
— Split component > Embed Code block
— Global components > Embed Code
— Global pods > Embed Code
— Extra Content pods > Embed Code
— Footer pods > Embed Code
Remember you can follow these methods for just about any other third party widget your website requires! :-)
#h5yr
Step 3
Create
Create content with the Visual Editor and utilise built-in eCommerce and integrations.
Step 4
Go Live
You can host securely on Azure with uSkinned Hosted, or go your own way with a Self-Hosted license.
