Add or edit redirects for a Hosted uSkinned website
Step 1
Log in to the uSkinned customer portal, go to your Hosted uSkinned websites and choose which site to manage.
Step 2
On the “Redirects” tab, you will see a list of all redirects assigned to your Hosted uSkinned website. If you have not assigned any redirects, this section will be blank.
Step 3
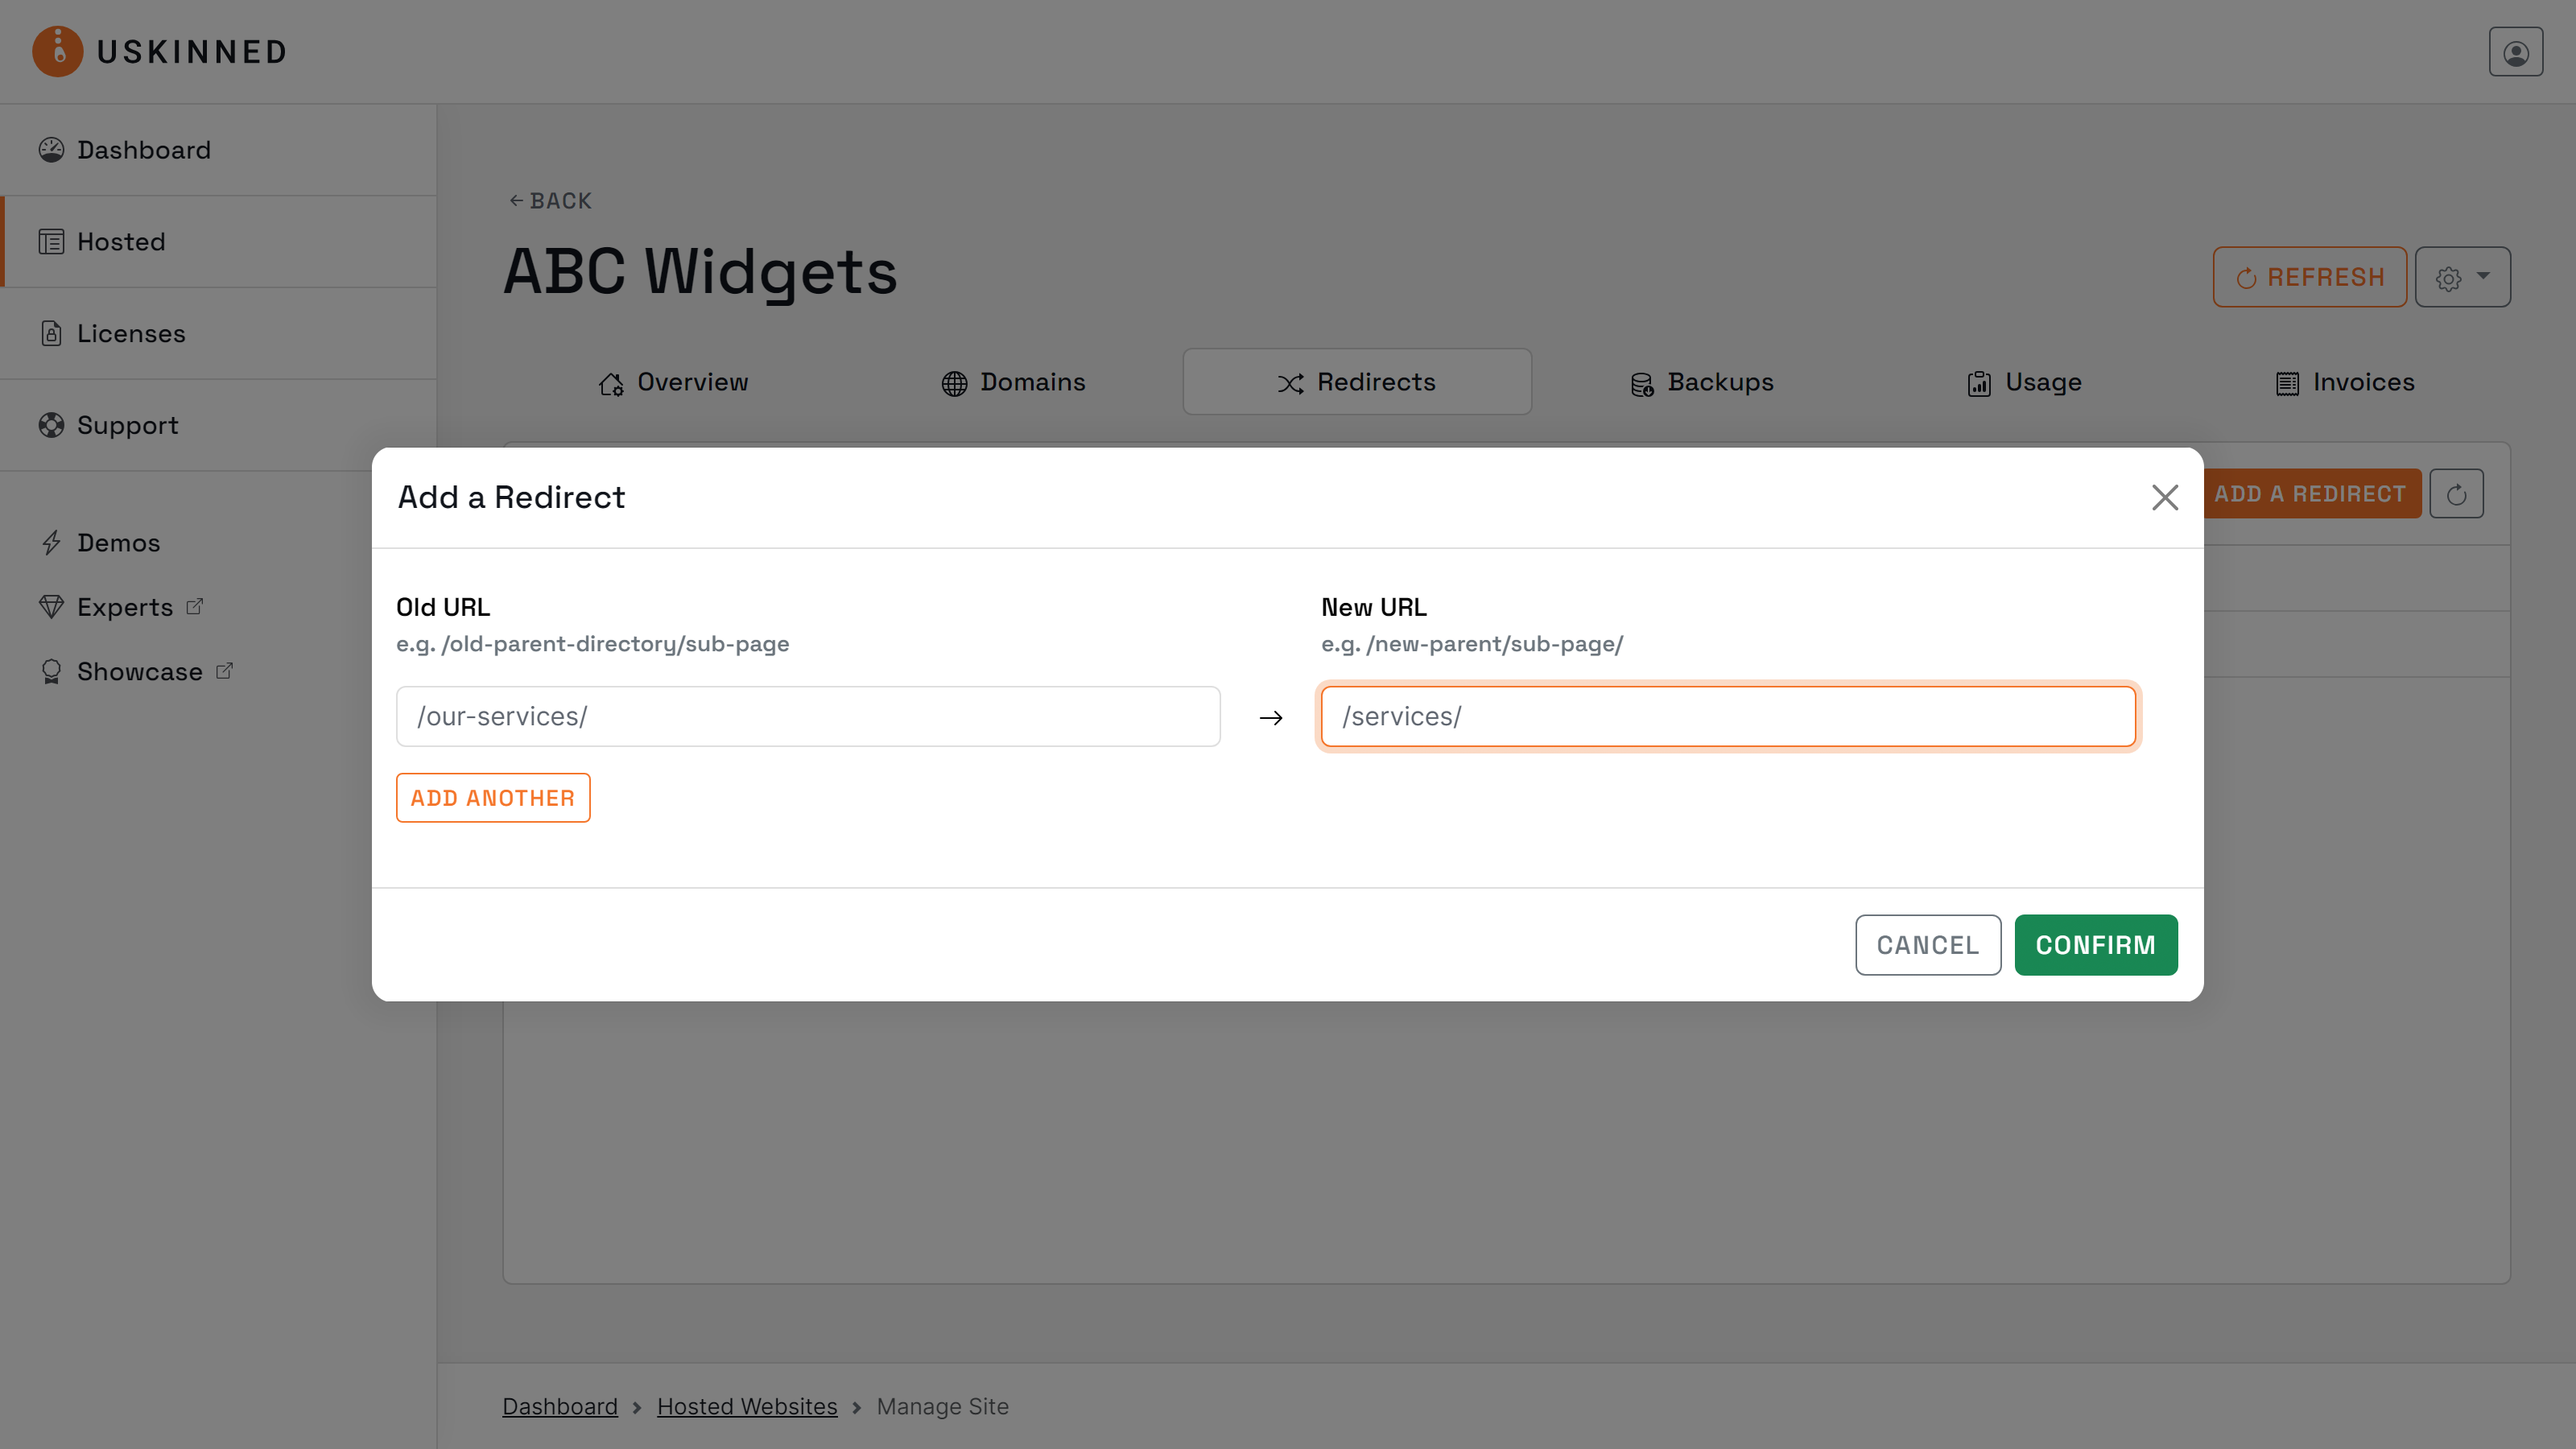
Use the “Add redirect” button in the top-right corner, this will open an overlay window.

Step 4
Enter the “Old URL” and “New URL”. If you need to add more than one redirect, click on the button “Add another”, and two new fields will appear. Once you are happy, click “Confirm”.
Please allow the overlay to disappear and avoid hitting “Confirm” more than once. Don’t worry if you need to add more later, you can add more at any point during your subscription.
Step 5
Your redirect(s) will now be displayed in the list. If you have entered any redirect incorrectly, you can use the “Actions” menu on the right-hand side of each redirect. You can choose “Edit redirect” or “Delete redirect”.
Step 6
Once you are happy with all of your redirects in place, hit the refresh button.
This will trigger a restart of your website within the next 5-10 minutes, please be patient.
#h5yr
If you run into any issues, contact support.
Related content
Step 3
Create
Create content with the Visual Editor and utilise built-in eCommerce and integrations.
Step 4
Go Live
You can host securely on Azure with uSkinned Hosted, or go your own way with a Self-Hosted license.
