Add or edit domains for a Hosted uSkinned website
Step 1
Log in to the uSkinned customer portal, go to your Hosted uSkinned websites and choose which site to manage.
![]()
Step 2
On the “Domains” tab, use the helper icon ( ? ) in the top-right corner to review the necessary DNS records you assign to your domain.
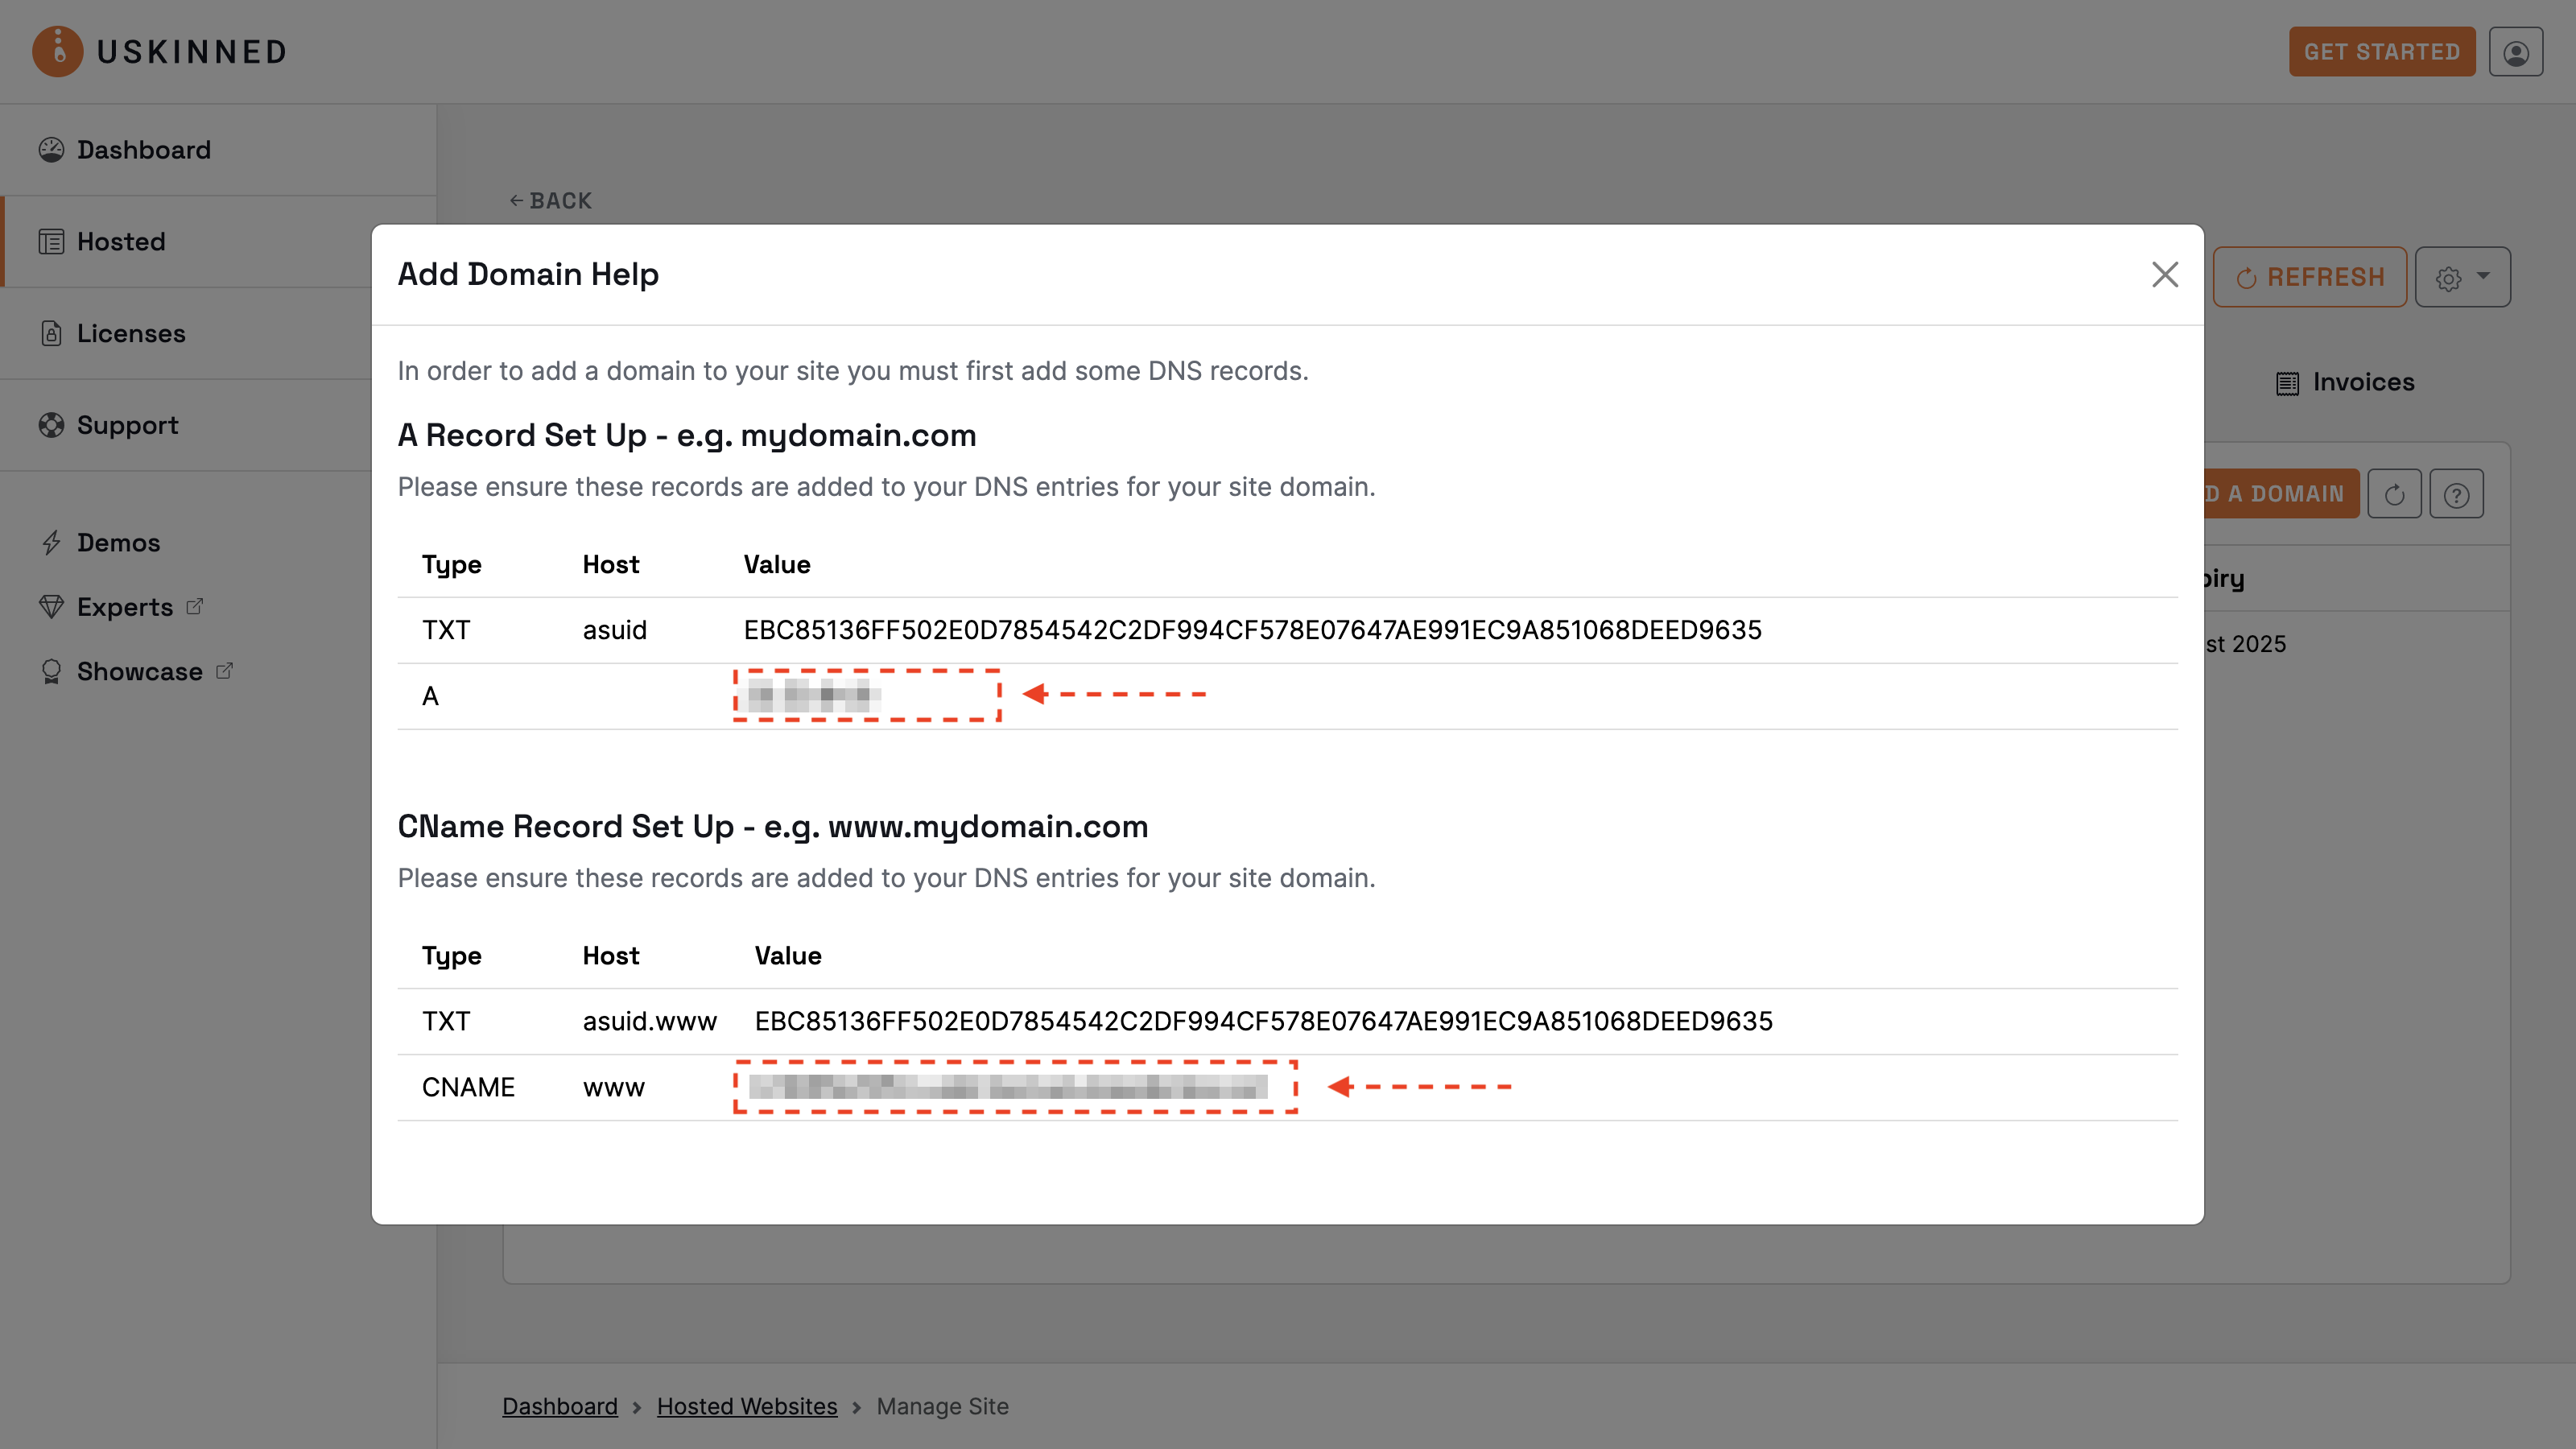
They should match the following:
|
TXT |
asuid |
EBC85136FF502E0D7854542C2DF994CF578E07647AE991EC9A851068DEED9635 |
|
A |
@ |
This value can be found in the Customer Portal. |
|
TXT |
asuid.www |
EBC85136FF502E0D7854542C2DF994CF578E07647AE991EC9A851068DEED9635 |
|
CNAME |
www |
This value can be found in the Customer Portal. |
Step 3
Go to your domain provider and enter the relevant records for each domain you wish to assign to your Hosted uSkinned website.
Step 4
Once you have added each record, please test your domain on a DNS Lookup website, such as What's My DNS (https://www.whatsmydns.net/#CNAME/). Please wait until your domain has propagated to all areas before attempting to add the domain to the uSkinned portal.
Step 5
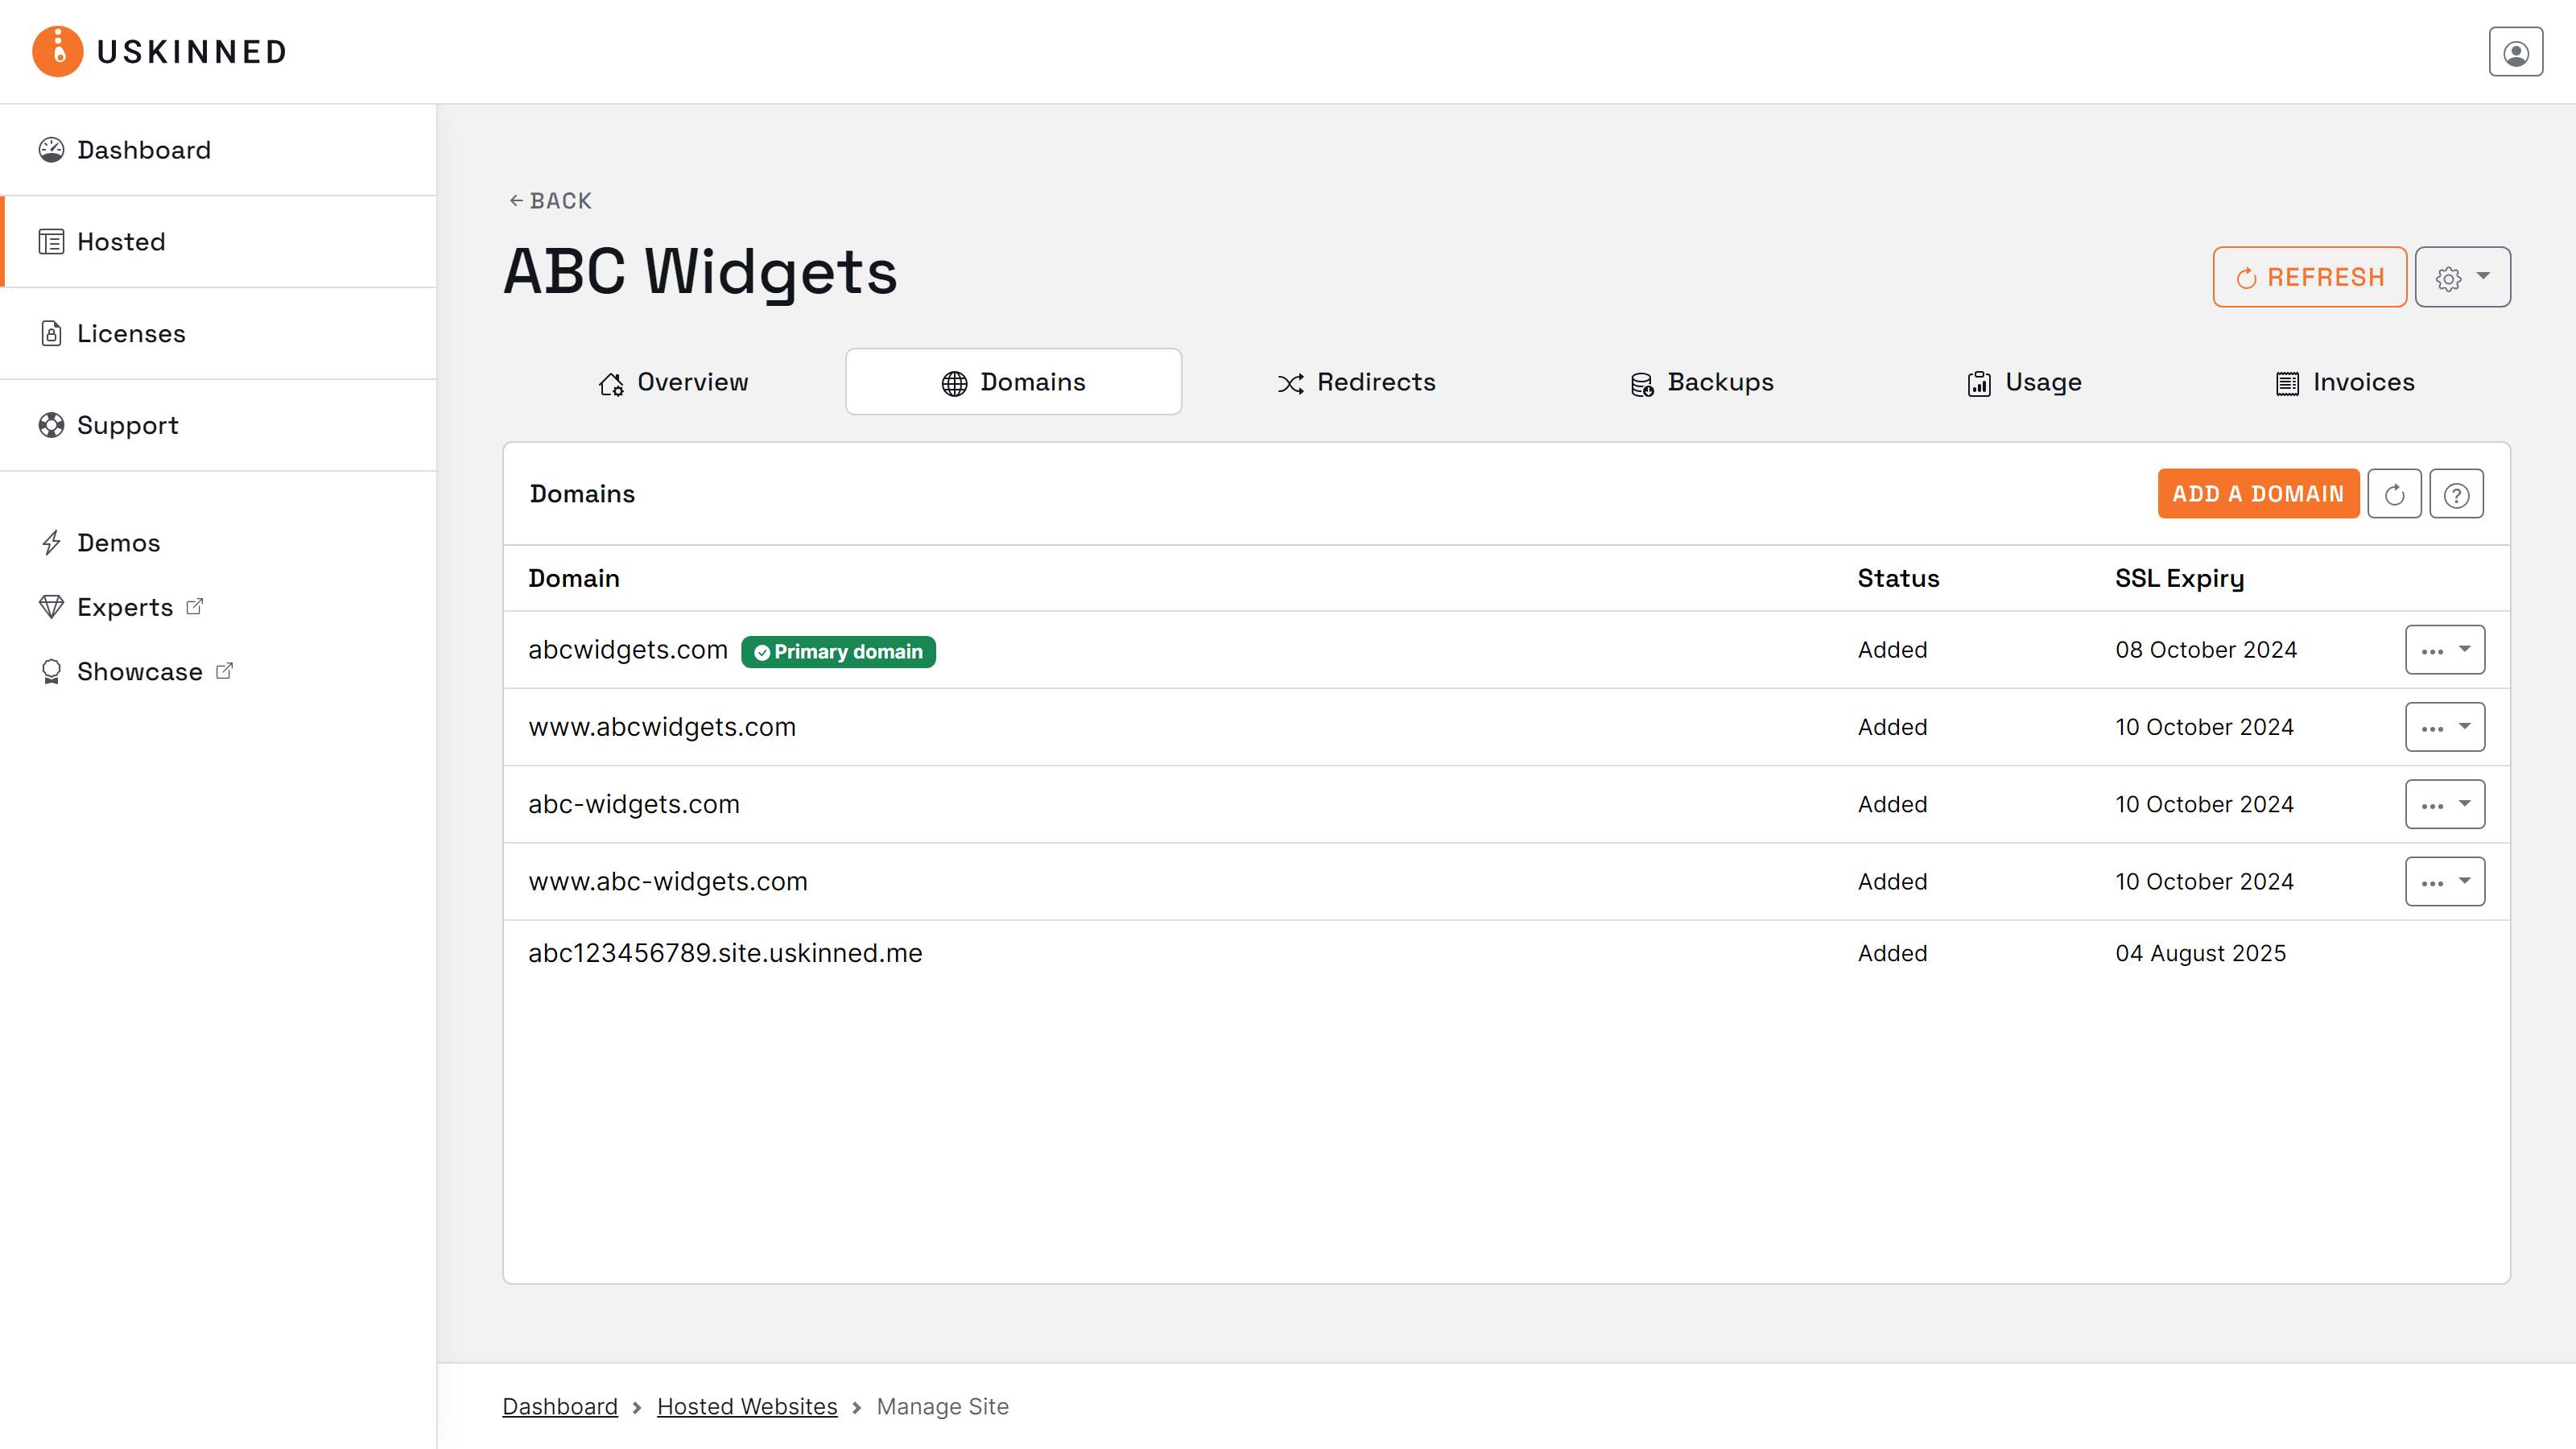
Now your domain(s) have propagated, go back to the “Domains” tab on your Hosted uSkinned website.
From the interface, click “Add domain”, this will open an overlay window.
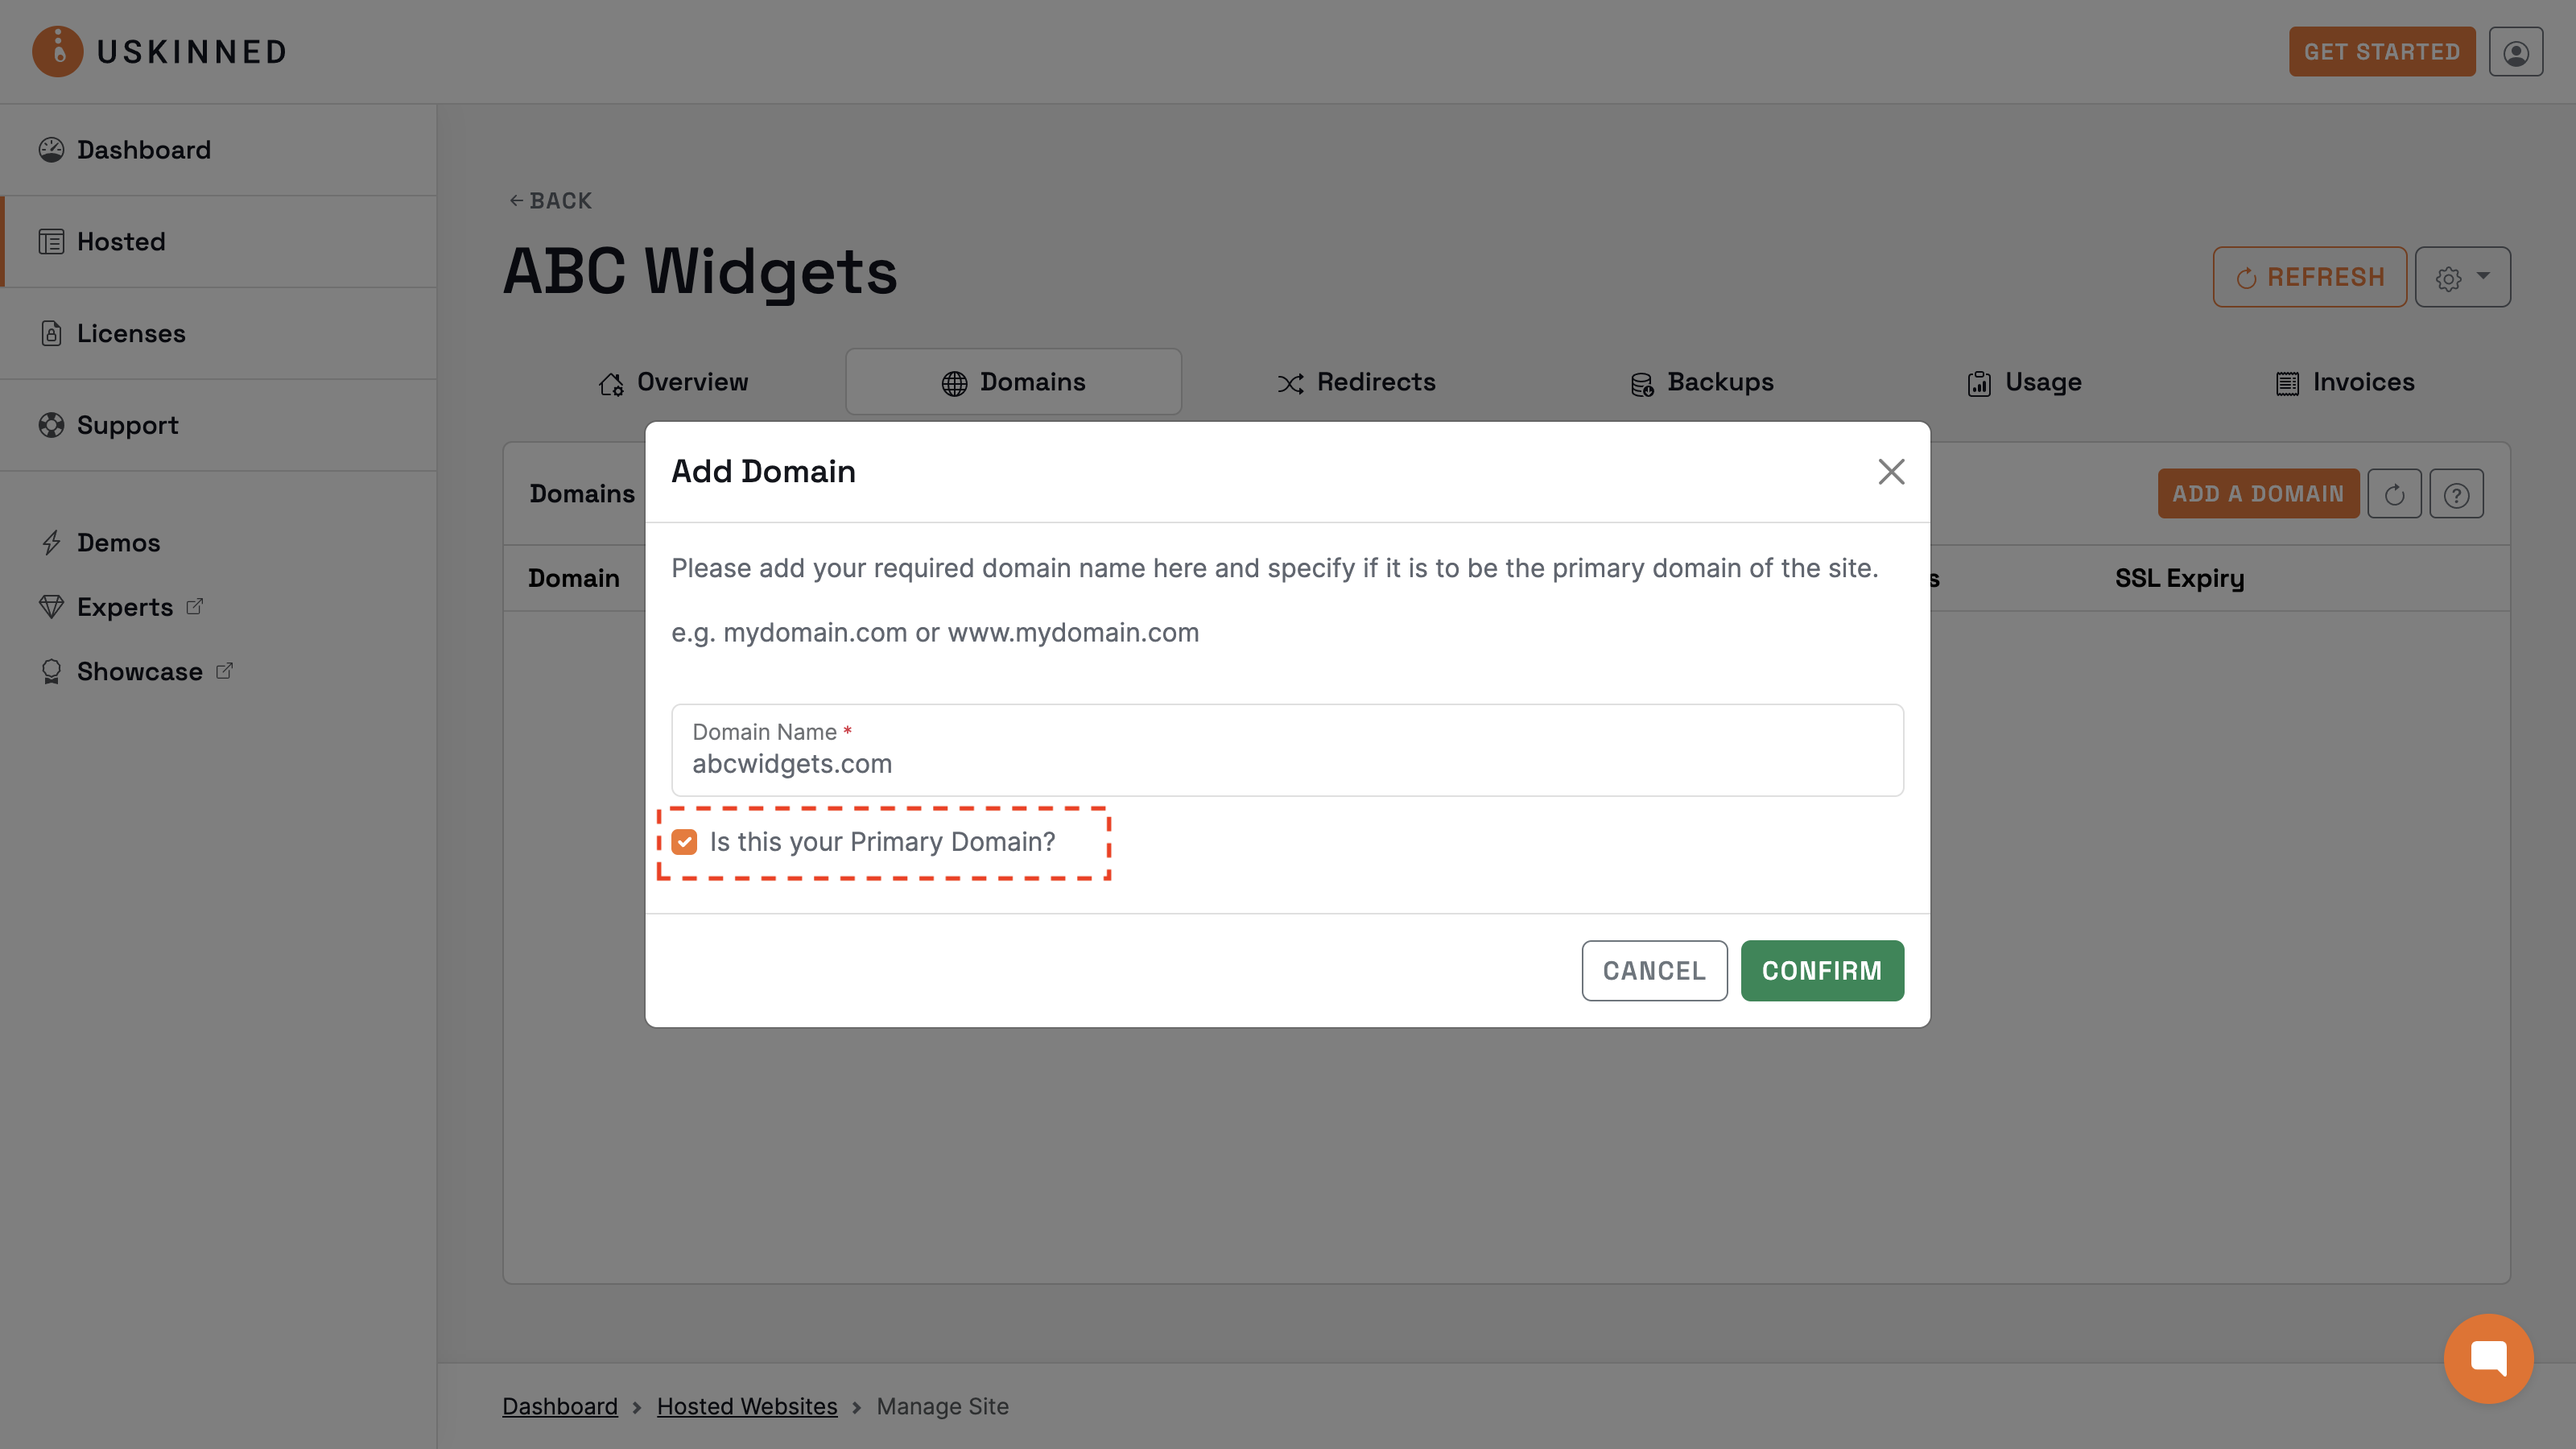
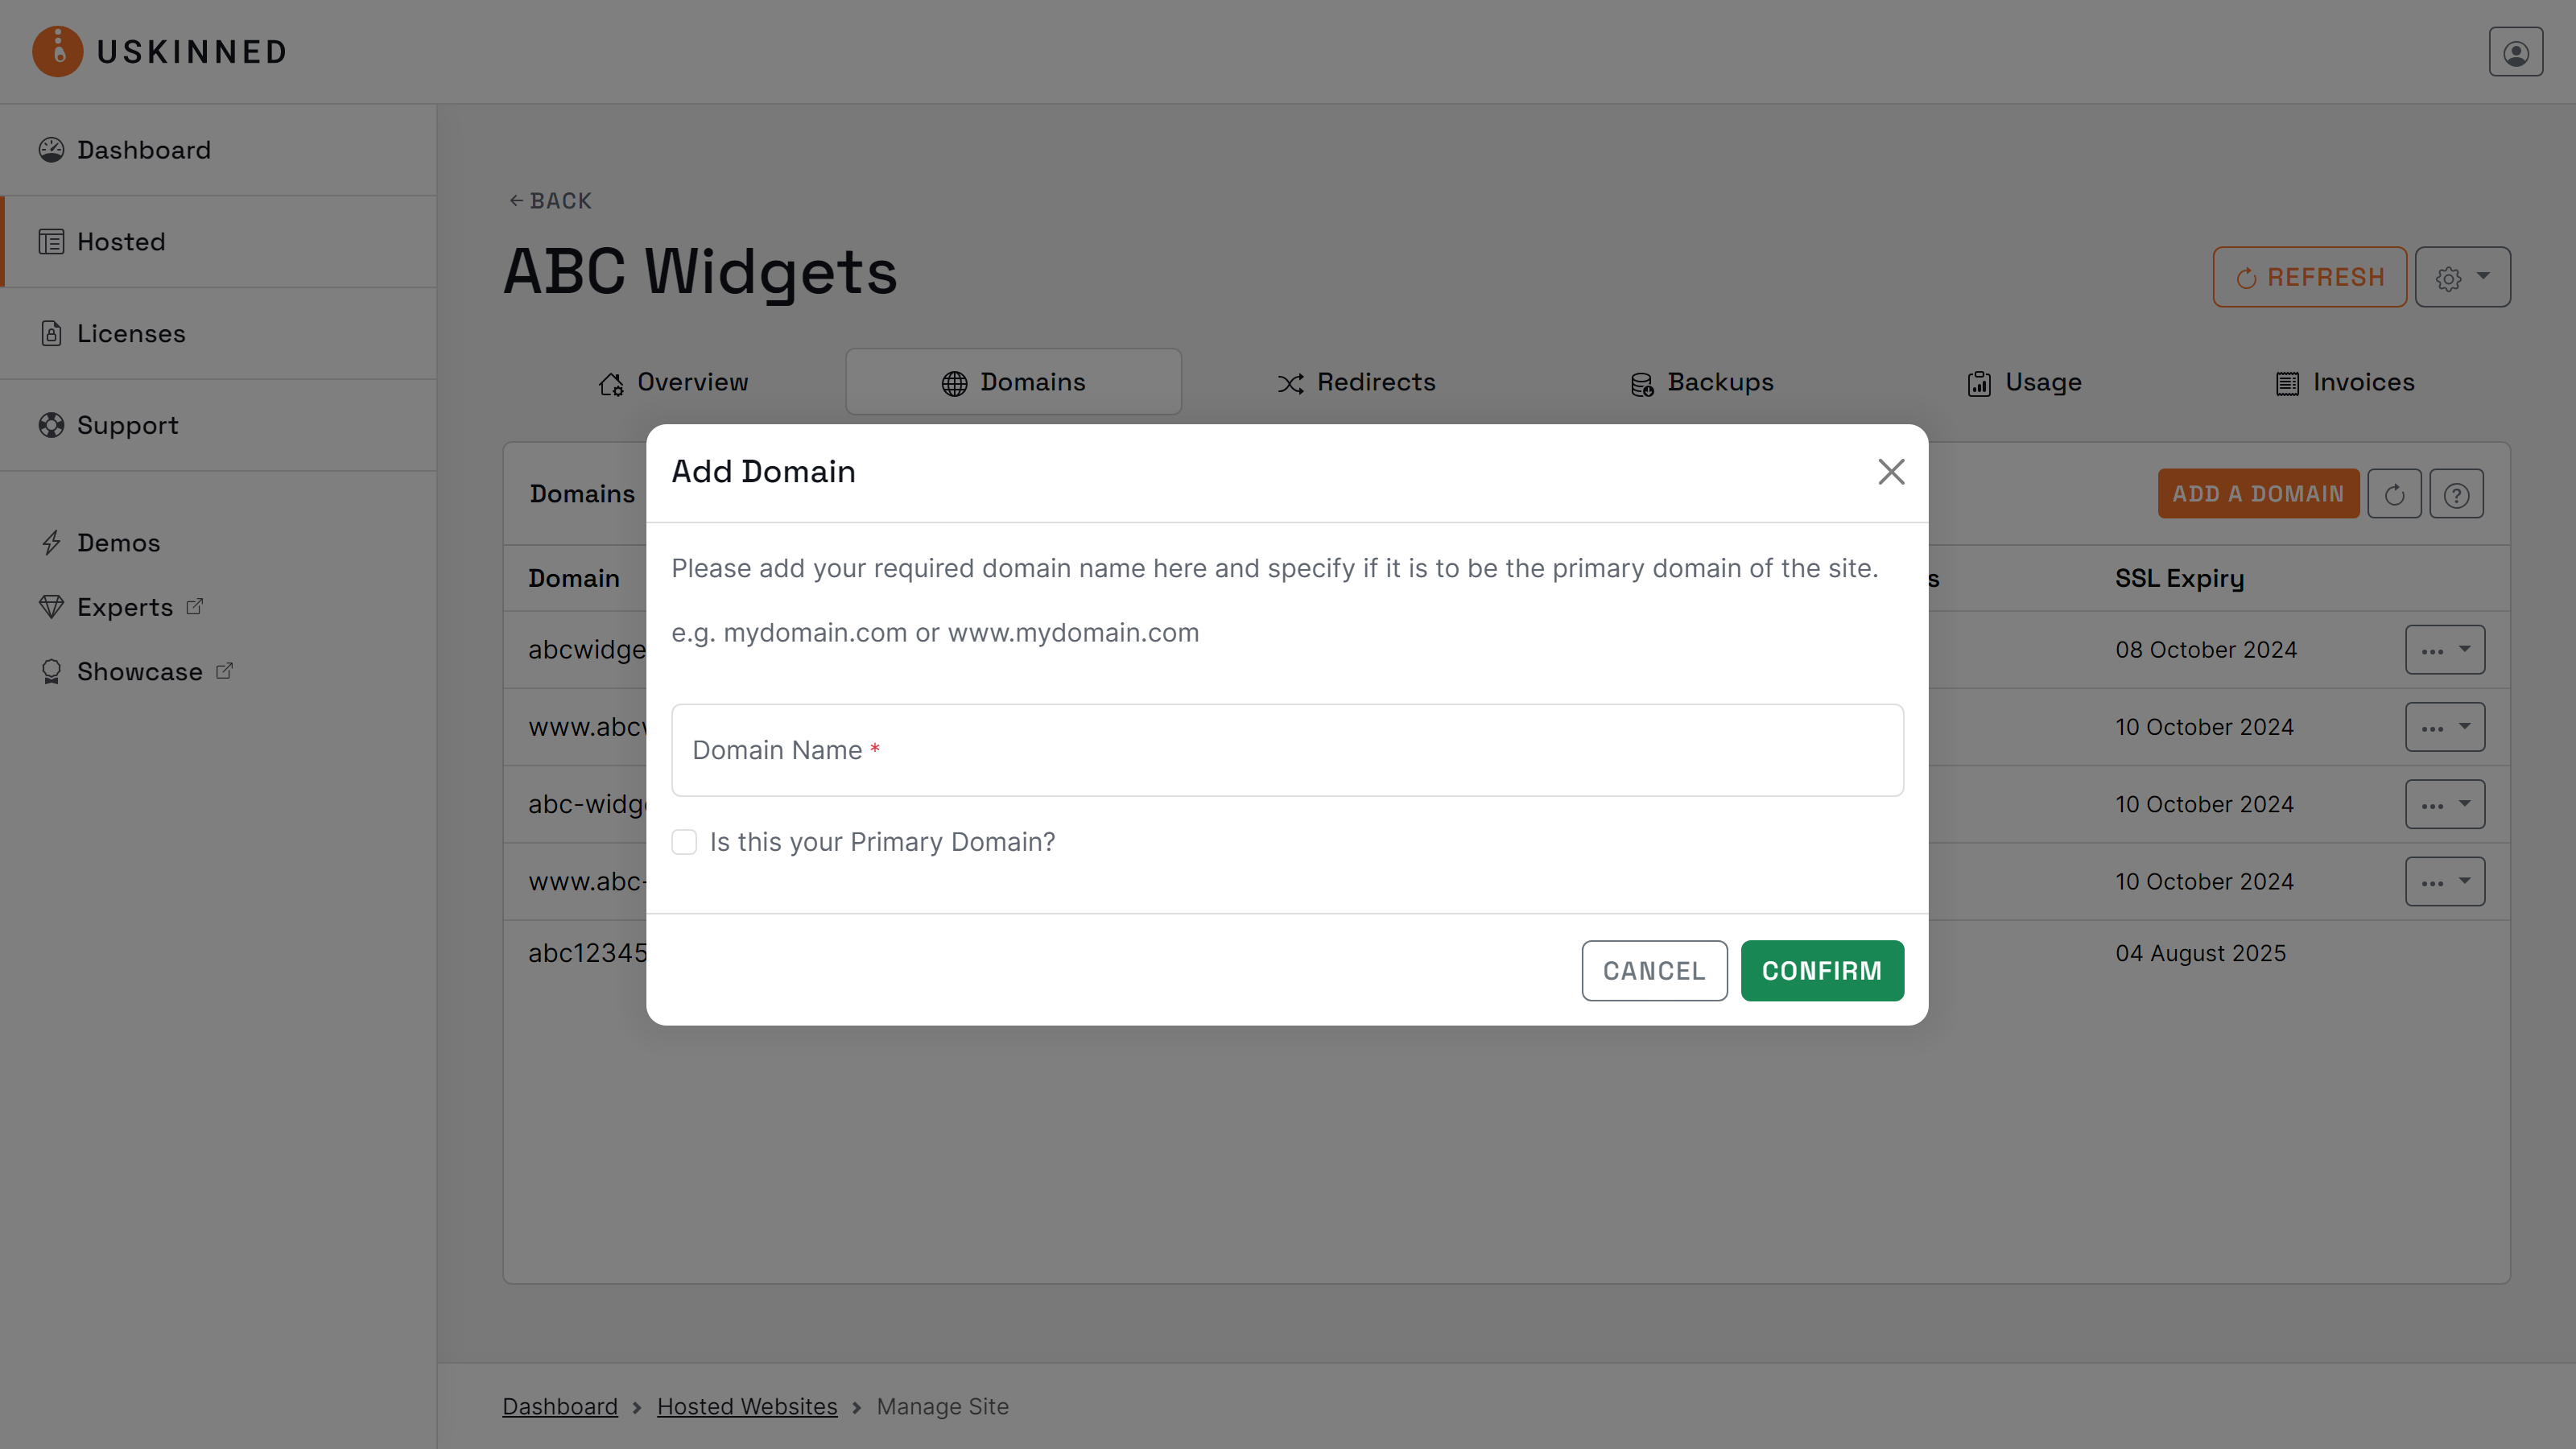
Step 6
In the overlay window, enter your domain name. If this will be your primary domain, please check the box accordingly and then “Add”.
Please allow the overlay to disappear and avoid hitting “Add” more than once.
Please first add your "Primary domain" — when you enter the domain check the box below the domain field.
Step 7
Your domain will now display in the list, the status on the right-hand side will update in real-time so please be patient. If the status does not change to “Added”, you can use the refresh button to force a status change.
Step 8
Once the status changes to “Added”, your Hosted uSkinned website will be accessible from your new domain. Visit it now.
If you wish to assign more domains, please repeat these steps.
#h5yr
If you run into any issues, contact support.
Related content
Step 3
Create
Create content with the Visual Editor and utilise built-in eCommerce and integrations.
Step 4
Go Live
You can host securely on Azure with uSkinned Hosted, or go your own way with a Self-Hosted license.
